
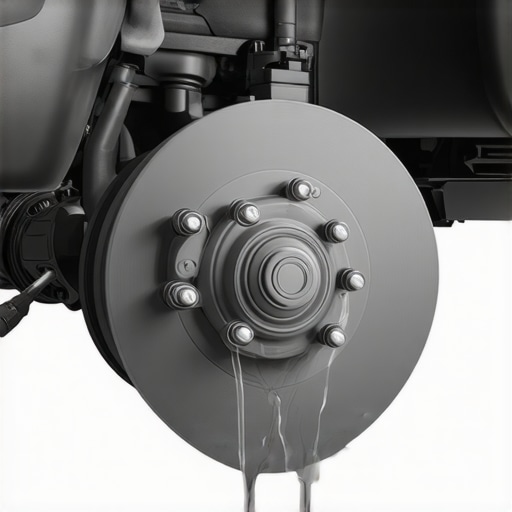
Ever been behind the wheel, pressing the brake pedal, and feeling a squishy, almost marshmallow-like softness under your foot? That frustrating sensation isn’t just annoying; it compromises your safety and can lead to costly repairs if you ignore it. I remember the first time I experienced it—panic setting in because I didn’t know what was wrong, just a vague feeling that my brakes weren’t responding as they should. It was a lightbulb moment for me, realizing I’d made a rookie mistake during a brake bleed that had left my pedal feeling soft and unresponsive.
Why Your Brake Pedal Feel Matters More Than You Think
Your brake pedal is your direct link to your safety on the road. When it feels spongy or marshmallow-like, it signals an issue in your brake system—often related to air trapped in the brake lines or other bleeding mistakes. These problems aren’t just minor inconveniences; they can drastically reduce your stopping power, increase wear on brake components, and in some cases, cause accidents. That’s why understanding and avoiding common brake bleeding mistakes is crucial, especially if you want to keep your car safe and reliable.
Are You Falling for the Hype? Think It’s Just a Brake Flush?
When I first started tinkering with my own brake system, I thought a simple flush would do the trick. Spoiler: it didn’t. Instead, I learned the hard way that air in the lines can be stubborn, and rushing the process leads to a pedal that still feels soft. This mistake is common among DIY enthusiasts and even some pros, because they overlook specific steps or use improper bleeding techniques. The good news? Once I identified these pitfalls, I was able to fix my brake pedal issue for good. Curious if you might be making the same mistake? Check out why your brake service cost might double—and how to save money by doing it right the first time.
Start with Preparation
Before diving into the bleeding process, gather your tools—clear brake fluid, a wrench, and a clear hose—and ensure your vehicle is parked on a stable surface. Engage the parking brake for safety. Remember, clean brake fluid is essential to avoid contamination that can cause further issues like corrosion. I’ve made the mistake of rushing into a brake bleed without checking my fluid levels, which only prolonged the process and added frustration. So, take the time to set up properly to achieve the best results.
Locate and Access the Brake Bleeder Screws
Identify the bleeder screws on each wheel caliper or drum. Usually, these are capped with rubber or metal fittings. Use a wrench to loosen the cap slightly—just enough to fit the hose over the nipple. Keep a catch container nearby for the old fluid. When I worked on my own brakes, I once overlooked the correct order of bleeding, which led to air trapped in higher lines. Following the correct sequence—typically starting from the wheel farthest from the master cylinder—is critical. For detailed guidance, check this comprehensive guide.
Flow the Fluid Properly
Apply Gentle Pressure
Utilize a clean, rubber-bristled brush or you can gently pedal the brake to push fluid through the lines. Do not press or pump the brake pedal excessively; gentle, steady pressure prevents introducing additional air or causing damage. During my first attempt, I pressed too hard, which made the process messy and less effective. Use a clear hose to watch for air bubbles—persistent bubbles indicate trapped air that needs to be expelled.
Consistent Fluid Replenishment
Regularly check the master cylinder reservoir and top it up with fresh brake fluid. This prevents air from being drawn back into the lines. I once neglected this step, forcing me to repeat the entire process. Remember, old or contaminated fluid not only hampers brake performance but can cause internal corrosion, as explained here.
Watch for Air Bubbles and Pedal Firmness
As you bleed each wheel, watch the clear hose for air bubbles. Once you see only clear fluid flowing steadily, tighten the bleeder screw and move to the next wheel, following the sequence: furthest from the master cylinder to the closest. After completing all wheels, test your brake pedal—press firmly and hold. It should feel solid and responsive. If it remains soft, repeat the cycle. I remember spending extra time re-bleeding my brakes because tiny air pockets persisted, but persistence pays off.
Final Checks and Safety Confirmations
Once the pedal feels firm, double-check all bleeder screws and the master cylinder fluid level. Perform a cautious test drive at low speed to ensure optimal braking performance. If issues persist, it might be time to consult professional help. This hands-on approach not only saves you money but also guarantees your safety, ensuring your brake system functions flawlessly when every second counts.
Many vehicle owners believe that a basic tune-up or auto repair is straightforward—just replace parts and go. However, this oversimplification can lead to overlooked nuances that make a significant difference in your car’s performance and longevity. One common myth is that all maintenance procedures are interchangeable or that once done, they don’t require attention for years. In my experience, regular inspections and understanding specific vehicle needs are crucial to avoid costly surprises down the line.
Myth Busting: More Parts Equal Better Maintenance
Contrary to popular belief, replacing more parts during a tune-up doesn’t always yield better results. In fact, unnecessary parts replacements can cause more harm than good if done without proper diagnostics. For example, replacing components just because they’re old without confirming they’re faulty can lead to premature wear of new parts and increased costs. Professionals emphasize targeted repairs based on precise diagnostics—something many DIY enthusiasts overlook, leading to inefficient repairs and wasted money. To avoid this, consider comprehensive diagnostic tests or seeking expert advice, as outlined here.
What’s the risk of ignoring subtle signs during repairs?
Neglecting minor irregularities during routine maintenance can escalate into major issues. For instance, a slight lag in acceleration or a faint squeal might seem insignificant but could indicate deeper problems like sensor failures or internal wear. Missing these signs often results in more extensive damage and higher repair costs later on. A thorough inspection, especially of sensors and electrical connections, can reveal issues before they become critical—highlighted in this guide.
Advanced Insight: Why Ignoring Brake System Nuances Is Dangerous
Many drivers think that a simple brake pad replacement is sufficient in brake service. However, the nuances of brake system maintenance involve core elements like rotor condition, caliper functionality, and brake fluid quality. Ignoring these aspects can lead to uneven brake wear, pulsation, or brake failure. For example, even after replacing pads, warped rotors or sticking calipers can cause pedal pulsation or squeaking—problems that persist if the entire system isn’t properly inspected. Learning the subtle differences can save you from dangerous situations. For detailed tips, visit this resource.
How do advanced sensors influence modern car maintenance?
Modern vehicles are equipped with a plethora of sensors—oxygen sensors, ABS sensors, tire pressure sensors—that constantly monitor and regulate vehicle performance. Malfunctions in these sensors are often misunderstood or overlooked, leading to issues ranging from poor fuel economy to dangerous driving conditions. Recognizing sensor anomalies and understanding their impact can help you avoid unnecessary repairs and improve safety. Regular diagnostic scans using specialized tools can detect sensor faults early, as discussed here.
Bottom line: don’t fall into the trap of thinking that routine maintenance is just about swapping parts. Instead, it’s about understanding the intricate workings of your vehicle and addressing issues proactively. This nuanced approach not only extends your vehicle’s lifespan but also ensures your safety on every drive. Have you ever fallen into this trap? Let me know in the comments.
Why Regular Maintenance Requires Precision Tools and Methods
Maintaining your vehicle’s performance isn’t just about replacing parts—it’s about applying the right techniques with reliable tools to ensure longevity and safety. Over the years, I’ve learned that investing in quality equipment streamlines repairs and prevents costly mistakes. For instance, a digital torque wrench is invaluable for precise tightening during brake repairs, preventing rotor warping caused by over-tightening, as outlined in this resource. Using the wrong tools can jeopardize your safety and lead to unnecessary expenses, emphasizing the importance of choosing equipment tailored to your specific tasks.
Tools I Personally Stand By for Long-Term Reliability
One of my most trusted instruments is the VIM Tool Digital Torque Wrench. It offers unmatched accuracy, ensuring that components like lug nuts, calipers, and wheel bearings are tightened within factory specifications. Accurate torque application not only extends part lifespan but also enhances safety. Additionally, I swear by a high-quality OBD-II scanner, such as the BlueDriver. It provides quick, comprehensive diagnostics, pinpointing sensor faults or electrical issues early before they escalate. This proactive approach fundamentally reduces repair costs and vehicle downtime, reinforcing the value of investing in dependable diagnostic gear.
Software and Techniques to Keep Your Maintenance on Track
Beyond physical tools, software systems like AutoEnginuity connect to your vehicle’s ECU, giving detailed insights into engine performance, emissions, and sensor data. I use it regularly during tune-ups to verify that all sensors are functioning optimally, especially after replacing critical components. This software helps identify anomalies that are often missed by visual inspections alone, improving the accuracy of diagnostics. Combining such software with methodical procedures—like checking electrical connections and sensor health—ensures your vehicle runs reliably over the long haul.
How do I maintain my vehicle’s reliability over time?
Consistency is key. Schedule routine diagnostics using advanced scanners, keep a log of maintenance intervals, and invest in high-quality tools tailored to your vehicle’s needs. For example, regularly monitoring brake fluid quality and replacing it following manufacturer recommendations, as shown here, prevents internal corrosion and prolongs brake system health. Over time, these practices build a comprehensive safety net, ensuring your car doesn’t just run, but thrives. I encourage you to try using a digital torque wrench during your next brake job—it’s a game-changer for maintaining system integrity and safety.
Over the years, I’ve realized that the most critical lessons in auto repair often come from unexpected moments of frustration and discovery. One such lesson is understanding that a soft or spongy brake pedal isn’t a minor nuisance but a warning sign that demands attention. These experiences have taught me that patience, precision, and ongoing education are the keys to maintaining a safe and reliable vehicle. For instance, I once overlooked the importance of proper bleeding sequence, leading to repeated failures and unnecessary expenses. Now, I always emphasize thorough preparation and attention to detail, which makes a significant difference in outcomes.
Why the Small Details Make the Biggest Difference in Brake Maintenance
In my experience, neglecting seemingly minor factors—like using fresh brake fluid or ensuring the correct sequence during bleeding—can compromise your safety. These nuances can prevent air from remaining in your brake lines or contaminants from causing internal corrosion. I’ve learned that adopting meticulous habits, such as double-checking fluid levels and tightening bleeder screws properly, saves time and money in the long run. Deeply understanding these subtleties—like how sensor issues might mimic brake problems—has been a game-changer in my approach to vehicle care. For more expert advice, check out this guide on saving money during brake service.
The Value of Mastering Proven Techniques and Tools
Using the right tools has been instrumental in achieving professional-grade results. My trusted digital torque wrench ensures accurate tightening, preventing rotor warping and enhancing safety. Equally, an OBD-II scanner like the BlueDriver provides insights that catch issues early, avoiding costly repairs. These tools—paired with methodical procedures—have transformed my maintenance routine from guesswork to precision craftsmanship. Investing in quality equipment and continuous learning, such as mastering electrical checks and sensor diagnostics, ensures my vehicles run smoothly and safely. For recommended tools, I rely on resources like these trusted guides.
Actively Maintaining Quality—Because Your Safety Is Worth It
Taking proactive steps—like scheduled diagnostics, inspecting brake components, and understanding advanced sensor functions—has given me peace of mind on the road. Recognizing subtle signs of system decline, rather than waiting for a warning light, can prevent emergencies. Embracing this mindset of continuous improvement and vigilance has been pivotal in extending my vehicle’s lifespan. If you’re ready to elevate your repair skills, consider adopting these practices and leveraging resources that demystify complex systems, ensuring your safety and saving money. Remember, staying informed and meticulous isn’t just smart; it’s essential. Are you prepared to take your brake maintenance to the next level? Share your experiences and questions below, and let’s learn together!
Comments are closed.