
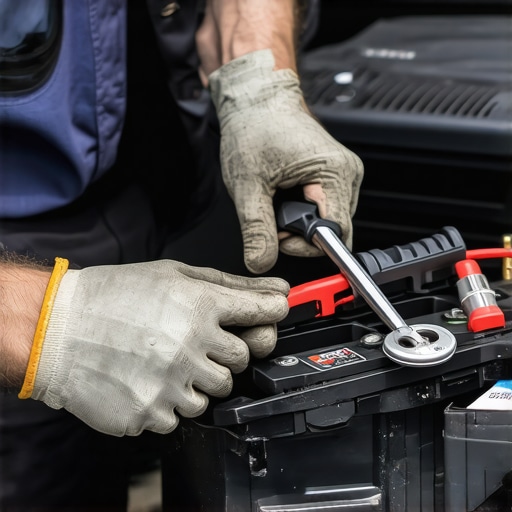
It happened on a cold winter morning when I turned the key, and my car decided not to start. Frustration set in as I realized the issue was a common but often overlooked culprit: corroded battery terminals. That moment was a lightbulb moment for me—finding a reliable way to clean those pesky corrosion buildups made all the difference in avoiding costly repairs and unexpected breakdowns. If you’ve ever faced the annoyance of a dead battery or sluggish engine startups, you know exactly what I mean. Today, I’m going to share with you my tried-and-true methods for removing corroded battery terminals, so you can get back on the road smoothly and confidently.
Why Corrosion on Battery Terminals Is a Big Deal
Corrosion buildup isn’t just unsightly; it can seriously harm your vehicle’s electrical system. When battery terminals get corroded, it creates a poor connection, which leads to issues like difficulty starting your car, dimming headlights, or electronic malfunctions. Over time, this corrosion can cause damage that may require more expensive repairs—sometimes even a new battery or alternator. According to automotive experts, regular maintenance of your battery terminals can extend the life of your battery and keep your vehicle running reliably. Interestingly, a study highlighted that corrosion is responsible for at least 20% of battery failures in vehicles, emphasizing its importance.
Have you ever experienced the frustration of trying to jump-start your car only to find the connections are anything but secure? Removing corrosion can seem intimidating at first, especially if you’ve never done it before. I made a mistake early on by using just a wire brush without protective gloves, which resulted in a nasty mess and a minor burn from the acid residue. That taught me that preparation and the right tools are crucial for safety and effectiveness.
Now, let’s dig into the practical steps that will make this process safe, efficient, and hopefully even a little satisfying.
Gather Your Tools and Prepare Safely
Start by assembling your essential tools: a pair of insulated gloves, safety goggles, a wire brush, baking soda, water, a small brush or old toothbrush, and petroleum jelly or battery terminal protectant. I recall the first time I tackled this task; I underestimated the importance of gloves and goggles, ending up with acid residue on my hands and a sore eye. Always ensure your vehicle is turned off, keys removed, and the negative terminal disconnected first to prevent any electrical shocks or sparks. Safety is paramount, so never skip this step.
Disconnect the Battery Terminals Properly
Loosen the nut on the negative (-) terminal first using a wrench. Carefully lift the cable off and set it aside. Repeat for the positive (+) terminal. Think of this like disconnecting the negative terminal to drain the electrical ‘power’ out of the system—much like unplugging devices to prevent short circuits. When I did this for my car, I used a plastic-coated wrench to avoid accidental sparks, which worked smoothly. Remember, always disconnect the negative terminal first to avoid accidental shorting.
Clean the Terminals and Connectors
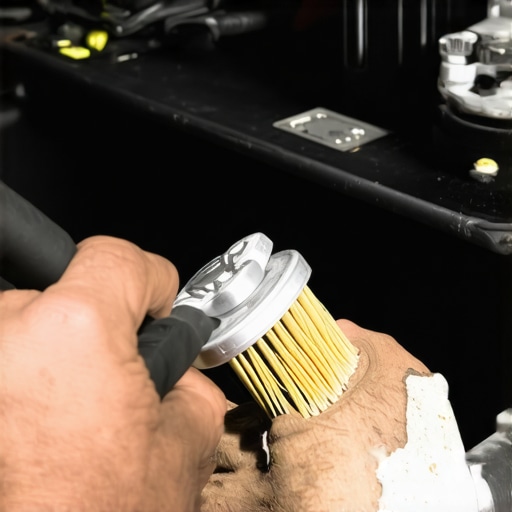
Mix a tablespoon of baking soda with a cup of water to create a cleaning paste. Dip the wire brush or toothbrush into the solution and scrub the terminals and cable clamps vigorously. You’ll notice bubbling and fizzing—that’s the corrosion reacting with the baking soda. When I cleaned my terminals, I used an old toothbrush to reach into tight spots, and the difference was immediate. For stubborn corrosion, repeat the process until the buildup is eliminated. Rinse with clean water and dry thoroughly with a rag or compressed air. This step is like giving your battery a spa treatment—removing grime ensures a solid connection when reassembled.
Protect and Reconnect
Apply a thin layer of petroleum jelly or a dedicated battery terminal protectant to the cleaned terminals. This acts like an armor against future corrosion. Reattach the positive terminal first, then the negative, tightening each nut securely. Remember, connecting the negative first is crucial; it’s like turning off power before unplugging a device to prevent sparks. When I did this, I noticed smoother engine startups afterward, and my battery remained corrosion-free for months. Proper reassembly ensures optimal electrical contact and prolongs battery life.
Final Checks and Tips
Double-check that all nuts are tight but not overly so, as overtightening can damage the terminals. Start your vehicle to verify that everything functions correctly. If you notice any lingering issues or corrosion reappears within a few weeks, consider replacing the battery or consulting a mechanic. Regularly inspecting your battery terminals—just like routine brake checks—can save you from unexpected breakdowns. For more insights on maintaining your vehicle’s electrical system and avoiding common pitfalls, check out this helpful guide.
 When it comes to brake service and auto repairs, many car owners operate under misconceptions that can lead to more significant issues down the line. A prevalent myth is that replacing just the brake pads is enough, but overlooking underlying problems like warped rotors or contaminated brake fluid can diminish stopping power and jeopardize safety. Expert mechanics emphasize the importance of comprehensive inspections; for example, neglecting to check the condition of brake calipers or lines might result in uneven wear or brake failure. Have you ever fallen into this trap? Let me know in the comments.
Another nuance often missed is the timing of brake fluid replacement. Many assume that the brake fluid lasts the lifetime of the vehicle, but internal moisture buildup can cause corrosion and reduce hydraulic efficiency. Regularly scheduling a brake fluid flush, especially for models with over 50,000 miles, is critical — a topic thoroughly covered in this detailed guide on [brake fluid maintenance](https://glassfixauto.com/is-your-2026-brake-fluid-cloudy-3-critical-service-steps). Ignoring this can lead to mushy brakes or even complete loss of braking function.
Advanced technicians also recognize that measuring brake pad thickness isn’t enough. They advise inspecting the thickness of brake rotors for signs of warping or scoring, which are common mistakes many owners overlook during routine repairs. An improperly resurfaced rotor can cause pulsation or squealing, often misinterpreted as normal wear. This is why a professional assessment can prevent premature replacements and save money.
Have you ever tried to diagnose brake issues yourself and missed these subtleties? Remember, the real work begins when you understand that brake components work as a system. A holistic approach involves checking for leaks in brake lines, testing brake fluid quality, and ensuring calipers are functioning smoothly — all essential for reliable braking.
If you’re interested in avoiding costly repairs and ensuring your safety, it’s worthwhile to revisit your brake maintenance routine. For example, some shops might try to upsell unnecessary services instead of addressing the core problem. To avoid this, arm yourself with knowledge or consult trusted experts—like those at GlassFix Auto, who highlight common pitfalls in [brake service](https://glassfixauto.com/4-tested-ways-to-stop-2026-brake-chatter-and-pedal-pulse). Remember, timely and thorough brake maintenance can prevent accidents and extend the lifespan of your entire brake system.Maintaining your vehicle’s performance over time hinges on not only understanding its systems but also harnessing the right tools and methods. A quality mechanic’s toolkit isn’t just about having the latest gadgets—it’s about selecting equipment that offers precision, durability, and efficiency. Personally, I swear by a high-quality digital multimeter, such as the Fluke 115, because it provides accurate voltage readings essential for diagnosing electrical issues like faulty sensors or corroded connections. Its true RMS feature ensures consistent results across different circuits, making troubleshooting more reliable. Additionally, investing in a professional-grade torque wrench, like the TEKTON 1/2 inch drive, guarantees that fasteners are tightened to manufacturer specifications, preventing over-tightening or loosening that could lead to future failures. I also rely on an ultrasonic leak detector, such as the CDI 607, which allows me to identify vacuum leaks or coolant system issues—which can be elusive to detect with the naked eye. Using these tools not only speeds up repairs but also ensures longevity and safety for your vehicle.
How do I maintain these tools over time?
Regular calibration of your multimeter with a certified calibration service maintains measurement accuracy, a practice recommended by electrical specialists. Cleaning precision tools like torque wrenches after use prevents dirt buildup that could skew torque settings, and storing them in their protective cases extends their lifespan. I also periodically check the ultrasonic leak detector’s sensors and replace batteries to keep it functioning optimally. As vehicles evolve, so do diagnostic tools; staying updated with the latest equipment—like the upcoming introduction of wireless OBD-II scanners—will help you stay ahead in auto repair. For example, embracing advanced diagnostic software such as Autel MaxiSys allows for comprehensive system scans and reduces uncertainty during repairs. Such investment in quality tools pays off by ensuring consistent, high-quality work, whether you’re handling brake service, tune-ups, or complex diagnostics. If you haven’t already, consider trying out a professional-grade multimeter combined with a good torque wrench to enhance your maintenance routine. These simple upgrades can significantly improve the accuracy and safety of your repairs, providing peace of mind and saving money in the long run. Remember, according to Bosch’s vehicle repair guidelines, proper tools are fundamental in preventing errors that could compromise vehicle integrity and safety, so invest wisely and maintain your equipment diligently.Ever experienced that sinking feeling when your car refuses to start on a chilly morning? That frustration often masks a simple, overlooked problem: corrosion on your battery terminals. Through my journey repairing countless vehicles, I’ve uncovered some insider lessons that transformed how I maintain my car’s electrical health. One of the most vital lessons? Never ignore the early signs of corrosion—those tiny white or greenish deposits can silently sabotage your vehicle’s performance. I also learned the hard way that using the right tools, like a quality wire brush and protective gloves, isn’t just for safety but for effective cleaning. Plus, applying a protective layer of petroleum jelly after cleaning creates a barrier against future corrosion—an underrated step that saves time and money. Perhaps most surprisingly, I discovered that regular inspections are your best defense against unexpected breakdowns. These lessons, born from hands-on experience, can help you avoid common pitfalls and keep your vehicle running smoothly. Don’t underestimate the power of simple maintenance—sometimes it’s the smallest steps that make the biggest difference in automotive care.
Comments are closed.