
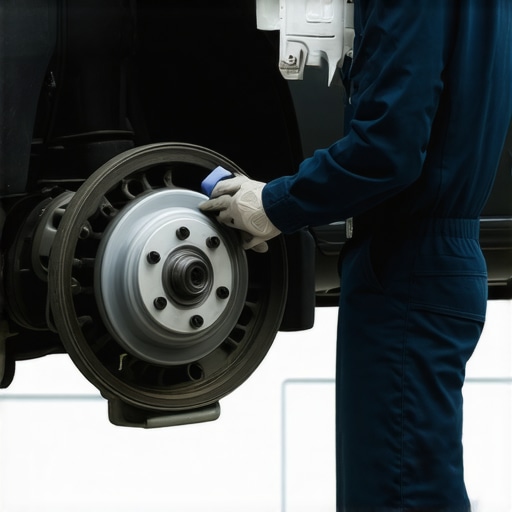
You know that sinking feeling when you press the brake pedal and hear that horrible, gritty screech? I’ve been there—every clunk and squeal seemed to echo my frustration until I realized what was really going on. One morning, during my usual drive, my brakes suddenly grinded so loudly that I thought everyone around me would turn their heads. It was embarrassing and honestly a little terrifying. That moment made me eager to understand how to fix this issue before it turned into something more serious.
Why Brake Grinding Is More Than Just An Annoyance
Brake grinding isn’t just an irritating noise that spoils your driving experience; it’s often a sign of underlying problems that can compromise your safety. Sometimes, it’s as simple as worn-out brake pads, but other times, the causes are more complex, involving brake caliper issues or rotor damage. Ignoring these sounds can lead to more costly repairs down the line or even brake failure—something none of us want to deal with when we’re halfway through a commute.
Have you ever experienced that unsettling feeling of your brake pedal vibrating or feeling softer than usual? That’s another common symptom that might accompany grinding and warrants prompt attention.
This is exactly why understanding how to effectively address brake grinding is crucial. Trust me, I’ve made the mistake early on of ignoring those squeals, assuming they’d go away. That was a mistake—one I don’t want you to repeat. Instead, I learned to recognize the signs and take swift action.
But here’s the good news: fixing your brakes doesn’t always require a trip to the mechanic for expensive repairs. Sometimes, a simple adjustment or replacing a part is enough. Over time, I’ve discovered that knowing when and how to fix these issues myself can save you both time and money—and keep your vehicle safe.
Before diving into the solutions, let me address a common concern. Many wonder, “Is it really worth trying to fix brake issues on my own?” Believe me, with the right guidance and tools, small repairs can be manageable. Just be sure to educate yourself about the specific signs your car shows, and if something feels beyond your scope, don’t hesitate to consult a professional.
**Did you know** that according to a report by the NHTSA, brake problems contribute to approximately 22% of all vehicle crashes? That statistic underscores the importance of proactive maintenance and being attentive to your brake system’s health. For more tips on avoiding other auto repair pitfalls, check out [how to spot a shop that is overcharging](https://glassfixauto.com/how-to-spot-a-shop-that-is-overcharging-for-basic-services) and ensure your repairs are fair.
Now that I’ve hopefully piqued your interest and reassured you that fixing brake issues is doable, let’s move on to understanding the common causes of brake grinding and how you can address them quickly and effectively.
Gather Necessary Tools and Safety Equipment
Before diving into brake repair, assemble essential tools like a jack, lug wrench, socket set, screwdrivers, and brake caliper piston tools. Equip yourself with safety gear such as gloves and eye protection. I remember the first time I attempted a brake fix without proper gloves—ended up with grease on my hands all day. That taught me the importance of preparation. Ensure your vehicle is on a flat surface, engage the parking brake, and block the wheels that remain on the ground to prevent movement.
Loosen Lug Nuts and Lift the Vehicle
Use the lug wrench to slightly loosen the lug nuts on the wheel you’re working on—just enough to turn counter-clockwise while the tire is still on the ground. Then, position the jack under the vehicle’s jacking point, raise the car until the wheel is off the ground, and fully remove the lug nuts. Remember, stepping onto a small stool or using a jack stand can make this safer—you don’t want your vehicle falling unexpectedly, which is akin to trying to fix a leaky pipe without turning off the water first.
Remove the Wheel and Inspect Components
Carefully take off the wheel and examine the brake assembly. Look for worn brake pads—they resemble thick rubber blocks; if less than 1/4 inch remains, replacement is necessary. Check the rotors for grooves, cracks, or excessive rust. If the rotor surface appears uneven or rusty, it might need resurfacing or replacement. In my experience, a visibly corroded rotor often mimics a sandpaper surface, causing that grinding noise. Identifying these signs early can save you from more complex repairs later.
Carefully Remove Brake Caliper
Locate the caliper bolts, typically on the back side of the component. Use the appropriate socket to unscrew them. Support the caliper with a bungee cord or piece of wire—don’t let it hang by the brake hose, which could cause damage. This stage is similar to unhooking a stubborn jar lid; firm but controlled movements prevent accidents. If the caliper is stuck, gentle taps with a rubber mallet can help loosen it—avoid using excessive force to prevent damage.
Replace or Resurface Brake Pads and Rotors
Remove the old brake pads, inspecting the caliper piston. If the piston is stuck or overly greasy, it might require cleaning with brake cleaner or piston retraction using specific tools. When installing new pads, ensure they sit flush against the rotor surface. If rotors are grooved or uneven, resurfacing can smooth them out—this process involves a machine that sands down the surface. Remember, a clean rotor surface provides optimal contact, reducing grinding noise and improving braking performance. If the rotor is too warped or rusted beyond repair, replacing it is more effective than resurfacing, saving you future headaches. For detailed guidance on this process, check out [how to fix a sticky power window without replacing the motor](https://glassfixauto.com/how-to-fix-a-sticky-power-window-without-replacing-the-motor).
Reassemble and Test the Brakes
After replacing or resurfacing, carefully reinsert the caliper over the new pads and tighten the bolts to manufacturer specifications—using a torque wrench ensures proper fastening. Place the wheel back on, hand-tighten the lug nuts, then lower the vehicle onto the ground and fully tighten the nuts in a crisscross pattern to ensure even pressure. Before testing, press the brake pedal several times to seat the pads against the rotors—a firm pedal indicates proper setup. Always test your brakes at low speeds in a safe area to confirm the grinding noise has ceased and the brakes function smoothly. During my first attempt, I forgot to properly tighten the lug nuts; the wheel wobbled, reminding me to double-check every step. Similar issues can be avoided by meticulous attention to detail. If you encounter persistent squeals or feel that your brake pedal is spongy, it might indicate an air pocket in the brake lines or other issues—these problems are worth exploring further, perhaps by consulting guides such as [how to spot a brake job that’s been rushed and dangerous](https://glassfixauto.com/how-to-spot-a-brake-job-thats-been-rushed-and-dangerous).While many car owners believe they understand auto repair basics, several misconceptions and overlooked details can trip up even seasoned drivers. A common myth is that all brake squeal indicates worn pads—yet, in my experience, sometimes it’s just moisture or dust. Rushing to replace parts without proper diagnosis can lead to unnecessary expenses, like replacing rotors prematurely; resurfacing often suffices if the rotor isn’t deeply gouged. Moreover, the idea that a vehicle’s tune-up involves only changing spark plugs is outdated. Advanced diagnostics reveal that sensors, fuel systems, and even transmission components benefit from periodic checks, which can prevent costly issues down the line. For instance, many overlook the importance of cleaning or replacing corroded battery terminals—something that many tech-savvy mechanics recommend for optimal electrical performance. Also, beware of auto shops that might overcharge for simple procedures; knowing what genuine costs should be helps you spot those overcharging practices, as discussed in one of my related articles. Have you ever fallen into this trap? Let me know in the comments.
Is Your Vehicle’s Issue More Complex Than It Seems?
Sometimes, what appears as a simple brake noise could be a symptom of deeper problems like caliper sticking or uneven pad wear—issues that require a nuanced diagnosis rather than a quick fix. External studies, such as those by the Car Care Council, highlight that overlooked subtleties—like slight vibrations or unusual smells—could hint at imminent failures if not addressed early. Understanding these advanced nuances allows you to approach auto repairs more strategically, saving money and avoiding dangerous breakdowns. Remember, thorough initial inspections and knowledge of these hidden aspects can make all the difference. Want to learn more about identifying these tricky situations? Check out some of my other guides, like how to spot a dangerous brake job or recognize signs of a slipping transmission.
Tools I Recommend for Auto Repairs and Maintenance
Having the right tools is fundamental to maintaining your vehicle efficiently. I personally swear by a quality digital multimeter, which helps me diagnose electrical issues like faulty sensors or corroded battery terminals (you can check out my guide on removing corroded battery terminals). An impact wrench is invaluable for lug nuts and stubborn components, saving time and effort. For brake repairs, a brake caliper piston tool ensures a proper overhaul, especially when replacing pads and rotors. I recommend limiting your purchase to tools with good ergonomics and durability; in the long run, they save you money by lasting through many repairs.
Additionally, a quality creeper allows you to work comfortably under your car, reducing fatigue and preventing slips that could cause injury. Don’t forget a set of precision screwdrivers—these help with delicate components like sensors or small fasteners. When it comes to cleaning, Brake cleaner and a wire brush can do wonders for brake components, helping you spot issues like uneven pad wear or rust buildup early. Using these tools regularly empowers you to intercept small problems before they escalate into costly repairs.
Embracing Modern Diagnostic Techniques
Beyond hand tools, investing in an OBD-II scanner is a game-changer. It allows you to read and clear error codes, monitor real-time sensor data, and sometimes even reset service lights. I recently adopted a Bluetooth-enabled scanner that syncs with my smartphone; this integration makes diagnostics quick and accessible. As technology progresses, expect more vehicles to feature advanced diagnostics embedded into their systems, so staying current with software updates for your scanner becomes critical. This ongoing learning helps you avoid unnecessary trips to the shop and saves money in the long run.
Where Do I See Auto Maintenance Going?
In the future, vehicle maintenance will become increasingly digital and interconnected. With the advent of electric vehicles and smarter onboard diagnostics, the traditional mechanic’s role will evolve into an integrated system calibration and data interpretation process. For example, software-based calibration tools will automate tune-ups by adjusting sensor thresholds via over-the-air updates. Staying proactive by incorporating tools that interface with your vehicle’s onboard computer will ensure you’re ready for this shift. As an example, in electric cars, regular software updates optimize battery management and extend lifespan—similar to updating apps on your phone. This trend underscores the importance of embracing advanced tools and knowledge to keep your vehicle performing at its best over the years.
How do I maintain my vehicle’s health over time?
The key is consistent routine checks combined with the right diagnostic tools. Regularly inspecting your brake system, fluids, and electrical components prevents minor issues from becoming major failures. Use an impact wrench and a reputable impact wrench for wheel work, and a quality OBD-II scanner to monitor your vehicle’s electronics. Moreover, adopting a proactive schedule for fluid changes, including brake fluid and coolant, will prolong component life and ensure safe operation. Remember, early detection through proper tools not only saves money but also keeps you safe on the road. For detailed procedures, consider consulting professional guides on specific systems, and don’t hesitate to experiment with the techniques to boost your confidence. Why not start today by investing in a diagnostic scanner and practicing basic checks? This small step can lead to huge savings and a longer-lasting vehicle.
Lessons That Changed How I Approach Brake Troubles
One of the hardest truths I learned early on was that not every squeal is just dirt or moisture—sometimes, it’s a warning sign of something more serious. By ignoring small signs, I almost faced costly repairs or dangerous brake failure. Now, I understand that even subtle vibrations or noises demand attention—preventive maintenance is always more affordable and safer than reactive fixes.
Another personal insight was realizing the importance of proper tools and knowing your limits. Rushing into repairs without the right equipment or understanding can do more harm than good. My experience has taught me that patience, education, and the right gear are crucial for DIY success and safety.
Lastly, the myth that all brake issues need professional intervention can be misleading. Many simple fixes, like replacing brake pads or resurfacing rotors, can be tackled at home—saving time and money—but only when you’re well-informed and cautious. That balance of DIY spirit and safe boundaries is the lesson I wish I had embraced sooner.
Tools and Resources That Keep My Brake System in Check
Over the years, I’ve relied on a few trusted tools to maintain my vehicle’s health. A good impact wrench makes removing stubborn lug nuts a breeze, and a quality OBD-II scanner allows me to monitor my vehicle’s electronic systems without guesswork. For brake-specific work, a caliper piston tool has proven invaluable, ensuring even stubborn calipers can be serviced properly.
Beyond tools, I trust online guides and communities for real-world advice. Resources like professional blogs and forums help me understand common pitfalls and innovative solutions—an essential part of my auto-maintenance toolkit. If you’re eager to enhance your DIY skills, starting with these resources can make all the difference.
Your Next Step in Vehicle Care
Embarking on your auto repair journey might seem daunting, but with patience, the right tools, and a willingness to learn, you can save money and boost your confidence. Regularly inspecting your brakes, fluids, and electrical systems ensures your vehicle remains safe and reliable on the road.
So, what’s stopping you from trying a simple brake pad replacement or checking your rotors this weekend? Remember, every small step builds your expertise and keeps your car in top shape. Why not start today? Your vehicle—and your wallet—will thank you for it.