
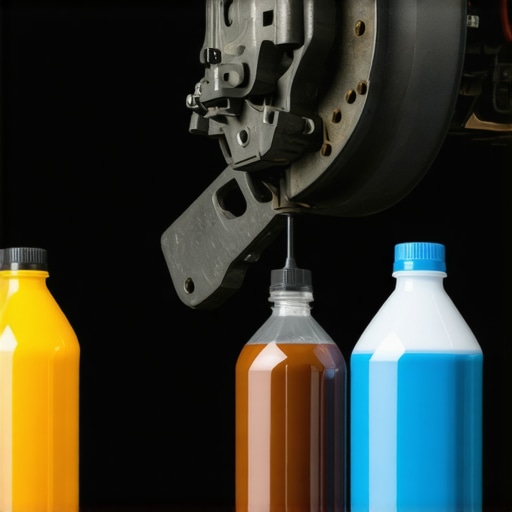
Ever experienced that sinking feeling when your brake pedal feels softer than usual, or your car just doesn’t stop as sharply as it used to? I remember the moment I realized I might have made a costly mistake during a routine brake fluid top-up. I had grabbed what I thought was the right type but didn’t think twice about mixing fluids from different containers. The result? A few weeks later, I was dealing with squealing brakes and a spongy pedal — not exactly the safety feature I rely on daily. That lightbulb moment made me dig deeper, and I want to share what I learned about the real danger of mixing different types of brake fluid.
Why Mixing Brake Fluids Is a Risk You Can’t Ignore
Brake fluid is a critical component of your vehicle’s safety system. It’s responsible for transferring force from the brake pedal to the brake pads, enabling stopping power. But here’s the kicker: not all brake fluids are compatible. Mixing different types can lead to chemical reactions that compromise your brakes’ effectiveness, or worse, cause catastrophic failure.
Early on, I unwittingly added the wrong brake fluid to my system, which didn’t seem like a big deal at the moment. However, I soon noticed the warning signs: increased stopping distances, strange noises, and even warning lights on the dashboard. It was clear my car’s braking system was under attack, and I had to act fast. That experience drove me to research deeper into the topic. Turns out, mixing brake fluids can cause the formation of gelling and vapor lock, leading to reduced braking performance and increased risk of accidents.
According to a study by the National Highway Traffic Safety Administration, improper maintenance, including using incompatible brake fluids, is a leading cause of brake system failures. And with modern vehicles often utilizing sensitive systems, the stakes are even higher. It’s not just about avoiding an inconvenience; it’s about ensuring your safety and that of your loved ones.
If you’ve ever faced a situation where you’ve mixed brake fluids or are unsure about the type to use, you’re not alone. Many car owners overlook this seemingly minor detail until it’s too late. Fortunately, the solution isn’t complicated, but first, you need to know exactly what you’re dealing with. In the upcoming section, I’ll guide you through how to identify the correct brake fluid and what steps to take to prevent costly mistakes. But before that, let me address a common concern I hear from skeptics.
Question: Is Brake Fluid Compatibility Really That Critical?
Absolutely. It might seem like a small fluid change, but incompatible brake fluids can cause serious damage. My early mistake taught me that even a minor mixing can lead to major repair bills or dangerous brake failure. Don’t let a simple oversight become your last-minute trouble. Want to learn how to avoid these pitfalls and keep your brakes functioning perfectly? Keep reading!
Identify Your Vehicle’s Brake Fluid Type
Before starting, check your vehicle’s owner manual or the existing brake fluid reservoir cap to determine the correct brake fluid type—DOT 3, DOT 4, or DOT 5.1. As I learned during my own brake fluid mishap, using the wrong type can cause chemical reactions harming your brake system. Take out the original cap and look for the specifications or color code printed there. If unsure, consult your mechanic or visit a reputable auto parts store with your vehicle details.
Gather the Right Tools and Supplies
Equip yourself with the necessary tools: a clear syringe or turkey baster, funnel, protective gloves, and measuring containers. Having the proper equipment helps prevent accidental cross-contamination, which is essential because mixing incompatible brake fluids leads to issues like gelling or vapor lock. I once attempted a DIY flush without proper tools, causing a mess that delayed my repair; now, I always prepare my kit beforehand to streamline the process.
Drain Existing Brake Fluid Correctly
Locate the brake fluid reservoir and remove the cap carefully. Using a syringe or baster, extract the old brake fluid into a sealed container. This step is like emptying a bathtub before refilling; you want as much old fluid out as possible to prevent mixing. Be cautious not to let dirt or debris fall inside. During my last brake fluid change, I used a clean, lint-free cloth to cover the reservoir opening while adding fresh fluid later, minimizing contamination risks.
Flush the System With Compatible Fluid
To fully replace the old fluid, you may need to bleed the brakes, which involves pushing new fluid through the lines. Attach a clear hose to each caliper or wheel cylinder, submerge the other end in a container with fresh brake fluid, and slowly pump the brake pedal. When I did this, I made sure to keep an eye on the fluid level in the reservoir, preventing air from entering the system—a crucial detail because trapped air can lead to soft brakes or pedal sponginess.
Refill the Reservoir With Precise Measurements
Using a funnel, pour the new brake fluid matching your vehicle’s specifications into the reservoir. Do this slowly to avoid introducing air bubbles. Regularly peek inside to monitor the level, keeping it within the recommended range. Remember, overfilling can cause leaks or reservoir damage. After my first attempt, I learned that patience and careful measurement ensure a perfect fill, avoiding costly repairs later.
Test and Confirm the Brake System’s Performance
After completing the fluid change, pump the brake pedal several times to build pressure. Check for firmness and responsiveness. Also, look for leaks around calipers and hoses. As I experienced firsthand, a soft pedal after filling indicates trapped air or incorrect fluid; re-bleeding may be necessary. Test drive carefully, noting any squeals or pulling, and address issues promptly.
For persistent squeals or uneven wear, consider a deeper inspection. Sometimes, impurities or incompatible fluids can damage brake components, so don’t hesitate to visit a professional if problems persist. For example, missteps here may lead to the issues discussed in this guide.
Many car owners operate under common misconceptions about vehicle maintenance, often believing that routine service is a simple checklist—and missing the crucial nuances that can impact safety and longevity. One widespread myth is that replacing parts like brake pads or performing a basic tune-up universally follows the same process, regardless of vehicle type or driving habits. In reality, advanced diagnostics reveal that what looks like standard wear may hide underlying issues requiring tailored solutions, like diagnosing uneven tire wear patterns to anticipate suspension problems.
Another misconception is that newer vehicles are more forgiving of maintenance shortcuts. However, modern cars integrate complex electronics and sensors—if these aren’t handled correctly, you risk triggering unnecessary warning lights or causing preventable damage. For instance, neglecting to reset the transmission control module after a fluid change can lead to inaccurate shifting behavior, despite the procedure seeming straightforward. To learn more about how advanced diagnostics can save you from costly mistakes, visit this detailed guide.
It’s also a common trap to assume all brake squeal is due to worn pads, leading many to replace parts prematurely. But sometimes, high-pitched brake noises are caused by cheaply made components or improper installation—problems that persist even after a seemingly completed repair. Professionals know that addressing such issues requires identifying the root cause, not just replacing parts blindly. For example, a persistent squeal might stem from a misaligned caliper or a contaminated rotor surface, which needs an expert’s touch to resolve effectively, as outlined here.
Advanced technicians also avoid the trap of overlooking subtle signals—like a slight vibration when braking—that hint at warped rotors or brake line issues. Recognizing these signs early can prevent larger failures and costly repairs down the line.
So, what are some pitfalls even seasoned car owners overlook? For example, many neglect to verify the compatibility of aftermarket parts with their vehicle’s specifications, risking reduced performance or damage. A good rule of thumb is always to consult manufacturers’ recommendations or a trusted mechanic to ensure you don’t cheap out on critical components. This proactive approach keeps your vehicle running smoothly and safely.
Have you ever fallen into this trap? Let me know in the comments! Remember, understanding these hidden nuances can mean the difference between a quick fix and a major repair.
Keep Your Car Running Smoothly with the Right Tools
Maintaining your vehicle over the long haul requires more than just basic knowledge; it demands the right set of tools to ensure precision and safety. Personally, I rely on a high-quality digital multimeter for diagnostics, especially when checking electronic systems like sensors or switches. A Fluke 115 multimeter, for instance, provides accurate readings essential for troubleshooting issues such as intermittent engine misfires or sensor failures, as discussed here.
For brake system inspections, a dedicated code scanner like the Autel MaxiSys Ultra is invaluable. It not only reads error codes but also provides live data streams, helping identify problems like brake pedal vibrations or uneven pad wear quickly. When sealing or inspecting brake calipers, I use a brake caliper piston press tool, which makes retraction and piston replacement effortless and reduces the risk of damage. Using inferior tools or makeshift methods can lead to costly mistakes or component damage, so investing in proper equipment has paid off in both safety and time savings.
Embracing Software for Diagnostic Precision
Beyond physical tools, software solutions are revolutionizing auto repair. I use OEM-specific diagnostic software, which connects via OBD-II adapters, to access manufacturer-specific trouble codes not available on standard scanners. For example, resets for brake sensors or ABS modules often require this specialized software to reset fault codes properly, ensuring the system functions correctly after maintenance. Advanced software can also help predict potential failures before they happen by analyzing trend data, like increased brake fluid temperature or minor shifts in sensor readings, which aids in proactive maintenance.
Looking ahead, the trend points toward integrating AI-driven diagnostics with augmented reality (AR). Think of AR glasses that overlay diagnostic data directly onto your vehicle components, offering real-time insights during repairs. This approach could drastically reduce troubleshooting time and improve accuracy, especially for complex systems involving multiple sensors and modules.
Question: How do I maintain my vehicle’s braking system over time?
Regular inspection and fluid analysis are critical. Using a high-quality, dedicated scan tool to monitor system performance can alert you to issues before they escalate. Additionally, keeping a record of maintenance intervals and symptoms helps in diagnosing recurring problems and planning future service. Don’t forget to check out these tips for preventing brake pedal vibrations. I highly recommend trying the advanced diagnostic approach I mentioned—investing in a OEM software and a reliable diagnostic scanner can save you time and money while keeping your brakes, and the rest of your vehicle, in top shape.
The Hardest Lesson I Learned About car service,auto repair,tune up,brake service
One of the most eye-opening experiences I had was realizing that a simple mix-up with brake fluid could jeopardize safety. It taught me that the devil is in the details—small mistakes like neglecting proper compatibility can lead to big problems, including costly repairs or unsafe driving conditions.
Uncovering Hidden Risks in Routine Maintenance
I used to believe that topping off brake fluid was straightforward, but I learned the hard way that using incompatible fluids can cause chemical reactions, leading to gelling and vapor lock. These issues diminish braking performance and can cause dangerous failures unexpectedly.
The Power of Proper Identification and Tools
My breakthrough came when I started checking my vehicle’s manual and learned about the importance of matching DOT specifications. Equipping myself with the right tools—not just for fluid changes but for diagnostics—has made a huge difference in how confidently I can maintain my car and avoid pitfalls.
Long-Term Benefits of Knowledge and Caution
Now, I proactively verify the correct brake fluid type and follow manufacturer recommendations. This simple step saves me money and keeps my driving safe. It’s a reminder that ongoing education and attention to detail are vital for every responsible car owner.
Resources That Truly Make a Difference
When I recommend tools for brake maintenance, I trust brands like Fluke for diagnostics and the Autel MaxiSys Ultra for comprehensive system scans. These tools provide reliable data and insights, helping me catch potential issues before they become emergencies. Reading trusted guides, such as this article, has expanded my understanding and preparedness.
Inspiration for Your Next Move
Remember, mastering your vehicle’s maintenance isn’t just about fixing problems—it’s about empowering yourself to prevent them. With the right knowledge, tools, and mindset, you can ensure your brake system—and your entire car—performs safely and efficiently for miles to come. Don’t be afraid to take control and keep learning; your safety depends on it.
What’s the one brake maintenance habit you’ve always wanted to get right? Share your thoughts and experiences below!