It happened on a scorching summer day. I was stuck in traffic, sweat pooling under my collar, when suddenly my engine temperature needle started creeping up—again. That little warning light flashed, reminding me just how many sleepless nights I’d spent dealing with coolant leaks caused by one surprisingly cheap part. I’d overlooked it for too long, thinking it was just a minor annoyance, but it turned into a costly mess. If you’ve been there, you know the frustration of chasing leaks that seem to pop up out of nowhere, draining your wallet and patience.
Why That Tiny Pump Part Could Be Sabotaging Your Coolant System
One of the most underestimated culprits behind coolant leaks isn’t some fancy gasket or expensive hose—it’s a small, inexpensive rubber component. This little part often gets overlooked because of its size and seemingly insignificant role in your cooling system. Yet, it’s the primary reason so many leaks occur, especially as the engine ages. Early on, I made the mistake of ignoring this rubber piece—assuming a quick fix elsewhere would do. That mistake cost me dearly in the long run, and I want to save you from the same headache.
Once I learned how this tiny rubber part works, everything changed. It’s often a cheap rubber valve or seal—commonly called the radiator overflow hose or a radiator cap gasket—that turns into a leak magnet over time. These parts are vulnerable to wear and temperature fluctuations, which cause tiny cracks and degradation. When they fail, coolant finds its escape route, seeping into places it shouldn’t.
And here’s the kicker: because it’s so small, many car owners and even some mechanics overlook its importance during regular maintenance. This oversight leads to the dreaded coolant leaks, engine overheating, and—if not caught early—a potentially catastrophic engine failure. The good news? With a keen eye and a bit of know-how, you can identify these little troublemakers before they turn into big disasters.
If you’ve struggled with persistent coolant loss or found yourself refilling the reservoir more often than normal, that tiny rubber part might just be the culprit. Don’t worry—next, I’ll walk you through how to identify signs of failure and what simple steps you can take to prevent costly repairs. But first, let’s clarify a common concern I hear from many readers:
Is replacing this small rubber part really worth the effort, or is it a waste of time?
Believe me, I’ve been tempted to ignore it more times than I can count. Early on, I thought a quick top-up of coolant was enough—until I realized it was a never-ending cycle. That’s a mistake many make, often wasting money on repeated coolant refills without addressing the root cause. According to experts at Car and Driver, tiny rubber seals are some of the most common failure points in the cooling system, and replacing them is a small investment compared to the cost of a complete engine rebuild or replacement. So, yes, it’s absolutely worth paying attention to this humble component.
Now that I’ve shared my story, let’s get practical. I’ll show you how to spot early signs of rubber part failure and keep your coolant system running smoothly. Have you already faced frustration with ongoing leaks? If so, read on—help is just a few steps away.
Prepare Your Tools and Workspace Efficiently
Start by gathering essential tools: a set of screwdrivers, pliers, a socket wrench, automotive gloves, and a clean cloth. Ensure the engine is cool before beginning to prevent burns. Park your car on level ground, activate the parking brake, and disconnect the negative battery terminal for safety. Taking these preliminary steps is akin to preparing your workspace before fixing a leaky pipe—precision and safety matter.
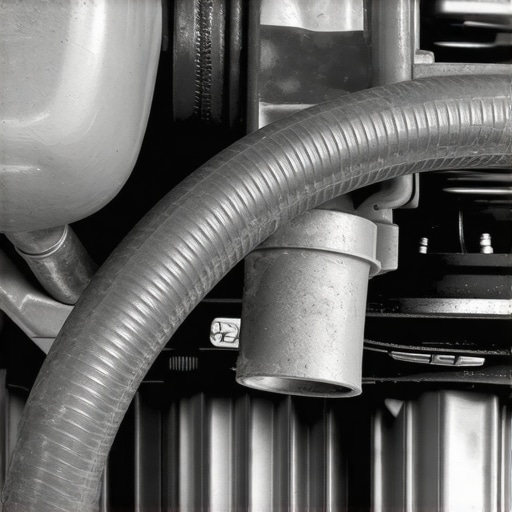
Locate the Rubber Seal and Assess Its Condition
Open the hood and find your radiator cap, usually on the radiator or the coolant reservoir. Carefully remove the cap (with a rag if hot) to access the seal underneath. Look for cracks, signs of hardening, or coolant residue around the rubber. I once found a tiny crack in my rubber gasket during a routine check, which explained recurring coolant loss. Replacing it before it worsened saved me from costly overheating issues.
Remove the Old Seal with Care
Using appropriate screwdrivers or pliers, gently disengage any clips or retaining rings holding the seal in place. Don’t force the rubber if it resists—use a plastic prying tool to avoid damaging surrounding parts. Think of it like carefully removing a stubborn sticker; patience prevents damage. If the seal has hardened or deteriorated, it will come out with minimal effort, revealing the clean surface underneath.
Clean the Area Thoroughly
Before installing the new seal, wipe the sealing surface with a clean cloth to remove any debris, old gasket remnants, or coolant residue. For stubborn grime, use a mild cleaner but avoid harsh solvents that could degrade new rubber. Proper cleaning ensures a tight, leak-free fit and longevity of the replacement. During my last job, neglecting this step led to a minor leak within weeks—so don’t skip it.
Install the New Rubber Seal Properly
Position the new seal exactly where the old one was, ensuring it sits flush and snug. Use your fingers or a soft tool to seat it evenly, avoiding twisting or deforming it. If your seal has an orientation, match the markings. Tighten any retaining clips or rings securely, but avoid over-tightening—they are like securing a small gasket; too tight risks cracking it. I once overtightened, causing the new rubber to crack immediately—a costly mistake.
Refill Coolant and Test the Repair
Replace the radiator cap securely and refill the coolant reservoir to the recommended level. Reconnect the negative battery terminal. Start the engine and let it reach operating temperature; observe the area for leaks or drips. Monitor the coolant level over the next few days. This step is comparable to testing a repaired pipe with a gentle pressure—ensure your fix holds before driving normally.
Monitor and Maintain to Prevent Recurrence
Regularly check the rubber seals for signs of aging—hardening, cracking, or shrinkage—and replace them early. Keep an eye on coolant levels and temperature gauges, acting swiftly if anomalies appear. Routine inspections can save you from emergency repairs. Remember, small preventive measures are like changing your oil—cheap and easy, but vital for longevity. If you’re unsure about the process or encounter unexpected hurdles, consulting a mechanic or referencing detailed guides can help prevent mishaps. Proper maintenance of these tiny rubber parts extends the life of your cooling system and keeps your engine running smoothly.When it comes to car maintenance, many drivers rely on popular advice that, quite frankly, oversimplifies complex systems. A frequent misconception is that replacing a component immediately solves the problem, but in reality, understanding the intricacies of your vehicle’s mechanics is essential for effective repairs. For example, many believe that using high-mileage oil alone guarantees engine longevity, yet neglecting other factors like proper sealing and regular oil changes can undermine its benefits. As highlighted by industry experts, focusing solely on one aspect without considering the holistic health of the engine can lead to premature wear [source].
Investing in the Right Equipment Can Save You Money and Time
If you’re serious about keeping your vehicle in top shape and expanding your repair skills, choosing the right tools is crucial. I personally rely on a high-quality digital multimeter because it allows me to test electrical components quickly and accurately—wiring issues or faulty sensors can be tricky, but with a reliable multimeter, I can diagnose problems without guessing. For example, regularly checking the health of your mass air flow sensor with an accurate multimeter ensures optimal fuel efficiency and engine performance.
Another indispensable tool I recommend is an ultrasonic leak detector, which helps me find tiny leaks in vacuum lines or coolant hoses that are often missed during visual inspections. These leaks can cause overheating or poor fuel economy, and catching them early prevents costly repairs. Investing in a set of quality automotive hand tools—including socket wrenches, screwdrivers tailored for automotive work, and trim removal tools—ensures you can handle most tasks safely and efficiently. Remember, using low-quality tools increases the risk of damaging parts or injuring yourself, especially when working on critical systems like brakes or suspension.
As you scale your repair skills beyond basic maintenance, consider adding a laptop with diagnostic software that interfaces with your vehicle’s OBD-II port. Modern cars store a variety of fault codes and live data that can tell you a lot about the health of your engine, transmission, and sensors. I personally use dedicated scan tools that support manufacturer-specific codes, which makes troubleshooting issues like persistent dashboard warning lights much more straightforward.
In terms of future trends, more automotive manufacturers are adopting advanced diagnostic systems and integrated electronic control modules. Staying ahead of the curve means investing in up-to-date tools and learning to interpret complex data. For example, diagnostic software that connects via Bluetooth or Wi-Fi can provide real-time updates from your vehicle’s ECU, helping you catch issues before they escalate.
How do I maintain my tools and equipment over time?
Proper maintenance of your tools involves regular cleaning, calibration, and storage in a dry, organized space. A well-maintained multimeter will provide accurate readings for years, and keeping diagnostic software up-to-date ensures compatibility with newer vehicle models. Consistent care of your tools maximizes their lifespan and keeps your repair work reliable and efficient.
Finally, I encourage you to try one of the advanced tips we discussed—like testing your radiator fan with a dedicated diagnostic tool—to see the difference high-quality equipment can make. Remember, as cars become more complex, your toolkit and skills must evolve accordingly. Continuing education through specialized courses or online tutorials can dramatically enhance your ability to scale your auto repair projects successfully.
Lessons I Learned from the Tiny Parts That Can Cause Big Trouble
One of the most profound realizations I had was that the smallest rubber components in your cooling system can make all the difference. Overlooking these tiny seals and valves is like ignoring a slow leak in a tire; eventually, it leads to bigger, more costly problems. Understanding that regular inspection and timely replacement of these overlooked parts can prevent engine overheating has transformed how I approach vehicle maintenance.
Another insight was realizing the importance of patience and precision during repairs. Rushing to swap out parts without thorough cleaning or proper fitting simply invites future leaks. Taking the time to clean surfaces and install components correctly has saved me money and time, and it’s a lesson I wish I’d embraced earlier. When it comes to your car’s cooling system, attention to detail is truly a virtue.
Tools and Resources That Changed the Repair Game
Equipping myself with a quality ultrasonic leak detector and a reliable multimeter proved invaluable. These tools enable me to spot tiny leaks and diagnose electrical issues that often compound cooling problems. I trust sources like this guide for cleaning sensitive sensors without damage. Additionally, investing in a good set of automotive hand tools has made every repair smoother and more confident.
Learning from specialized books and online tutorials has opened my eyes to the complex interplay of components in the cooling system. Continual education ensures I stay up-to-date with evolving techniques and technology, ultimately making me a better DIY mechanic and a smarter car owner.
Seize the Moment and Keep Moving Forward
Don’t let the fear of complex repairs hold you back. Each small step you take towards understanding your vehicle’s intricate systems builds confidence and independence. Whether it’s replacing a humble rubber seal or diagnosing a stubborn leak, remember that your proactive efforts can prolong your car’s life and save you hundreds of dollars. The future of auto maintenance is in your hands—armed with knowledge and the right tools, there’s nothing you can’t handle. What repair project are you planning to tackle next? Share your goals below, and let’s learn together!