
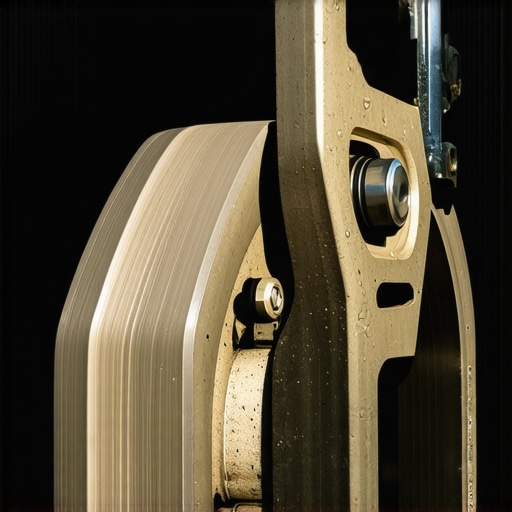
Ever been jolted awake by that unmistakable groan from your brakes when you hit the pedal first thing in the morning? I can’t count how many mornings I’ve been startled by that loud squeal—those first few seconds feel like my car is complaining about itself. Initially, I dismissed it as just normal noisy brakes, but after a while, I realized it was a hint of a bigger issue. That sound bugged me so much I decided to dig into it, and let me tell you, it’s a common problem many drivers overlook.
Deciphering the Morning Brake Groan: Why Does It Happen?
The first stop of the day is when your brake system is most vulnerable to showing signs of wear or dirt buildup. Moisture, dust, and rust settle on your brake components overnight, especially if your car sits outside. When you press the brake pedal in the morning, those deposits create friction that results in that groaning sound. But more often than not, it’s a sign that your brake pads or rotors need some attention.
From personal experience, I used to think that a quick spray of WD-40 or some cheap fix would do. Boy, was I wrong. That mistake taught me the importance of proper brake maintenance. Regular inspection and maintenance can prevent those morning noises from turning into costly repairs later on. If you’ve noticed that squealable warning, it’s time to get proactive.
Want to keep your mornings peaceful and your brakes reliable? We’re going to explore simple ways to diagnose and fix that dreaded groan. Whether it’s a matter of cleaning, minor adjustments, or replacing worn-out parts, I’ll share what I’ve learned from my own car care journey. And trust me, you don’t have to be a mechanic to make your brakes silent and smooth again.
Before we jump into the solutions, let me ask: Have you ever been kept awake or annoyed because of that initial morning brake squeal? If so, you’re in good company. In fact, studies show that ignoring brake noise can lead to more serious issues, like rotor warping or caliper problems, which only get worse if left unchecked. For more insights on brake system health, check out [Understanding Brake System Repairs](https://glassfixauto.com/understanding-brake-system-repairs-a-guide-for-vehicle-owners).
With that in mind, let’s roll up our sleeves and get to the root of the problem. Your morning commutes are about to get a whole lot quieter—and safer.
Start with a Visual Inspection
Park your car on a level surface, engage the parking brake, and open the hood. Examine your brake pads for uneven wear, cracks, or glazing. Then, check the rotors for rust, scoring, or warping. I once found rust buildup on my rotors after a rainy week, which was causing that morning squeal. Removing the wheels and inspecting closely can reveal issues before they escalate.
Clean and Lubricate Brake Components
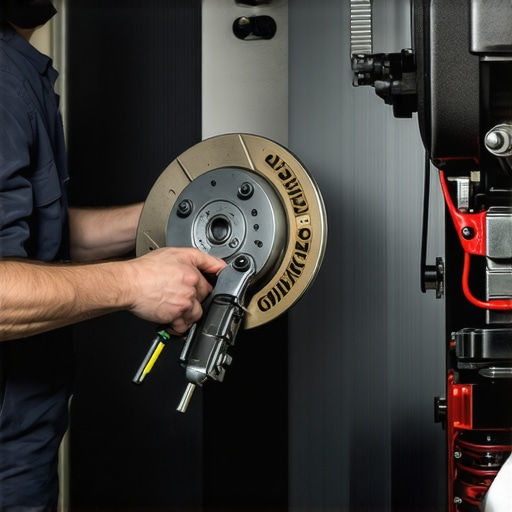
Remove the wheels using a lug wrench, and then carefully detach the brake calipers. Use a brake cleaner to remove dirt, rust, and debris from the caliper, pads, and rotors. Apply a high-temperature brake lubricant to the caliper slides and contact points—this prevents sticking and reduces noise. During my DIY attempt, I used a wire brush on the rotors, then applied brake grease, which significantly cut down the groaning during cold starts.
Note:
Replace Worn or Damaged Parts
If inspection reveals worn-out brake pads—those with less than 1/8 inch of material left or with cracks—consider replacing them. Also, warped or deeply scored rotors should be turned (resurfaced) or replaced. I learned this the hard way when I ignored squeaking pads; the rotor warping led to pulsating brakes and even more noise. Replacing parts ensures smoother operation and quiet mornings.
Check Brake Fluid and Hydraulics
Low or old brake fluid can cause inconsistent braking pressure, leading to noise and vibrations. Use the brake fluid reservoir cap to inspect fluid level and clarity. If fluid appears dark or is below the minimum line, flush and replace the fluid—consult your vehicle’s manual or visit a professional if unsure. Remember, maintaining hydraulic health prevents abnormal noises from insufficient pressure.
Test and Reassemble
After cleaning and replacing parts, carefully reassemble the brake components in reverse order. Tighten all bolts to manufacturer specifications, and reinstall the wheels. Lower the vehicle and gently pump the brake pedal to ensure firm, responsive braking before driving. Test drive in a safe area to confirm the noise has disappeared and braking feels smooth. Regular maintenance like this can prevent that annoying morning squeak from returning.
For ongoing brake health tips, visit this checklist. Proper attention to your brakes not only quiets the groan but also boosts safety and longevity of your components.
When it comes to vehicle maintenance, many car owners rely on common advice or quick fixes, but there’s often a deeper layer of complexity that gets overlooked. For instance, the myth that a standard tune-up can fix all engine issues is widespread—yet, in reality, modern engines require specialized attention to sensors and electronic systems that traditional tune-ups neglect. This misconception leads many to believe that replacing spark plugs or filters alone suffices, but neglecting the importance of updating engine control modules or software can prevent optimal performance.
Another prevalent mistake is the assumption that all brake pads are created equal. While budget pads might seem an appealing choice, they often lack the proper friction compounds, leading to premature wear or uneven braking. It’s a trap that many fall into, only to face costly rotor replacement later. Advanced drivers understand that opting for high-quality materials and proper calibration can significantly extend brake system lifespan, a nuance often missed by DIY enthusiasts.
Within auto repair, there’s also a dangerous oversimplification: the idea that flashing warning lights or dashboard alerts are mere inconveniences. In truth, these signals often indicate underlying issues that, if ignored, can escalate into expensive repairs or safety hazards. For example, a blinking check engine light may stem from simple misfires or complex sensor failures. A professional diagnosis, considering the vehicle’s history and sensor data, can prevent missteps. Experts advise consulting trusted sources like this guide to understand the significance behind these alerts.
Why do some repair techniques actually harm your vehicle more than help?
Sometimes, well-intentioned DIY fixes can backfire. For example, using aftermarket parts without verifying their compatibility can lead to issues like misfiring or uneven wear. Similarly, relying solely on visual inspection without diagnostic tools might cause you to miss subtle problems like failing sensors or worn-out belts that only sophisticated testing can reveal. Recognizing these advanced nuances is essential; according to automotive engineers, neglecting electronic diagnostics is a common oops that costs drivers more in the long run. To avoid these pitfalls, investing in professional assessment or learning about proper diagnostic methods is recommended. For comprehensive tips, visit this checklist.
Have you ever fallen into this trap? Let me know in the comments and share your experience. Remember, understanding these hidden nuances empowers you to make smarter choices—saving you money and keeping your vehicle dependable for years to come.Maintaining your car’s performance over the years requires more than just basic upkeep; it demands reliable tools and a strategic approach. One essential investment is a high-quality diagnostic scan tool like the Launch X431, which allows me to read and clear error codes quickly, saving time and preventing small issues from escalating. Coupled with a professional-grade multimeter such as the Fluke 115, I check battery health and sensor voltages with precision, ensuring electronic components function optimally. For brake-specific diagnostics, I rely on a dedicated brake fluid tester to confirm the fluid’s moisture content aligns with safety standards, reducing the risk of corrosion and brake fade. Personally, I also swear by a set of precision torque wrenches from GearWrench to tighten fasteners accurately, avoiding over- or under-tightening that can lead to component failure.
When it comes to long-term results, integrating software updates into your vehicle’s ECU is crucial, especially as automakers release patches addressing common issues. Many modern cars are networked, and utilizing manufacturer-specific tools like the Autel MaxiCOM ensures your system stays up-to-date—this proactive step can optimize fuel efficiency and drivability. I’ve seen firsthand how regular software refreshes prevent erratic sensor readings, as highlighted in recent automotive research (see https://glassfixauto.com/auto-repair-trends-to-watch-in-2025-staying-ahead-of-the-curve).
Scaling vehicle maintenance for multiple cars at home? Consider creating a dedicated maintenance station equipped with a hydraulic lift like the Challenger 7500 and a mobile tool chest filled with essentials. Organizing your tools and parts streamlines routine checkups, making it easier to stay consistent and catch potential issues early.
How do I maintain my tools and systems over time? Regular calibration, proper storage, and staying updated with the latest diagnostic software are key. For example, recalibrating torque wrenches every six months maintains their accuracy, while updating your scan tool firmware ensures compatibility with new vehicle models. It’s also wise to clean and inspect tools after each use to prevent corrosion and damage.
Looking ahead, the trend is moving towards integrated vehicle diagnostics that connect directly to your smartphone, enabling remote monitoring of health reports. Keeping pace with these innovations requires adopting versatile tools that can adapt to future tech, like mobile-compatible scan kits and cloud-based repair logs.
If you’re serious about long-term vehicle health, I recommend trying the advanced diagnostic techniques I mentioned—like regular software updates and precise torque calibration. These small investments in your toolkit can extend your vehicle’s lifespan and enhance safety. Need personalized advice or assistance setting up your maintenance station? Feel free to contact me via this contact page. Remember, staying proactive with the right tools is the best way to keep your vehicle running smoothly for years to come.
Lessons from the Garage: Hidden Revelations About Brakes
One of the biggest lightbulb moments I had was realizing that those early morning squeals weren’t just annoying—they were signals begging for attention. Ignoring them can lead to costly repairs, but addressing them early transformed my approach to vehicle maintenance.
Another insight was understanding the importance of quality parts and proper lubrication. Skimping on brake components or applying inappropriate lubricants can make the problem worse, not better. Investing in good materials and following proper procedures makes a real difference in quiet mornings and safe drives.
Lastly, I learned that routine inspections are your best allies. Catching rust, uneven wear, or glazing before they cause more damage saves money and ensures peace of mind every time you start your car.