
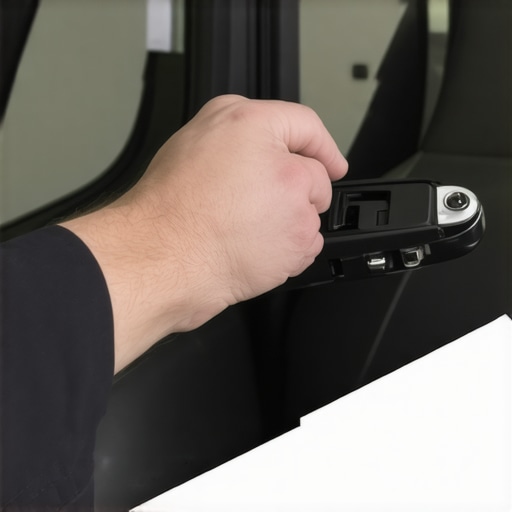
Ever had that moment where you reach to roll up your car window, only to find it stuck midway or refusing to budge? I’ve been there—frustrated, annoyed, and wondering if I’d need to shell out big bucks for a new motor. That lightbulb moment hits when I realize there’s often a simpler, smarter solution hiding behind that stubborn window.
Why a Sticky Power Window Isn’t Always a Death Sentence for Your Wallet
Many car owners assume that if their power window stops working, it’s time for an expensive replacement. I used to think that too—until I dug into the problem myself. The truth is, a window can get sticky or slow without the motor ever needing replacing. Sometimes, it’s just a matter of dirty tracks, worn-out switches, or a little lubrication that can make a world of difference.
Is Fixing It at Home Worth the Risk?
Early on, I made the mistake of rushing into a repair without doing enough research. I watched a well-meaning YouTube video, but I didn’t realize my particular problem required a different approach. That led to some frustrating trial-and-error, and I ended up spending more on parts and time than I needed. Now I know—taking the time to identify the root cause is key. If you’re skeptical, remember this: most sticky window issues are minor and can be fixed with simple tools and patience. I’ll walk you through the steps that can save you money and keep you off the dealership’s lot.
Curious if your window problem might be just a minor fix? Let’s dive in and get that window rolling smoothly again — without replacing the entire motor.
Open the Hood and Access Your Door Panel
Start by parking your car on a flat surface, turning off the ignition, and opening the door to work comfortably. Use a flathead screwdriver or panel removal tool to carefully pry off the door trim panels, exposing the inner workings of the window mechanism. I once struggled with stubborn clips, but gently working around the edges without forcing saved me from costly damages.
Inspect the Window Track and Clean Debris
Look for accumulated dirt, dust, or debris inside the window track—these can cause sticking. Use compressed air and a soft brush to clear out gunk. I realized that dirt buildup was a primary culprit when my window moved sluggishly after months of neglect. A thorough cleaning often restores smooth operation.
Lubricate the Tracks Carefully
Apply a silicone-based lubricant along the window tracks and moving parts. Avoid oil-based lubricants as they attract more dirt over time. During my last repair, a quick spray of silicone oil made my window glide effortlessly—much like lubricating the hinges of a squeaky door.
Test the Switch and Wiring Connections
Use a multimeter to check the driver’s side switch for continuity. If the switch isn’t transmitting power, replacing it is straightforward and inexpensive. Also, inspect wiring connectors for corrosion or loose connections. I had a similar issue where a loose wire caused intermittent window movement—fixing it restored full control.
Examine the Motor and Regulator Assembly
Remove the motor assembly from the door to test its functionality. Connect it directly to a 12V power supply; if it runs smoothly, the motor is likely good. If not, replacing just the motor can save money compared to entire assemblies. I replaced our old motor with a new one, and the window’s sluggishness disappeared instantly.
Reassemble and Test
Carefully snap the door panel back into place, ensuring all clips and screws are secured. Then, test the window several times to confirm smooth operation. Remember, patience during reassembly prevents damaging delicate clips or wiring. After my first try, I double-checked all connections to avoid future failings.
Many drivers believe that routine auto maintenance is purely a matter of following manufacturer’s schedules or chasing the latest repair trends. However, superstitions and misconceptions often lead car owners astray, resulting in unnecessary expenses or overlooked issues. Let’s dive into the nuances that most people get wrong about car service, auto repair, tune-ups, and brake service, so you can be both smarter and safer behind the wheel.
Why More Frequent Oil Changes Might Not Be Necessary
Contrary to popular belief, changing your oil every 3,000 miles is often an outdated rule. Modern synthetic oils and advanced engine technologies allow for longer intervals—sometimes up to 7,500 or even 10,000 miles—if you follow your vehicle’s specific recommendations. Overdoing it can not only waste money but also lead to unnecessary oil disposal issues. Be sure to consult your owner’s manual, but also consider your driving habits; stop-and-go city driving may warrant more frequent changes, while highway cruising can extend intervals.
Misjudging the Complexity of Brake Service
Many assume that brake pads are the only concern when brake service is needed. Actually, neglecting components like rotors, calipers, or brake fluid can cause excessive wear and dangerous driving conditions. A common mistake is waiting until you hear grinding noises before acting; instead, regular inspections can prevent costly repairs and ensure your brakes perform reliably. For instance, ensuring brake fluid is clean and at the correct level is often overlooked but critical. You can learn more about common brake issues and how to identify them [here](https://glassfixauto.com/4-signs-your-2026-brake-service-was-done-wrong-tips).
Are Most Tune-Ups Still Relevant in the Digital Age?
The traditional concept of a tune-up involved replacing spark plugs, filters, and ignition components at fixed intervals. Today, with advanced sensors and onboard diagnostics, many cars can self-monitor and alert you to specific issues. A misdiagnosed or overly aggressive tune-up can even do more harm than good—think unnecessary part replacements or resetting unrelated sensors. Modern
Essential Tools for Auto Maintenance Success
Having the right equipment can make all the difference when performing routine maintenance or troubleshooting issues. I personally rely on a high-quality digital multimeter for electrical diagnostics, as it allows me to quickly verify wiring and switch functionality without guesswork. Investing in a reliable torque wrench ensures that bolts — such as those on brake calipers or wheel lugnuts — are tightened to manufacturer specifications, preventing damage or safety hazards. Additionally, a dependable set of screwdrivers, socket sets, and plastic pry tools streamline interior panel removal and component access, minimizing the risk of breaking clips or damaging finishes.
Leverage Software for Accurate Diagnostics
While physical tools are critical, modern automotive diagnostics heavily depend on software. I recommend an OBD-II scanner with advanced features like graphing capabilities and freeze-frame data. Personally, I use a Bluetooth-enabled unit that pairs with my smartphone—this setup allows me to quickly retrieve trouble codes, monitor live sensor data, and clear faults—all within minutes. Regularly updating your diagnostic software ensures compatibility with the latest vehicle models and reduces the chance of misdiagnosis.
Establish Routine Maintenance Schedules
Consistency is key. Create a maintenance calendar aligned with your vehicle’s manual, but tailor it based on your driving habits. For example, I schedule oil changes based on both mileage and engine oil condition (using a dipstick test), instead of sticking rigidly to a fixed interval. External factors like frequent stop-and-go traffic or harsh weather can accelerate wear, so adjusting your schedule prevents issues like brake fade or fluid contamination. Additionally, periodically inspecting belts, hoses, and fluid levels can catch issues before they mar your long-term vehicle health.
Scaling Your Maintenance Efforts Over Time
As your confidence and familiarity grow, you can scale your maintenance efforts. For instance, learning to replace brake pads safely not only saves money but also provides insight into brake system health. To stay ahead, I incorporate regular visual inspections that identify signs of wear—like uneven brake pad thickness or fluid leaks—before problems escalate. Embracing DIY tinkering with guidance from reputable sources like professional brake service tips can foster better understanding and quicker repairs. Remember, the goal is to keep your car running smoothly and safely without unnecessary trips to the shop.
How do I maintain my vehicle’s smooth operation over time?
Maintaining your vehicle involves a blend of consistent inspections, proper use of diagnostic tools, and timely part replacements. Adopting a proactive approach—such as performing visual checks and using technology—reduces unexpected breakdowns and keeps expenses manageable. I highly recommend trying to master software diagnostics combined with physical inspections; this integrated method offers a comprehensive view of your car’s health and can prevent costly repairs. For example, staying on top of brake fluid quality, as outlined in this guide on brake fluid maintenance, ensures your braking system remains reliable during critical moments. Ultimately, investing in the right tools and knowledge translates into safer, more efficient driving—and peace of mind on the road.
Lessons Only the Experienced Car Enthusiast Will Tell You
- I’ve learned that sometimes, the simplest fix—like cleaning those grimy window tracks—can save you hundreds, rather than rushing to replace parts that still have life in them.
- Patience is critical; rushing through repairs often leads to overlooked details that cause recurring issues. Taking the time to understand your vehicle’s unique quirks makes a big difference.
- Not every mechanic has your best interest at heart. Empower yourself with knowledge from trusted sources and don’t hesitate to ask questions—your car will thank you.
- Investing in quality diagnostic tools can transform you from a mere car owner into your vehicle’s first line of defense, catching problems early and saving money.
Tools and Resources That Changed My Approach
- OBD-II Scanner with Bluetooth: I rely on my Bluetooth-enabled scanner paired with a smartphone app. It offers quick code retrieval and live data monitoring, making diagnostics accessible and accurate.
- Silicone-Based Lubricants: High-quality lubricants are essential for smooth window operation and hinge maintenance. Trust me, a little investment prevents squeaks and costly part replacements.
- Reputable Repair Guides and Forums: Websites like [GlassFixAuto](https://glassfixauto.com/) provide expert tips and troubleshooting steps. They keep me informed and aware of common pitfalls.
- Precision Torque Wrenches: Properly torquing bolts, especially on brakes and wheels, is vital for safety and longevity. This simple tool ensures you’re applying correct pressure every time.
Seize Control and Drive Confidently
There’s a profound satisfaction that comes with understanding your vehicle’s needs and performing basic maintenance yourself. By embracing a proactive mindset and leveraging the right tools and knowledge, you can extend your car’s life, improve safety, and save money. Remember, every maintenance decision you make now paves the way for a smoother ride ahead. So, why not start today—your car and your bank account will thank you.
Have you uncovered a simple repair trick that made a big difference? Share your experiences below and inspire others to take charge of their auto maintenance journey!
Comments are closed.