
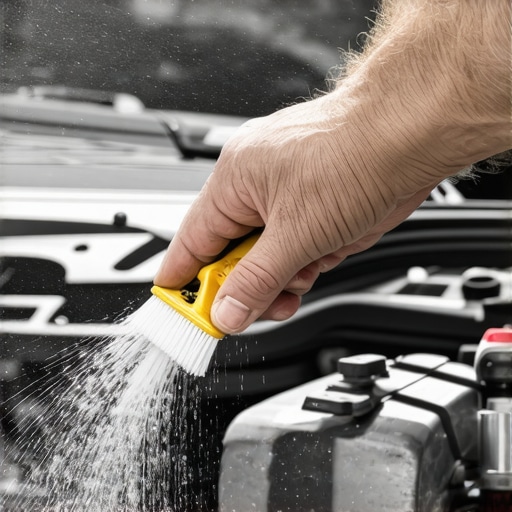
Ever been behind the wheel, flooring the gas, and feeling like your car’s response is just a little sluggish—like dragging a stone instead of flying off the line? I remember those moments vividly—frustrating, and honestly, a bit scary when you realize that your ride isn’t performing like it used to. Turns out, that sticky throttle body might be the culprit, quietly slamming the brakes on your engine’s response. But dont worry. In this post, Im going to walk you through how I tackled this issue and how you can do it too, restoring that crisp acceleration and smooth idling.
Why Ignoring a Sticky Throttle Body Can Cost You More Than Just Power
Is the Hype About Cleaning the Throttle Body Just Overblown?
Many folks dismiss throttle body cleaning as unnecessary maintenance, and I used to be in that camp—until I faced a noticeable drop in my car’s responsiveness. What I didn’t realize at first was how much a buildup of carbon and dirt can clog your throttle plate, making it hard for air to flow smoothly into the engine. This, in turn, messes with your air-fuel mixture, leading to rough idling, hesitation, or even stalling. I learned this the hard way, making the mistake of ignoring this tiny component early in my car maintenance journey—a mistake I wouldnt make again.
Here’s a startling fact: According to auto industry experts, a dirty throttle body can reduce engine efficiency by up to 20% (source: [Glass Fix Auto](https://glassfixauto.com/why-your-engine-revs-up-high-when-you-start-it)). That’s like throwing money out the exhaust pipe!
So, why is this often overlooked? Well, many car owners think that regular oil changes and tire rotations are enough. But the truth is, neglecting the throttle body can lead to more significant issues down the road, like increased fuel consumption and engine misfires.
Before we dive into how I cleaned mine, I want to tell you about a common mistake I made early on: relying solely on carb cleaner without disconnecting the intake or removing the throttle body. That approach did little more than wash the surface. True cleaning requires a bit more patience and some basic tools—things Ill guide you through next. If youve experienced sluggish acceleration or rough idling, keep reading. We’re about to bring the zing back to your engine’s response—fast and effectively.
Gather the Right Tools and Prepare Your Workspace
Before diving into cleaning, gather essentials like a throttle body cleaner, screwdrivers, rags, safety gloves, and eye protection. Find a shaded, well-ventilated area under your hood. I once attempted this on a hot summer afternoon without gloves, ending up with chemical burns on my fingers—so don’t skip safety gear.
Disconnect the Battery to Prevent Accidental Throttling
Start by disconnecting the negative terminal of your car battery. Think of this as disabling your car’s nervous system before performing a delicate operation, ensuring you avoid accidental engine activation. This step prevented me from unintentional throttle opening, which could have caused injuries or further damage.
Locate and Remove the Throttle Body
Find the throttle body, usually located between the air filter box and intake manifold. Loosen the clamps and vacuum hoses gently—these connections are like the joints of a Lego set, fragile if forced. Remove the mounting screws and carefully take off the throttle body. I once accidentally dropped a screw into the engine bay, turning a simple task into an hours-long hunt.
Inspect for Carbon Buildup and Debris
Visual inspection reveals a dark, oily film around the throttle plate—sign of carbon deposits. Imagine this as a clogged sink drain hampering water flow; in this case, dirt blocks air from entering freely, causing sluggish engine response. If deposits are heavy, plan to spend extra time scrubbing.
Apply Throttle Body Cleaner and Scrub Gently
Spray the cleaner liberally onto all moving parts and deposits. Use a clean rag or a soft-bristled brush to remove soot and grime. Be cautious not to damage the throttle plate or sensors—think of cleaning a delicate jewelry piece. During my first attempt, I over-scrubbed and dislodged a sensor; learn from my mistake and proceed patiently.
Tip
For stubborn deposits, repeat spraying and scrubbing until the surface looks shiny and clean. Remember, patience produces better results than brute force.
Reassemble the Throttle Body and Reconnect All Components
Once clean, reattach the throttle body to the intake manifold, secure screws, and reconnect vacuum hoses and sensors. Ensure everything is tight and correctly aligned—think of it as putting together a puzzle. Don’t forget to reconnect the negative battery terminal. I once forgot this step, leading to a non-starting engine, wasting hours diagnosing the issue.
Perform a Throttle Body Reset and Test Drive
Start your engine and allow it to idle for a few minutes. Many modern cars require your ECU to relearn throttle positions. Some models benefit from a throttle reset procedure—consult your vehicle manual or perform a disconnect-of-battery trick. Drive gently to evaluate improvements. After my cleaning, throttle response was noticeably sharper, and the engine idled smoothly.
Maintain the Cleanliness Regularly
Repeat this cleaning every 30,000 miles or if symptoms recur. Regular maintenance prevents excessive buildup, saving time and avoiding more costly repairs down the line. Think of it like brushing your teeth—consistent effort keeps problems at bay. Skipping this step can lead to issues like rough idling and poor acceleration, which might even affect your safety on the road.
 Many car owners approach vehicle maintenance with a list of generic tasks or trust the common advice they hear from friends or even some technicians. However, what most people don’t realize is how nuanced and complex proper auto repair and tune-ups truly are. Let’s explore some misconceptions and advanced pitfalls that can cost you time, money, or even safety if overlooked.
Why the Standard List of Maintenance Doesn’t Guarantee Peak Performance
Many assume that following the manufacturer’s scheduled tune-up intervals and replacing parts like spark plugs, filters, or fluids is enough. While these are vital, the real secret lies in understanding the condition and operation of subsystems like your ignition system, fuel injectors, or emissions components. For example, carbon build-up in fuel injectors can cause misfires and poor fuel economy, but routine maintenance might not address this unless you specifically ask for an injector cleaning. According to a study by auto experts, neglecting such targeted repairs can reduce engine efficiency by up to 15% despite adhering to a typical maintenance schedule.
The Oops You Make When Ignoring Brake System Nuances
Many think that replacing brake pads is sufficient when brakes start squealing. But the squeal often indicates warped rotors or a need for a brake system overhaul, which, if ignored, can lead to dangerous situations. For instance, warped rotors not only reduce braking efficiency but can also cause vibrations during braking—an underrated hazard during emergency stops. To avoid this, it pays to inspect and replace rotors when signs of warping develop, rather than just changing pads. You might also want to explore [how warped rotors impact braking](https://glassfixauto.com/3-signs-your-brake-rotors-are-warped-and-how-to-fix-them) for a more detailed understanding.
Advanced Mistake: Overlooking the Importance of Proper Fluid Dynamics
A common misconception is that topping off fluids like transmission or differential oil is enough. In reality, old or contaminated fluids drastically affect vehicle performance and component longevity. For example, failing to flush and replace transmission fluid regularly can cause shifting issues or even transmission failure. Modern vehicles have complex systems that depend on clean, properly pressurized fluids; neglecting this can be an expensive mistake. Check out [how to diagnose a whining sound from engine related to fluid issues](https://glassfixauto.com/how-to-diagnose-a-whining-sound-from-your-engine) to learn more.
Is Your Car’s Computer Overlooking Key Faults?
Advancing tech has placed greater reliance on onboard diagnostics, but many car owners assume that a simple check engine light covers all issues. However, some problems, like a failing alternator or subtle coolant leaks, can evade basic scans. These issues can cause unexpected breakdowns or damage other components if not caught early. A comprehensive understanding of these hidden failure modes helps in planning preventive maintenance. For example, a [failing alternator](https://glassfixauto.com/how-to-spot-a-failing-alternator-before-it-leaves-you-stranded) can be silent until battery failure occurs.
Having the right knowledge prevents you from falling into the classic traps of misdiagnosis and unnecessary repairs. Instead, approaching car maintenance with an eye for detail, understanding the nuances, and asking the right questions empowers you to keep your vehicle running smoothly and safely. Have you ever fallen into this trap? Let me know in the comments!Maintaining your vehicle’s optimal performance over the long term requires more than just basic upkeep; it demands the right tools, consistent practices, and a proactive mindset. As someone deeply involved in auto repair, I rely on specific equipment and methods that ensure accuracy, safety, and efficiency. For instance, a high-quality **digital multimeter** is indispensable for diagnosing electrical issues—the precision it offers helps me pinpoint problems like failing alternators or faulty sensors quickly. I personally prefer the **Fluke 117** model because of its reliability and ease of use, especially when testing complex circuits or verifying battery health, which can prevent inconvenient breakdowns, as discussed in detail on [how to spot a failing alternator before it leaves you stranded](https://glassfixauto.com/how-to-spot-a-failing-alternator-before-it-leaves-you-stranded).
Beyond fundamental tools, I also recommend investing in a **compression tester** for assessing engine health. This device allows me to check the cylinder compression ratio, providing insights into potential issues like worn piston rings or valve problems that can lead to poor performance or oil consumption. Using a quality gauge, such as the **AeroVery Compression Tester**, has saved me countless hours by catching problems early.
Scheduling regular **diagnostic scans** with a **professional-grade OBD-II scanner** like the **Autel MaxiCOM** enables me to stay ahead of warning lights and code errors. These devices interpret the vehicle’s onboard diagnostics, giving a comprehensive overview that simple check engine light codes can’t provide—saving money and preventing complex failures.
When it comes to brake servicing, I lean on **professional rotor measuring tools** to verify warping signs accurately, avoiding the risk of overlooked issues that can cause vibrations or increased stopping distances. For example, accurate rotor runout measurements can prevent unsafe driving conditions, as outlined in [this guide on warped rotors](https://glassfixauto.com/3-signs-your-brake-rotors-are-warped-and-how-to-fix-them).
Looking ahead, I believe that **smart diagnostics and predictive maintenance** will become standard. Vehicle manufacturers are increasingly integrating sensors that monitor component wear and predict failures ahead of time, allowing for timely interventions. Staying updated with **connected diagnostics apps** will be essential for both professionals and DIY enthusiasts alike.
How do I maintain these tools and the car’s performance over time? First, I ensure I clean and calibrate my diagnostic equipment regularly, following manufacturer guidelines. For example, calibration of multimeters is critical for accuracy, which can drift over time if neglected. I also keep a **maintenance log** for my tools, recording calibration dates and system tests. For the car itself, I adhere to scheduled fluid changes, tire rotations, and brake inspections, supplementing with targeted repairs when symptoms appear—like early signs of rotor warping or fluid contamination.
If you’re serious about your vehicle’s longevity and safety, I highly recommend investing in quality diagnostic tools and learning their proper use. Try performing a comprehensive battery and alternator test with your multimeter today; it’s a simple step that can save you from unexpected breakdowns. Regularly review your tools’ calibration and update your maintenance routines—these small actions accumulate into major long-term benefits, ensuring your ride is always road-ready.
How I Learned to Trust My Intuition Over Routine Checks
Early in my auto repair journey, I used to rely strictly on checklists and scheduled intervals, assuming that following the manual was enough. But after troubleshooting a persistent engine shudder, I realized that listening to my own observations—the subtle vibrations and sounds—was often more revealing than any schedule. This taught me to develop a keener ear and a proactive mindset, making me a better DIYer and mechanic for my own vehicle.
Why Overconfidence Can Make Repairs Costlier Than They Should Be
One mistake I repeatedly saw among fellow car enthusiasts was assuming that simple fixes like replacing brake pads would solve all issues. I once replaced brakes without inspecting rotors, which led to premature wear and more noise down the line. Recognizing that some problems are more nuanced than they seem saved me money and time. It’s vital to understand the interconnectedness of auto systems—like how [warped rotors](https://glassfixauto.com/3-signs-your-brake-rotors-are-warped-and-how-to-fix-them) can undermine new brake pads.
The Power of Consistent Maintenance and Staying Ahead
Fluids are the lifeblood of your vehicle, and neglecting their condition can silently cause huge issues. I learned the importance of regular fluid changes—transmission, coolant, and brake fluid—to prevent costly breakdowns. Using reliable tools, like my favorite [diagnostic scanners](https://glassfixauto.com/how-to-diagnose-a-whining-sound-from-your-engine), helps me spot potential failures early. This preventive approach keeps my car running smoothly and brings peace of mind knowing I’m avoiding surprises on the road.
Why Sharing Your Experience Can Empower Others
When I started sharing my repair stories, I realized how much I learned from others’ advice and mistakes. Encouraging an open dialogue creates a community where knowledge grows, and challenges become opportunities for learning. Whether it’s a tricky clutch adjustment or diagnosing a whining noise, exchanging insights accelerates mastery. Your story might help someone else avoid the pitfalls I faced—so don’t hesitate to share your journey.
Resources That Elevated My Repair Skills
Over time, I found a handful of tools and sources that truly made a difference. The [autel MaxiCOM](https://glassfixauto.com/how-to-diagnose-a-whining-sound-from-your-engine) scanner, for instance, allows me to interpret complex codes and understand my vehicle better. A quality [compression tester](https://glassfixauto.com/how-to-spot-coolant-leaking-into-your-oil) reveals hidden engine issues, while reliable repair manuals have saved me from guesswork. Investing in these resources has turned maintenance from a chore into a rewarding experience.
Keep Pushing Forward and Trust Your Abilities
Getting your hands dirty and tackling auto problems head-on can be intimidating, but it’s incredibly empowering. Every workshop mistake or unexpected challenge is a step toward mastery. Remember, even seasoned technicians started as beginners. Embrace the learning curve, stay curious, and celebrate each fix—your confidence will grow with every mile. Are you ready to take charge of your vehicle’s health and make maintenance your new advantage?
What’s the next repair or upgrade you’re excited to try yourself? Share below and let’s grow together!