
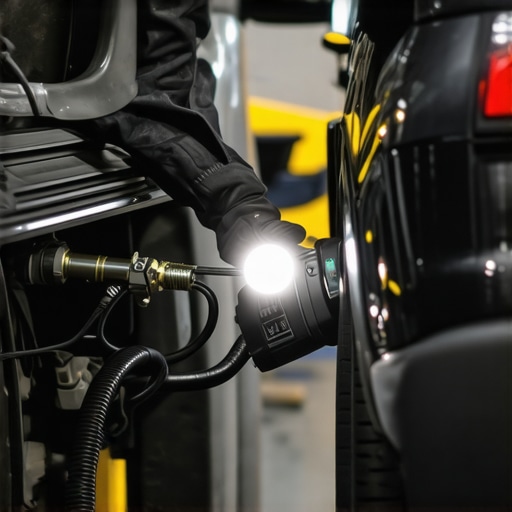
How to Diagnose an Evap System Leak Without Expensive Shop Tools
Few things are as frustrating as driving down the road and seeing that amber “Check Engine” light pop up on your dashboard. You plug in a basic scanner, and there they are: the dreaded P0440, P0442, or P0457 codes. When an evap system leak detected message appears, many drivers fear a massive repair bill. The Evaporative Emission (EVAP) system is a complex network designed to trap gasoline vapors before they escape into the atmosphere, where they contribute to smog and pollution. While professional repair shops often use smoke machines costing upwards of $1,000 to find these leaks, you don’t necessarily need high-end equipment to get the job done. As a Service Director with years of experience at AutoNation Toyota Libertyville, I’ve seen how simple many of these fixes can be. In fact, most homeowners can diagnose and locate the majority of EVAP leaks with about $20 worth of supplies and a little patience. In this guide, I’ll show you how to tackle evaporative emission system repair without breaking the bank.
Understanding the EVAP System: Why That Light is On
To fix the system, you first have to understand how it works. The EVAP system is essentially a sealed loop that manages fuel vapors. Its primary components include the gas tank, the charcoal canister (which acts like a sponge for fumes), the purge valve (located near the engine), and the vent valve (usually near the gas tank). When your car is off, the charcoal canister absorbs fumes. When you’re cruising down the highway, the purge valve opens, allowing the engine to “suck” those vapors into the intake manifold to be burned off.
The “Check Engine” light triggers because the engine’s computer (the PCM) performs a self-test. It seals the system and monitors how well it holds a vacuum or pressure. If the pressure drops faster than a predetermined threshold, the computer assumes there is a leak. According to industry data, EVAP leaks are consistently among the top five reasons for failed emissions tests across the United States. If your system isn’t airtight, you won’t pass your state inspection, and your vehicle will continue to emit hydrocarbons into the air. Understanding this process is the first step toward successful The Dangers of Leaving That Check Engine Light On.
Common Symptoms of an EVAP Leak
Aside from the glowing icon on your dash, there are several physical symptoms that point toward an EVAP failure. The most obvious is the smell of raw gasoline around the vehicle, particularly after it has been parked for a while or immediately after refueling. This indicates that vapors are escaping directly into the air rather than being stored in the canister.
Another common symptom is difficulty starting the car specifically after you fill up at the gas station. If the purge valve is stuck open, fuel vapors can flood the engine intake during refueling, making the air-fuel mixture too rich for the engine to fire up easily. You might also notice a slight but measurable drop in fuel economy. While an EVAP leak won’t usually cause your car to stall in traffic, the loss of efficiency adds up over time. If you’ve noticed your mileage isn’t what it used to be, you might want to check out our guide on Why Your Gas Mileage Dropped Suddenly.
The DIY Diagnostic Toolkit: What You Need
Before you head to a carmax service department or a local mechanic, you can assemble a diagnostic kit for less than the cost of a tank of gas. You don’t need the “industrial strength” tools found at a carmax car service center to find a leak. Here is what you should have on hand:
- OBD-II Scanner: A basic Bluetooth version that connects to your smartphone can be found for around $20. This is essential for reading and clearing codes.
- Flashlight and Telescopic Mirror: Many EVAP components are tucked away above the fuel tank or behind the engine block.
- Soapy Water: A simple spray bottle filled with water and a generous amount of dish soap.
- The “Poor Man’s Smoke Machine”: This can be a thick cigar or even a DIY smoke generator made from a sealed paint can and a soldering iron.
Step 1: The Visual Inspection (The “Low-Hanging Fruit”)
Before performing any complex tests, start with a visual inspection. You would be surprised how often the “Check Engine” light is caused by something incredibly simple. Did you know that a loose, damaged, or incorrect gas cap is responsible for nearly 17% of all EVAP-related check engine lights? Inspect the rubber O-ring on your gas cap. If it looks cracked, dry-rotted, or flattened, replace it. It’s a $10 fix that solves a huge percentage of P0440 codes.
Next, follow the rubber hoses. EVAP lines run from the fuel tank to the charcoal canister and up to the engine. In older vehicles, these rubber lines frequently dry-rot and crack. Look for any disconnected lines or hoses that feel brittle to the touch. Also, inspect the charcoal canister itself. It is usually located under the vehicle near the fuel tank. Because of its location, it is susceptible to damage from road debris or “bottoming out” on speed bumps. If the plastic casing is cracked, you’ve found your leak. Learning to perform these checks is a vital part of Troubleshooting Common Auto Repair Issues Before Visiting the Shop.
Step 2: The Soapy Water Test
If the visual inspection doesn’t yield results, it’s time to get the soapy water out. This method works best for finding leaks in connections and valves. Professional technicians might use a transmission leak repair fluid or specialized dyes for other systems, but for the EVAP system, bubbles are your best friend. While the engine is running and the system is attempting to purge, or by using a small air compressor to very gently pressurize the system, spray the soapy water on all hose connections and the seams of the valves.
Crucial Warning: If you use an air compressor, you must regulate the pressure to under 1 PSI (pounds per square inch). Professional smoke machines operate at approximately 0.5 PSI. The EVAP system is not designed to handle high pressure; if you blast it with 30 PSI from a standard compressor, you will blow out sensitive seals and turn a small oil leak repair or EVAP fix into a multi-thousand dollar disaster. If you see bubbles forming and growing at a connection point, you’ve successfully located the leak.
Step 3: The “Poor Man’s Smoke Test” (Cigar Method)
The most effective way to find a pinhole leak is with smoke. Since we are avoiding the $1,000 professional machine, we use the “Cigar Method.” This is a classic DIY trick used by enthusiasts for decades. First, locate the EVAP service port or the line connecting to the purge solenoid under the hood. Disconnect the hose and, using a thick cigar, blow smoke into the line.
Once the system is full of smoke, use your flashlight to look along the length of the vehicle. You are looking for a faint wisp of smoke escaping from a hose, a fitting, or the canister. This method is incredibly effective at finding the “Small Leak” (P0442) that soapy water often misses. Safety is paramount: Never use an open flame or light a cigar directly next to the gas tank. Always blow the smoke into the lines from the engine bay side, and ensure you are in a well-ventilated area. For more detailed variations, see our articles on How to Detect a Small Vacuum Leak Using a Simple Cigar or How to Find an Evap Leak Using a Simple Smoke Machine.
When to Put Down the Wrench: Complex EVAP Issues
While DIY methods are great for finding holes in hoses or bad gas caps, they have limits. Sometimes the leak isn’t a “leak” in the traditional sense, but an internal failure of a solenoid. The Purge and Vent valves are electromagnetic solenoids that can fail electrically or get stuck in the wrong position. Diagnosing these often requires a bidirectional scan tool that can manually command the valves to open and close – something most basic DIY scanners cannot do.
Furthermore, if your car is throwing a P0456 code (“Very Small Leak Detected”), the hole may be as small as 0.020 inches – roughly the thickness of a paperclip. These are notoriously difficult to find even with professional equipment. If you’ve tried the smoke and soapy water and still can’t find the culprit, it might be time to search for the best jeep service near me or visit a specialist like libertyville vw. Some issues, like a bmw oil leak repair or a complex EVAP failure, require the precision of factory-trained technicians.
Professional Solutions in Libertyville, IL
For those living in the Libertyville area, you have access to some of the best automotive minds in the business. If your DIY efforts haven’t cleared that light, local experts at AutoLab Libertyville or the carmax service department can provide a definitive diagnosis. Professional shops use nitrogen-based smoke machines that are safer and more precise than the cigar method.
If you recently purchased a vehicle from a major retailer, check your paperwork. Those who bought through CarMax may find that their MaxCare warranty covers evaporative emission system repair. Utilizing carmax servicing can save you hundreds in parts and labor costs. Whether it’s a simple carmax oil change or a deep dive into an emissions failure, local shops like Auto Lab offer the diagnostic tools necessary to get you back on the road and through the emissions testing line. For more information, read What Libertyville Drivers Need to Know About MaxCare Warranty Repairs.
Financing Your Repair: Synchrony Car Care & More
Sometimes the diagnosis reveals a costly reality, such as a cracked fuel tank or a failing charcoal canister assembly which can cost several hundred dollars. If you find yourself facing an unexpected repair bill – whether it’s for an EVAP issue, an oil pan repair, or a transmission leak repair fluid service – don’t panic. Many shops in Libertyville offer financing options.
Synchrony Car Care is a popular credit option accepted at many local repair facilities and even for oil change carmax services. It allows you to break up the cost of the repair into manageable monthly payments, often with interest-free periods. This ensures that you can keep your vehicle environmentally compliant and safe without draining your savings account all at once. Even a carmax repair shop or a local independent mechanic can often help you navigate these payment options.
Conclusion & Next Steps
Diagnosing an evap system leak detected doesn’t have to be a high-stress event. While the system is vital for the environment and for passing your state inspection, most leaks are caused by simple rubber degradation or a faulty gas cap. By starting with a visual inspection, moving to the soapy water test, and finally trying the “poor man’s smoke test,” you can save yourself the $150 diagnostic fee most shops charge just to hook up their machines.
Remember, while an EVAP leak won’t leave you stranded on the side of the road like a broken timing belt, it will prevent you from passing emissions and can lead to decreased performance. Try the simple fixes first. Still seeing that light? Visit us at Glass Fix Auto or contact a local Libertyville specialist today for a professional smoke test.