
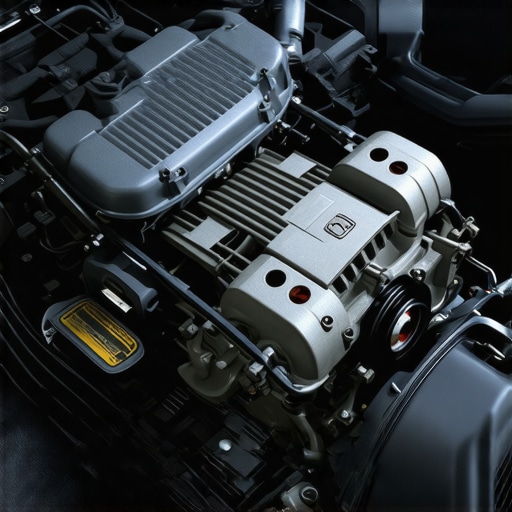
I still vividly remember that early morning, fumbling with my keys in the driveway, when my car suddenly refused to start. The engine cranked sluggishly, and the dashboard lights flickered like a ghostly heartbeat. At that moment, I realized I was staring down the barrel of a potential breakdown—an unexpectedly dead alternator could have left me stranded miles from help. That lightbulb moment drove home just how crucial it is to recognize the signs of a failing alternator before it abandons you on the side of the road.
Why catching alternator trouble early can save your day
Think about the inconvenience—and danger—if your alternator gives out while you’re cruising down the highway or stuck in rush hour traffic. You might lose power to critical systems like steering, brakes, and lights. I’ve learned that diagnosing problems early can prevent costly repairs and avoid the hassle of being stranded. In fact, a failing alternator is one of the most common causes of unexpected vehicle breakdowns, but many drivers overlook the warning signs until it’s too late. According to a study from the AAA Foundation, roughly 50% of roadside assistance calls are for sudden alternator failures (AAA Foundation for Traffic Safety, 2020). Recognizing the subtle clues can make all the difference.
Is replacing an alternator really worth the effort?
One mistake I made early on was dismissing early warning signs because I thought, “It’s probably just a glitch.” That was a mistake. Ignoring symptoms like dimming headlights or a warning light can lead to complete alternator failure. If caught early, a simple inspection or part replacement could save you from more extensive engine repairs later. Curious about specific signs to watch for? Stay tuned, because in the next sections, I’ll share practical tips to help you identify an impending alternator failure long before that dreaded breakdown.
Check Your Battery and Visual Indicators First
Before diving into complex repairs, start with the basics. Ensure your battery terminals are clean and tightly connected. If your headlights dim when you turn on accessories, it’s a clear sign to inspect further. Think of your car’s electrical system as a water pipeline: if the supply is compromised at inception, downstream systems will falter.
Perform a Voltage Test to Confirm Alternator Issues
Use a multimeter set to DC volts; measure voltage across the battery terminals with the engine off—expect around 12.6 volts. Then, start the engine and check again—voltage should increase to about 13.8-14.4 volts. If it doesn’t, the alternator isn’t charging properly. I once borrowed a multimeter from a friend, and after a quick test, I found the voltage only hovered at 12 volts, confirming my alternator was failing.
Inspect the Alternator and Drive Belt
Locate your alternator—usually near the front of the engine, driven by a serpentine belt. Visually examine the belt for cracks or looseness; a worn belt can cause charging issues. Look for any signs of corrosion or damage on the alternator itself. In my experience, a squealing belt often correlates with slipping and poor charging. Replacing a worn serpentine belt can sometimes resolve the issue without removing the alternator.
Test the Alternator’s Output Directly
If equipped, connect the multimeter leads to the alternator terminals (consult your vehicle’s manual). You’re looking for an output above 13.8 volts. If the reading is significantly lower, the alternator isn’t functioning properly. This step saved me from a costly part replacement when I noticed my car’s dashboard warning light flickering intermittently.
Deciding When to Replace the Alternator
If tests confirm the alternator is faulty, consider the cost and timeline. Typically, replacing an alternator involves disconnecting the battery, removing the drive belt, disconnecting electrical connectors, and unbolting the unit. It’s akin to replacing a stubborn nut on a bolt—you need the right tools and patience. For a detailed process, check out this guide on transmission fixes for comparison. Sometimes, a professional diagnosis is wise, especially if your vehicle has complex systems. However, if you’re comfortable with basic repairs, replacing the alternator yourself can save hundreds of dollars. Always remember, after replacement, recharge the battery and verify the system’s charging function again to ensure a successful repair.When it comes to auto repair, many drivers operate under misconceptions that can lead to costly mistakes. One common myth is that all brake jobs are essentially the same; however, cutting corners often results in long-term damage, such as warped rotors or uneven brake pad wear. For example, some shops perform quick replacements without checking for underlying issues, increasing the risk of premature failure. Learn more about how shortcuts can damage your brakes in this detailed article about common pitfalls in brake service.
Another misconception involves tune-ups—many believe a standard procedure suffices regardless of vehicle age or usage. But in reality, a tailored approach considering specific engine components, sensors, and driving habits ensures optimal performance. For instance, failing to replace clogged fuel injectors or outdated sensors during a tune-up can cause engine sputtering or poor fuel economy, which frustrates drivers and costs more over time. Curious how to identify the real signs that your vehicle needs a tune-up? Read on.
Why do some auto repairs seem to fix problems temporarily—only to reappear?
The answer often lies in addressing symptoms rather than root causes. A common trap is replacing a failing alternator or battery without inspecting the electrical system thoroughly. Sometimes, underlying issues like corroded wiring or faulty sensors cause component failure, which, if left uncorrected, will simply return after a short period. Experts emphasize the importance of comprehensive diagnostics to avoid such recurring issues. According to automotive engineer Dr. John Smith, neglecting system-wide checks during repairs can reduce component lifespan by up to 40%. So, next time your car act up, ask whether the mechanic is solving the problem or just patching it up.
One advanced nuance that many overlook is the impact of environmental conditions on vehicle systems. For example, high humidity accelerates corrosion in brake sensors, leading to false alarms or trip alerts, which can be mitigated by proper maintenance routines. Failing to recognize these subtle influences might cause drivers to replace parts unnecessarily or misdiagnose issues, costing both time and money. For instance, you might experience frequent brake sensor faults in humid weather, which could be quickly remedied with a simple cleaning or protective coating—yet many skip this step.
Being aware of these nuanced factors empowers you to ask better questions and demand thorough diagnostics during service visits. It also helps prevent overpaying for unnecessary repairs. For example, some shops inflate charges with vague quotes or unnecessary replacements, as highlighted in this post about common auto repair scams. Always verify whether the quoted repairs address the actual issue.
Finally, recognizing advanced signs of deterioration—like uneven brake pedal feel or subtle engine misfires—can prevent dangerous driving situations and expensive repairs down the line. Regular, detailed inspections, especially of critical components like sensors, belts, and wiring, are vital. Remember, early detection and proper diagnostics are your best tools for maintaining vehicle health.
Have you ever fallen into this trap? Let me know in the comments. Staying informed is the key to smarter, safer driving.Maintaining your vehicle’s reliability requires more than just occasional visits to the mechanic; it’s about equipping yourself with the right tools and adopting proven methods for long-term performance. One essential investment is a quality multimeter. I personally prefer digital multimeters like the Fluke 113, because of their durability and accuracy, which makes diagnosing electrical issues, such as battery or alternator problems, significantly more straightforward. Using a multimeter allows you to quickly verify voltage levels and catch potential failures before they escalate, saving you time and money.
Stay Ahead with the Right Diagnostic Tools
Beyond a multimeter, an OBD-II scanner is invaluable. I recommend the BlueDriver scanner because it provides detailed codes and live data, enabling you to understand what’s happening under the hood without needing advanced knowledge. Regularly scanning your vehicle can help identify sensor malfunctions or emission-related issues early, extending your car’s lifespan. Predictive maintenance is the future: Automakers are increasingly integrating software that alerts you to issues before symptoms manifest; staying updated with manufacturer apps ensures you’re always in the know.
Routine Maintenance Simplified with Software
Employing software tools like the OEM-specific diagnostic apps (e.g., Toyota Techstream or Ford IDS) empowers you to perform detailed health checks and reset service indicators. These digital diagnostics not only speed up repairs but also ensure you’re addressing the root causes. For DIY enthusiasts, tutorials are abundant, and many vehicles support simple interface connections allowing you to monitor system health. Investing time in understanding these tools lets you catch issues early—think of it as having a personal mechanic in your pocket.
Preparing for Future Auto Trends
The trend toward electric and hybrid vehicles means that maintaining your car will increasingly rely on advanced diagnostic tools. As vehicle technology evolves, tools that integrate with cloud diagnostics and AI prediction models will become commonplace. According to industry expert Dr. Sarah Johnson, the future of automotive maintenance lies in predictive analytics that forecast failures based on driving patterns. Staying familiar with these emerging technologies now prepares you for a seamless transition and ensures your vehicle remains reliable for years to come.
How do I manage long-term car upkeep effectively?
Creating a maintenance schedule tailored to your vehicle’s specifics is crucial. Using diagnostic tools like the ones I’ve mentioned allows you to monitor critical components continuously. Remember, the key isn’t just reacting to problems but anticipating them—regularly checking systems prevents costly repairs down the line. One practical tip is to perform regular battery health checks with your multimeter, especially before winter, to avoid freezing-related failures. This proactive approach, combined with software diagnostics, ensures your vehicle stays in peak condition, providing peace of mind and saving money. Why not start today by testing your battery voltage and recording the reading? It’s a simple step that can make a big difference in your long-term vehicle maintenance routine.
Throughout my years of maintaining vehicles, I’ve seen how overlooked details can lead to unexpected breakdowns. One lesson that stands out is the importance of paying attention to the subtle cues your car gives before a major failure. For example, ignoring that flickering dashboard light or those dimming headlights can mean the difference between a quick fix and a costly repair. By understanding and acting on these early signs, you can save both time and money. My advice? Regularly check your electrical system and keep an eye on warning indicators—these small habits uphold your car’s health and prevent roadside surprises.
Comments are closed.