
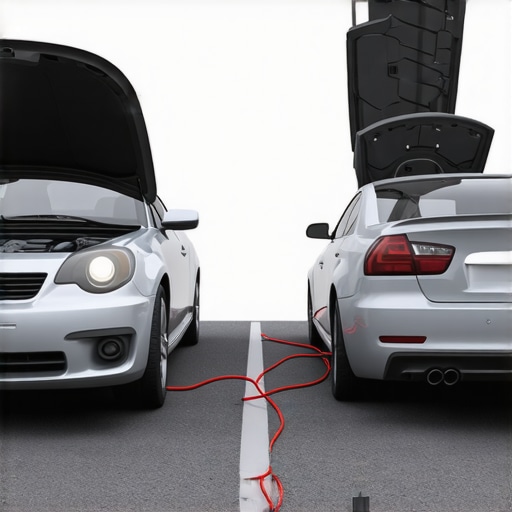
Have you ever been in a midnight scramble, your SUV refusing to start, and a pair of jumper cables suddenly feeling more intimidating than a scene from a science fiction movie? I remember the first time I tried jumping my new car, only to hear that dreadful spark and see warning lights flicker—my heart sank. It was a classic rookie mistake, thinking any jump start was created equal. Honestly, it left me wondering: “Am I about to fry my precious ECU?” That little lightbulb in my head finally brightened when I realized there was a right way—and a wrong way—to do this modern magic.
The Real Danger of Jump Starting the Wrong Way
Today, I want to share what I’ve learned so you won’t have to go through the same scare. Modern vehicles are loaded with sensitive electronics, and the Engine Control Unit (ECU) is essentially the brain of your car’s computer system. It manages everything from engine timing to emissions control—damage to it can lead to costly repairs, or worse, an irreversible malfunction. A study by automotive experts underscores that improper jump-start procedures are among the leading causes of ECU failures among new cars. That’s a confidence-shattering reality for any car owner.
Is It Really That Easy to Harm Your ECU?
Up until a few years ago, jump-starting a car was pretty straightforward—connect, charge, start. But modern cars? Not so much. I vividly recall connecting jumper cables incorrectly during a late-night rush, causing a sudden electrical surge that I learned later could have fried my ECU. My mistake was not understanding the importance of proper connection order and voltage checks. Just like how doing a brake service improperly can cause uneven wear and safety hazards, a misstep during jump starting can lead to internal damage that’s hidden until it’s too late.
If you’re worried about whether your last jump start may have caused more harm than good, don’t fret. There are simple, proven methods to safely energize your vehicle’s battery without risking your ECU. And believe me, taking these precautions is worth every minute—saving you from future headaches and hefty repairs. Want a step-by-step guide? Stick around, because next, we’ll dive into the essential tools and techniques that keep your car’s electronics safe while giving your battery the boost it needs.
Prepare Your Tools and Space
Start by gathering a quality set of jumper cables, ideally with thick, well-insulated wires to handle high voltage. Park the functioning car close enough so the cables can reach both batteries without stretching. Turn off both vehicles, engage the parking brakes, and open the hoods. Think of this step as setting the stage for a safe performance; rushing here increases risk of mistakes or damage.
Understand the Connection Sequence
Next, remember the critical order: connect the positive red clamp to the dead battery’s positive terminal first, then to the donor’s positive terminal. Follow with the negative black clamp to the donor’s negative terminal, and finally attach the remaining black clamp to an unpainted metal surface on the dead vehicle, away from the battery. This sequence minimizes voltage spikes that could jeopardize your vehicle’s electronics. I once hurried through this, forgetting to connect the negative clamp to metal rather than the battery, which caused a spark and made me realize how crucial this step is.
Start the Donor Vehicle and Let It Charge
Start your donor vehicle and let it run for a few minutes—think of it as giving your dead battery a gentle push. Avoid revving the engine excessively; gentle idling is sufficient. During this time, the donor’s alternator supplies power to the dead battery, much like a steady stream filling a drained pool. This gradual process prevents sudden surges that could harm sensitive components like the ECU. My first attempt involved leaving the donor car running for only 30 seconds, which wasn’t enough—giving it a few minutes made a noticeable difference in getting the dead car to turn over.
Attempt to Start the Dead Vehicle
With power supplied, attempt to start the dead vehicle. If it turns over, great—let it run a bit to stabilize the electrical system. If not, wait a few more minutes and try again. Remember, never try to jump-start multiple cars at once or use damaged cables, as this increases risk of damaging your vehicle’s electronics. After successful start-up, keep both cars running for at least five minutes to allow the battery to recover capacity. This step helps prevent future issues and is especially important if your vehicle showed signs of battery trouble previously.
Disconnect Cables Carefully in Reverse Order
Remove the black negative clamp from the metal surface first, then from the donor’s negative terminal. Next, disconnect the red positive clamp from the donor’s positive terminal, and finally from the dead battery. Think of this as reversing the connection process to prevent voltage spikes. Drawing an analogy, it’s similar to unhooking a lightning rod safely—reversing the connection order reduces the chance of a harmful electrical jolt. I once saw an acquaintance disconnect the cables in the wrong order, causing a small arc, emphasizing why meticulous attention here matters.
Check the Battery and Electrical System
After successfully jump-starting and disconnecting, let the vehicle run for a few more minutes or drive it around. Then, check your battery’s health with a multimeter or visit a technician for a complete system inspection, especially if your car struggles to hold charge. Regular maintenance, such as inspecting and replacing worn batteries and terminals, can save you from repeated jump-starts. For more insights into maintaining your vehicle’s electrical health, see this guide on preventing idle issues. Taking these small steps not only gets you back on the road but also shields your vehicle’s sensitive electronics from damage, much like ensuring your home wiring isn’t overloaded.
Many drivers believe that basic maintenance tasks like tune-ups or brake services are straightforward, cookie-cutter procedures. However, in my experience, there’s a lot of nuance and misconceptions that can lead to costly mistakes. One common myth is that all brake pads or spark plugs are created equal, which isn’t true—using the wrong type or installation method can exacerbate issues rather than solve them. Another trap is thinking that a simple fluid flush is sufficient for complex systems; in reality, some components require more detailed diagnostics and specialized procedures to prevent future failures.
Beyond misconceptions, many car owners overlook critical nuances in diagnosing problems. For example, a soft brake pedal might seem like a simple air pocket, but it could be a sign of internal corrosion or a failing master cylinder, direct issues that require targeted attention. Neglecting such details often results in repeat repairs or unsafe driving conditions, emphasizing the importance of understanding the deeper technical aspects of vehicle maintenance.
**Watch out for common pitfalls that even seasoned DIY enthusiasts might overlook.** For instance, during a brake service, improper rotor resurfacing or neglecting to replace worn-out calipers can cause pulsing or squealing down the line. Similarly, in tune-ups, failing to inspect and replace sensors or managing fuel injection issues without understanding their interrelated systems can lead to persistent engine problems.
Have you ever fallen into this trap? Let me know in the comments.
What advanced indicators should I watch for beyond routine inspections?
As vehicles become more sophisticated, subtle signs like engine surges, irregular shifts, or dashboard warning lights can be early warnings of deeper issues such as sensor failures or internal leaks. Relying solely on visual inspections isn’t enough; diagnostic tools and understanding of system interdependencies are vital. For example, a sudden acceleration hesitation might be mistaken for dirty fuel injectors, but could actually be a failing throttle position sensor—an issue that could be missed if one isn’t familiar with typical symptom patterns. Experts recommend routine diagnostics and staying informed about the latest vehicle technologies, which can be found in guides like this comprehensive checklist to avoid costly misdiagnoses.
Understanding these nuances allows you to differentiate between superficial fixes and underlying problems, ultimately saving time and money. Recognizing the subtleties of auto repair and service ensures you’re not just reacting to symptoms but addressing root causes. Remember, a well-informed car owner is a safe and economical one.
Tools That Make a Difference in Auto Maintenance
Investing in the right tools is crucial for effective and safe vehicle upkeep. I personally rely on a high-quality digital multimeter like the Fluke 117, which provides precise readings of battery voltage and electrical system health. This allows me to diagnose issues quickly, especially in complex systems where voltage irregularities can indicate deeper problems. For brake servicing, I use a reliable brake caliper piston tool, enabling me to retract pistons accurately without damaging rubber seals—crucial for ensuring proper pad installation and braking performance. Additionally, an infrared temperature gun helps me monitor brake rotor temperatures during testing, identifying potential issues with overheating or uneven wear. Having these tools in my toolkit has consistently saved time and prevented unnecessary repairs.
Software and Diagnostics for Long-Term Results
While physical tools are essential, modern vehicles demand sophisticated diagnostic software. I recommend using a reputable OBD2 scanner, such as the BlueDriver Bluetooth Pro, which connects seamlessly to your smartphone. This device not only reads error codes but also provides detailed freeze-frame data and real-time sensor readings, giving insights into underlying issues that simple visual inspections might miss. For example, persistent misfires could be caused by subtle fuel injector problems or sensor malfunctions that only become evident through diagnostic data. Regularly updating your scanner’s firmware ensures compatibility with the latest vehicle models and software improvements. Combining these digital tools with routine manual checks can extend your car’s lifespan and maintain optimal performance.
Where do I see maintenance heading in the future?
Future advancements in vehicle maintenance are pointing towards increased integration of AI-driven diagnostics and predictive maintenance systems. Imagine vehicles that can alert you to impending failure modes before symptoms appear, or even schedule maintenance automatically. This proactive approach is set to revolutionize how we care for our cars, making maintenance more efficient and cost-effective. Staying ahead with current tools now positions you to adapt seamlessly to these emerging trends, ensuring your vehicle remains dependable and safe for the long haul.
How Do I Maintain Long-Term Performance From My Tools
Regular calibration and proper storage of your diagnostic and repair tools are vital for consistent accuracy. For instance, my multimeter is checked against a known voltage source every few months, preventing measurement drift. Similarly, clean and organize your toolkit to avoid damage or misplacement of critical components. Keeping software updated and familiarizing yourself with device manuals also helps you leverage tools to their fullest extent. This disciplined approach ensures your equipment remains reliable, saving you money and frustration over time. Look into the detailed brake system diagnostics for deeper insights into how proper testing can improve safety and performance.
Remember, the right tools aren’t just for emergencies—they’re your frontline allies in proactive car care. Try incorporating a digital multimeter into your routine, and you’ll quickly see how early detection can prevent costly repairs down the line. For ongoing success, dedicate a bit of time each month to inspect and calibrate your equipment, keeping your maintenance game sharp and your vehicle running smoothly.
Lessons Hidden Behind My Mistakes in Car Care
One eye-opening lesson I learned was the importance of respecting each component’s sensitivity—particularly the ECU—when performing tasks like jump-starting. Ignoring the correct connection order can lead to costly repairs, and now I know that patience and proper technique are key. Additionally, I realized that investing in quality tools and understanding their proper use can save you hours and hundreds of dollars in the long run. The biggest takeaway? Never cut corners during critical procedures; the cost of a small mistake can be the price of a new vehicle ECU.
Gear Up with Trusted Auto Repair Resources
My go-to tools include a high-quality digital multimeter from Fluke, which provides reliable readings to catch electrical issues early. I also trust the BlueDriver Bluetooth Pro scanner for detailed diagnostics—it’s a game-changer for identifying hidden problems before they escalate. For books, I swear by “Automotive Repair: A Comprehensive Guide”—it’s packed with practical advice that complements hands-on experience. Lastly, online communities like the [GlassFix Auto Blog](https://glassfixauto.com/) keep me updated with latest fixes and industry tips, ensuring I stay informed about emerging vehicle technology and safety standards.
Empower Your Engine with Confidence
Now is the perfect time to take control of your vehicle’s health. Think of your car as a living, breathing machine that benefits from proactive care. By applying these insights—using the right tools, following proper procedures, and continually educating yourself—you can drive with peace of mind. Remember, every successful jump-start not only gets you back on the road but also reinforces your mastery over your automobile’s complex systems. Don’t wait until a minor issue becomes a major repair—your vehicle’s health depends on your attentiveness. So, what’s the one auto maintenance tip you plan to implement today? Share below and inspire others to keep their cars safe and sound.