
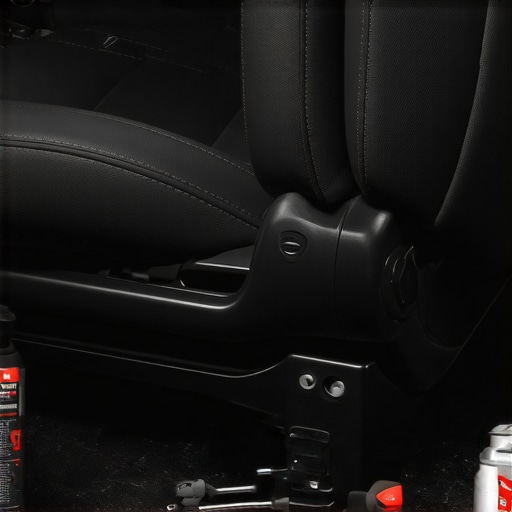
Ever been poised to greet a friend or rush out the door, only to be greeted by that loud, annoying squeak every time you shift in your driver’s seat? I’ve been there — stuck in my driveway, frustrated, wondering if I needed a whole new seat or some fancy fix. That squeal can be surprisingly stubborn and embarrassing, especially if you’re sitting in traffic or have passengers. But here’s the thing: I found out that most of these squeaks are surprisingly easy to fix once you know the tricks.
Why Your Driver’s Seat Squeaks and Why It Matters
Everyone’s car is different, but many squeaks are caused by simple issues like dry or loose hinges, worn-out lubricants, or minor fabric rubbing. Ignoring this noise might seem harmless, but over time, it can point to underlying problems that could escalate if neglected. Plus, squeaky seats can break your focus on the road, or worse, cause you to become annoyed and distracted.
One mistake I made early on was using the wrong lubricant—something too greasy that collected dirt. Turns out, not all lubricants are created equal, especially for car interiors. Comparing my initial approach, I realized that selecting the right product and proper application made all the difference. Curious if your squeak is something minor or a sign of bigger trouble? You can learn more about common auto repair mistakes and how to avoid them by visiting [this guide](https://glassfixauto.com/how-to-survive-a-brake-service-scam-at-the-dealership).
Are you tired of that nagging squeak refusing to go away? Well, I promise, you don’t have to shell out hundreds for professional repairs or replace the entire seat. With a few simple steps, you can quiet that noise for good and regain the comfort and peace of mind you deserve. Ready to turn that annoying squeal into silence? Let’s dive into exactly how to do it.
Prepare Your Tools and Environment
Gather a clean cloth, a spray lubricant specifically designed for car interiors, and if needed, a flat-head screwdriver or trim removal tool. Park your car in a well-lit, flat area and ensure the seat is moved to its most accessible position. Remember, working in a tidy space makes the process smoother, like tuning a guitar—every string needs precision for a perfect sound.
Identify the Squeak Source
Sit in the seat and gently rock it back and forth to locate the exact squeaking spot. I once spent 15 minutes lubricating the wrong hinge because I assumed the noise was coming from the armrest. Using a flashlight and a mirror can help you see joints and hinges clearly. Once identified, mark the area lightly with chalk or a marker so you know where to focus.
Clean and Prepare the Joints
Before applying lubricant, wipe the hinges or rubbing surfaces with a cloth to remove dust, dirt, or old grease. Dirt acts like sandpaper, wearing down parts faster and making lubrication less effective. For instance, I once neglected cleaning and ended up with a messy mixture of old grease and dirt that just attracted more grime—causing the squeak to worsen.
Apply the Right Lubricant
Select a silicone-based spray or a dry graphite powder—these are best for interior car parts to avoid attracting dirt. Shake the can well, then spray sparingly on the squeaky joints or rub the powder into the hinges with a cloth. Think of it as giving your seat’s moving parts a light, smooth coating—much like lubricating a bicycle chain for a quiet ride. Be cautious not to over-apply, as excess can drip or cause a mess.
Pro Tip: Avoid using heavy greasy oils, which can gather dirt and cause more squeaks over time. For stubborn squeaks, applying a second coat or letting the lubricant settle for a few minutes can enhance the effect.
Work the Lubricant into Motion
After applying, move the seat through its full range—forward, backward, tilt—to distribute the lubricant evenly. This helps the lubricants reach all contact points and ensures lasting silence. I recommend doing this slowly and deliberately; rushing can leave dry spots that lead to future squeaks.
Test and Finalize
Sit in the seat and shift around, listening carefully for any remaining noise. If the squeak persists, repeat the lubrication process on the suspected area. Sometimes, squeaks are caused by fabric rubbing or loose parts, so tightening bolts or adjusting fabric may also be needed. Once satisfied, clean off any excess lubricant to prevent dirt attraction. Taking these steps transformed my squeaky seat into a whisper-quiet zone, restoring comfort and peace of mind during every drive.
Many car owners believe that a simple brake pad replacement or routine oil change is all that’s needed to keep their vehicle running smoothly. However, this misconception often leads to overlooked nuances that can cause serious issues down the line. Contrary to popular belief, not all auto repairs are as straightforward as they seem—there are complex factors at play that many overlook. For instance, many assume that using synthetic oil automatically benefits every vehicle, but in reality, older high-mileage cars may actually benefit more from conventional oils because of their unique engine wear patterns. Learn more about this misconception [here](https://glassfixauto.com/why-synthetic-oil-is-not-always-the-answer-for-older-high-mileage-cars). One common trap is assuming that all brake fluids are interchangeable. Mixing different types of brake fluid can lead to corrosion and brake failure, which is a costly mistake many make without realizing. Always check your vehicle’s manual before topping off or replacing brake fluid.
Why does my car hesitate during acceleration despite a recent tune-up? This is a question I get often, and the answer isn’t always obvious. Sometimes, the issue stems from overlooked sensor problems or fuel delivery issues rather than the engine itself. For example, a misfiring engine only under heavy acceleration could be due to a clogged fuel injector or a failing sensor, which standard tune-ups might not fix. Addressing these nuanced problems early can save you money and prevent breakdowns. Regularly inspecting and diagnosing subtle warning signs can be the difference between a minor fix and a major repair. So, don’t just stick to the basics—dig deeper and get to the root of the problem before it escalates. For detailed signs of transmission issues, check out [this guide](https://glassfixauto.com/how-to-check-your-own-alignment-using-a-piece-of-string). Remember, consulting a professional who understands the nuanced mechanics of auto systems can help you avoid costly mistakes and extend your vehicle’s lifespan. Have you ever fallen into this trap? Let me know in the comments.Gear Up for Success: Tools I Trust for Auto Maintenance
Over the years, I’ve honed my toolkit to include a few specialized items that make car repairs both safer and more efficient. My absolute must-have is a high-quality digital multimeter—like the Fluke 115—for diagnosing electrical issues such as faulty sensors or inconsistent power supplies. This device provides precise readings, helping me avoid unnecessary part replacements and pinpoint problems quickly. Additionally, I always keep a set of metric and standard ratchet wrenches organized in a portable tool roll. This setup allows me to work comfortably in tight spaces, essential for tasks like changing brake pads or tightening loose bolts.
One underrated gem in my arsenal is a brake caliper piston tool, which simplifies complex tasks like rotor replacements. For software diagnostics, I rely on a Bluetooth OBD2 scanner—such as the BlueDriver—paired with my smartphone. This combination grants me real-time access to engine codes, transmission data, and emissions information, streamlining troubleshooting and ensuring my vehicle runs smoothly over the long haul. Remember, investing in quality tools now saves you time and money down the road, especially when scaling your maintenance routines for multiple vehicles.
Keeping Up and Scaling Your Car Care Routine
As your vehicle ages, or if you own multiple cars, routine maintenance becomes essential. Regularly updating your diagnostic software ensures compatibility with the latest vehicle updates. For example, tools like the Autel Maxisys series offer comprehensive scan capabilities that can diagnose everything from engine misfires to complex electrical issues, helping you prioritize repairs early. Also, maintaining clear records of service history can guide you in scheduling preventative care, like timing belt replacements before failure occurs—saving you from costly repairs later. As technology evolves, integrating data logging and remote diagnostics will further empower drivers to handle minor repairs before they escalate.
Want to extend your vehicle’s life? Try calibrating your OBD2 scanner to perform periodic system checks and keep a log of error codes. This proactive approach can reveal emerging issues before they become critical, particularly in high-mileage cars. To deepen your expertise, consider exploring tutorials on interpreting diagnostic trouble codes, or schedule periodic professional inspections to complement your DIY efforts.
Predicting where auto service trends are headed, I believe AI-powered diagnostic tools and augmented reality will soon become standard. These innovations will help even amateur mechanics perform complex repairs with greater confidence, reducing dependence on costly shop visits. Whether you’re an enthusiast or a casual car owner, embracing these tools now sets the stage for long-term vehicle reliability.
How do I maintain auto repair tools over time?
Proper maintenance of your tools is just as crucial as their selection. Regularly clean and lubricate mechanical parts like ratchets and screwdrivers to prevent rust and ensure smooth operation. For electronic devices, keep batteries charged and store the scanner in a climate-controlled environment to avoid damage. Calibration is essential; periodically verify digital multimeters against known voltage sources to maintain accuracy. Remember, well-maintained tools last longer and provide more reliable diagnostics, saving you frustration and costly mistakes in the future. For instance, a miscalibrated multimeter could mislead you into replacing a working sensor, wasting your time and money. Make it a habit to inspect and test your tools regularly, especially before undertaking critical repairs or scaling your maintenance routine.
What I Wish I Knew When I Started Fixing Cars
One of the biggest surprises was realizing that most squeaks and issues aren’t as complicated as they seem—it’s often about attention to detail and patience. I used to rush through repairs, hoping to fix everything quickly, but I learned that taking the time to identify the exact source of a squeak saves me frustration and money. Also, I underestimated the importance of choosing the right lubricant—silicone-based sprays are a game-changer for interior squeaks. Lastly, understanding my car’s unique needs, like knowing that high-mileage vehicles may benefit more from conventional oils, helped me avoid common pitfalls and extend my vehicle’s life.
Tools and Resources That Keep Me Ahead of Auto Problems
My go-to tool is a high-quality digital multimeter, like the Fluke 115, which helps me diagnose electrical issues accurately without guesswork. I also rely on a Bluetooth OBD2 scanner such as BlueDriver for real-time engine diagnostics, saving me trips to the mechanic. For physical repairs, a set of quality ratchet wrenches and a brake caliper piston tool make tasks faster and safer. When it comes to learning, I trust detailed guides and tutorials from reputable sources, and I often refer to [this resource](https://glassfixauto.com/why-your-engine-misfires-only-under-heavy-acceleration) to understand complex ignition problems. Investing in these tools and knowledge keeps me confident and prepared for most repairs.
Step Into Your Auto Maintenance Journey Today
Remember, auto repair is less daunting than it seems when you equip yourself with the right knowledge and tools. Every squeak or minor issue is an opportunity to learn more about your vehicle and build your confidence. By embracing DIY fixes, you not only save money but also develop a deeper understanding of how your car works, leading to safer and more enjoyable drives. So, don’t wait for that squeak to become a bigger problem—start small, stay curious, and keep improving your skills. Your vehicle will thank you, and you’ll gain the satisfaction of mastering your auto care.