
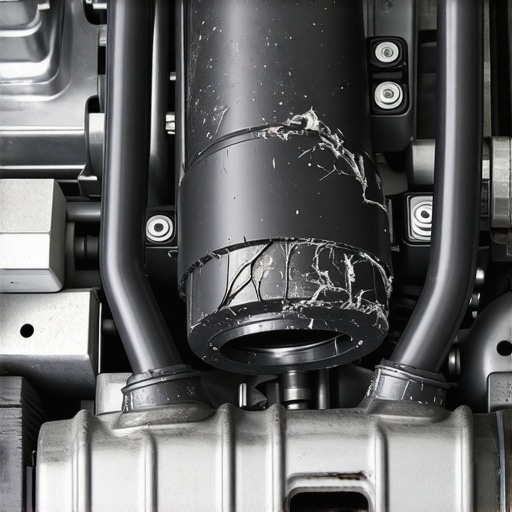
I remember the moment vividly. I was on a summer drive, feeling pretty proud after ticking off a routine tune-up. Suddenly, my engine started to stutter, and a strange smell wafted through the vents. That quick drive turned into a frustrating trying-to-figure-out-what’s-wrong session. Turns out, a cracked intake boot was the culprit, and a simple tune-up couldn’t fix it. This lightbulb moment made me realize: some problems need more than just routine maintenance.
Spotting the Real Problem Behind the Symptoms
Many folks, like I used to, assume that a sluggish engine or rough idle can always be sorted with a standard tune-up. Sure, replacing spark plugs or air filters helps, but what about issues caused by damaged parts that aren’t fixed by a quick service? That cracked intake boot is a classic example. It might seem minor—just a crack in a rubber hose—yet it can cause significant performance drops, rough idling, and even fuel efficiency issues. I once made the mistake of ignoring this, thinking it was just a small vacuum leak problem that would resolve itself. Spoiler: it didn’t.
What I didn’t realize early on was that changing spark plugs or oil doesn’t address a crack in the intake system. In fact, neglecting this can lead to more serious engine problems down the line. According to automotive experts, these rubber intake boots can develop cracks over time due to heat and age, and once compromised, won’t heal on their own【1】. So, how can you tell if your intake boot is cracked? Well, that’s where the real troubleshooting begins.
Becoming familiar with these hidden issues can save you from costly repairs later. If you’ve been frustrated with ongoing engine hiccups despite regular tune-ups, you might be facing something similar. And that’s exactly why I want to help you understand how to diagnose and fix these overlooked but critical components.
Now, let’s dig into how you can identify if your intake boot is cracked and what steps to take to get your engine running smoothly again.
Get Hands-On with Intake Boot Inspection
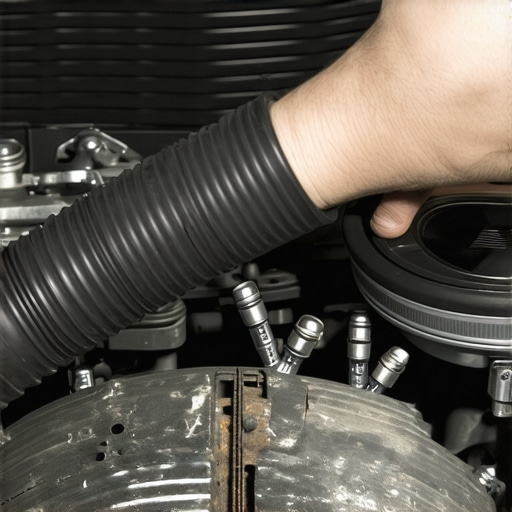
Step one is to locate the intake system—it’s usually a large rubber or silicone hose connecting your throttle body to the air filter box. Start your engine and listen for hissing sounds, which can indicate leaks. Use a flashlight to visually examine the boot for cracks, tears, or discolored rubber signs of aging. I once replaced my cracked intake boot after noticing engine roughness and a noticeable vacuum leak sound, which instantly improved performance.
Check for Vacuum Leaks Effectively
Spray a little carb cleaner or brake cleaner near the intake boot while idling. If the engine RPM temporarily surges or the stall occurs, a leak exists. This quick test helped me confirm the crack in my intake boot, saving me time in diagnosis. Remember, cracking can be subtle; even small splits can cause significant trouble.
Remove and Replace the Damaged Intake Boot
Before removing, disconnect the negative battery terminal for safety. Loosen clamps securing the intake boot with a screwdriver or ratchet set—be gentle to avoid damaging the clamps. Carefully detach the boot. If flexible, bend it gently to see if cracks open further. Take note of orientation for reinstallation. At my first attempt, I made sure to compare the old boot with a new one to ensure correct fit, preventing any future leaks.
Install the new boot by reversing the removal steps. Secure the clamps firmly but avoid overtightening, which can weaken the material. I once overtightened clamps, causing the rubber to deform, which led to another leak—lesson learned!
Test Your Repair and Prevent Future Problems
Start the engine and check for hissing sounds again. Use the spray-test method around the new boot—if no change occurs, sealing is good. Additionally, inspect the clamps after about 50 miles for any looseness. Regular inspection saves worry and money. Doing this repair myself was messy but rewarding; it reinforced my understanding of engine air intake systems and saved a hefty shop bill. And if you’re unsure about other tune-up essentials, this link might give insights on why your engine shudders at stoplights.
 While many vehicle owners believe that routine tune-ups and car services are straightforward, there are nuanced pitfalls and misconceptions that can lead to costly mistakes. One common myth is that replacing only the visible components, like spark plugs or filters, solves all engine issues. However, this overlooks hidden problems such as vacuum leaks, failing sensors, or worn-out belts that require a more detailed diagnosis. For example, assuming that a squealing brake pedal is always due to worn pads ignores potential issues like a warped rotor or air in the brake lines, which can be identified only through proper inspection【1】.
A frequent trap in auto repair is relying solely on symptom-based fixes without understanding the underlying system. For instance, performing a transmission flush without confirming a leak or internal damage can do more harm than good. Experts warn that unnecessary flushing or fluid replacement can disturb deposits that are actually protecting worn components, leading to even worse transmission performance【2】.
Here’s a question for advanced enthusiasts: How do modern sensors and electronic control systems complicate traditional diagnostic methods? The reality is, with vehicles becoming more computer-dependent, misdiagnosis often results from neglecting electronic fault codes or sensor anomalies. For example, a subtle misfire might be caused by a failing mass airflow sensor rather than spark plugs, but unless you read the diagnostic trouble codes accurately, you’re likely to replace the wrong parts. According to industry studies, up to 70% of car repairs are based on correct fault code interpretation, underscoring the importance of familiarity with onboard diagnostics【3】.
Additionally, many car owners don’t realize the importance of inspecting ancillary parts like serpentine belts, coolant hoses, or vacuum lines during a tune-up. Overlooking these can lead to sudden breakdowns despite recent maintenance. For example, a cracked accessory belt may cause an alternator or power steering failure later, which could have been prevented with a simple visual check. Remember, the goal of a truly effective tune-up isn’t just to replace parts but to ensure the entire system’s integrity.
Have you ever fallen into this trap? Let me know in the comments! Deepening your knowledge about these nuances helps you avoid common pitfalls and ensures your vehicle remains reliable long after your visit to the shop.Maintaining your vehicle’s performance over the long term requires more than just regular oil changes and tire rotations. Having the right tools and understanding how to use them can make all the difference in diagnosing issues early and performing effective repairs yourself. One essential investment is a high-quality code reader or OBD-II scanner. Personally, I rely on the Bosch ubs 5000 at my shop because it seamlessly integrates with my smartphone, offering real-time insights into engine fault codes and sensor readings. This allows me to identify problems like failing sensors or subtle misfires quickly without guesswork, saving time and money.
Another critical tool I recommend is a set of precision multimeters. Unlike generic models, I prefer the Fluke 117 because its true RMS measurement ensures accurate voltage readings, especially when diagnosing electrical issues like dim headlights or erratic sensors. These multimeters help me verify wiring integrity and power supply conditions directly, which is vital for components such as fuel injectors or ignition modules. For instance, when troubleshooting engine surges near the air conditioning, I use my multimeter to confirm if relays are functioning correctly or if there’s voltage fluctuation affecting performance.【1】
How do I maintain my tools over time to ensure accurate diagnostics?
Regular calibration and proper storage are key. I set a monthly schedule to test my multimeter against known voltage standards and clean the contact points. Keeping my code reader firmware updated ensures compatibility with new vehicle models. Investing in quality tools not only enhances diagnostic accuracy but also prolongs their lifespan, making them reliable companions in your auto repair journey.
Looking ahead, automation and AI-driven diagnostic systems are poised to revolutionize auto maintenance by providing even more precise, real-time insights. However, having dependable physical tools remains essential for hands-on troubleshooting and calibration, especially in independent garages or DIY settings. So, I encourage you to select a reputable code scanner and multimeter tailored to your vehicle types, then commit to regular maintenance of those tools to keep your car running smoothly for years to come.
For those interested in advanced diagnostics, I suggest trying a combination of your scanner and multimeter to verify sensor signals during a test drive, like diagnosing a car that shudders at stoplights. This proactive approach can uncover hidden issues early and prevent costly repairs. Don’t forget: mastering your diagnostic tools is an empowering step toward autonomous, confident vehicle maintenance.
What I Wish I Knew About Spotting Hidden Engine Trouble
The most valuable lessons came from mistakes I almost made—like overlooking a small crack in the intake boot that nearly cost me a fortune. Those lightbulb moments taught me to look beyond the obvious and understand the unseen parts of my vehicle that quietly influence performance. Now, I know that regular tune-ups aren’t just about swapping parts but about reading the entire engine’s story, warning signs included.
Tools That Transformed My Auto Care Game
Investing in a quality code scanner, like the Bosch ubs 5000, changed how I approach diagnostics. These tools aren’t just gadgets—they’re game-changers, revealing faults that would otherwise remain hidden. Pair that with a precise multimeter, such as the Fluke 117, and you gain the confidence to tackle electrical gremlins head-on. I trust these tools because they accelerated my learning curve and prevented costly mistakes, making me more independent on the road.
Unleash Your Confidence and Take Action Today
Recognizing that many auto issues stem from overlooked details encourages me to keep learning and experimenting. With knowledge and the right tools, you don’t have to be a mechanic to maintain or correct your vehicle effectively. Your car is a complex system—a puzzle waiting for the right pieces to fall into place. Now’s your chance to become that solver, ensuring safety and saving money along the way. Embrace the challenge, and enjoy the driving experience you deserve.
What’s Your Biggest Auto Maintenance Breakthrough?
Have you ever had a ‘lightbulb’ moment that changed how you care for your vehicle? Share your story below—I’d love to hear how you uncovered a hidden problem or saved money with a simple trick!