
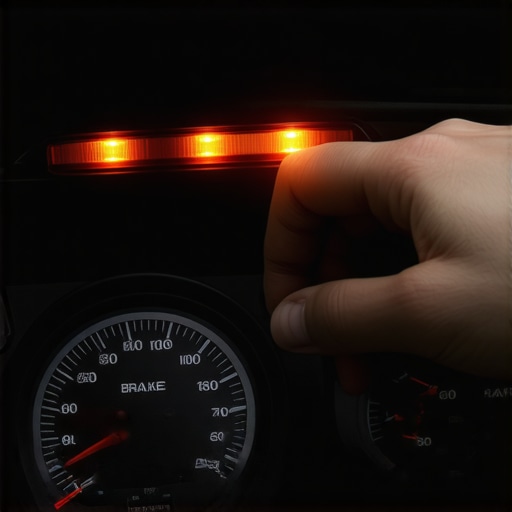
I remember the first time I changed my brake pads myself. Excited and a little proud, I hit the ignition, only to be greeted by that persistent, nagging brake warning light. It stayed on, mocking my DIY efforts. Frustrating, right? That was my lightbulb moment: sometimes, the fix isn’t just about replacing parts but understanding what comes next.
Don’t Let That Warning Light Dictate Your Day
If you’re like me, you probably assumed that once you swapped out your brake pads, the warning light would turn off on its own. Well, surprise! It often doesn’t. This little light is your car’s way of saying, “Hey, I noticed something’s not quite right.” But what exactly? And more importantly, how do you fix it without unnecessary guesswork or extra trips to the mechanic?
Is Resetting the Brake Warning Light Really Worth the Fuss?
Early in my repair adventures, I made a common mistake: I ignored the importance of properly resetting the system after a brake job. Turns out, simply installing new pads doesn’t automatically clear the warning. You need to manually reset or recalibrate certain sensors or the light will keep blinking at you, even if everything’s perfectly fine. Ignoring this can lead to misdiagnosing other issues or unnecessary repairs. For more on avoiding common repair pitfalls, check out this guide on clearing check engine lights.
What You’ll Discover Today
In this post, I’ll walk you through the reasons why your brake warning light might stay on after a pad change and share proven steps to fix it. No more guessing games or costly visits. Just simple, effective ways I’ve learned through experience—and a few inevitable mistakes along the way. Ready to get your brake system back on track? Let’s dive in!
}
Ensure Your Car Recognizes the Work You’ve Done
First, turn off your engine and make sure the key is in the “Off” position. Remove the key and wait a couple of minutes to allow the vehicle’s systems to reset, similar to how a computer needs a reboot after updates. This waiting period helps the sensors settle and prepares the system for the reset process.
Access the Brake System Reset Procedure
Insert the key and turn it to the “On” position, but don’t start the engine. This powers the vehicle’s electrical system. Locate your car’s user manual to find the specific reset method for your model. Most vehicles require a sequence like pressing the brake pedal multiple times or navigating through onboard menus—think of it as giving your car a simple “thank you” for understanding the recent work.
Utilize the Dashboard and Settings
Some cars feature a menu option through the digital display to reset warning lights. Use the steering wheel buttons to navigate to the ‘Settings’ or ‘Vehicle’ menu, then look for “Brake System” or “Warning Light Reset.” Follow the prompts to confirm the reset. It’s akin to clicking “OK” on a computer pop-up; just ensure you’re following the sequence exactly as your vehicle’s manual describes.
Perform a Manual Reset with a Code or Tool
If your car doesn’t reset through menu commands, consider a manual reset involving a scanner or OBD-II code reader. Plug it into the port under the dashboard—similar to plugging in a USB device—and follow the device’s instructions to clear codes and reset warning lights. This step is like pressing “Control + Alt + Delete” on a computer to refresh the system and clear glitches.
Verify the Reset and Test Drive
Start your engine and observe the dashboard for the warning light. If it’s off, take a short drive around the block. Lightly apply the brakes to see if the warning reappears. If the light turns back on, double-check the brake sensor connections or consult your vehicle manual for specific calibration procedures. Think of this as a stress test—if everything runs smoothly, your reset was successful, and you’re ready to hit the road confidently.
Remember, if the warning persists despite these steps, it might indicate an underlying issue—possibly a sensor misalignment or a need for further diagnostics. For additional tips on car maintenance, visit this guide on clearing check engine lights or check out tips on tire safety. Staying proactive will save you time and money in the long run.Many car owners operate under misconceptions about auto repairs, leading to costly mistakes. One widespread myth is that a simple oil change or tune-up will forever keep the car running smoothly. In reality, neglecting critical components like the transmission fluid or timing belt can cause severe damage, as highlighted in expert discussions on the importance of regular maintenance. Additionally, many believe that replacing brake pads alone suffices; however, if the rotors are warped or the calipers are sticking, the safety and longevity of your brakes are compromised, which underscores the need for comprehensive brake service.
Let’s explore a nuanced aspect often overlooked: the importance of precise sensor calibration post-repairs. Many assume that resetting warning lights is a trivial task, but improper calibration can mask underlying issues or cause false alarms, ultimately leading to unnecessary repairs. Research shows that up to 30% of vehicle issues are related to faulty sensor readings, emphasizing the need for proper diagnostic procedures. For instance, when replacing components like spark plugs or fuel injectors, ensuring the ECU is correctly recalibrated is essential for optimal performance.
Another advanced mistake involves misdiagnosing engine misfires. A common shortcut is swapping spark plugs or wires without diagnosing the root cause, such as a failing ignition coil or clogged fuel injectors. These underlying issues, if unaddressed, can lead to increased emissions, reduced fuel economy, and engine damage. For detailed insights, see how diagnostic scans can reveal hidden problems beyond surface symptoms.
The key takeaway is that auto repair is far from just replacing parts; understanding system relationships, sensor calibration, and condition-specific diagnostics are crucial. Skipping these steps might seem like saving time or money initially, but it often results in bigger expenses down the line.
Thinking about your current vehicle maintenance? Ensuring proper calibration and diagnostic checks can prevent small issues from escalating. Curious about the subtle signs of system failures? Check out this guide on preventing streaks in wiper blades or explore signs of worn struts to keep your vehicle in top shape. Stay vigilant with your maintenance routines, and don’t fall into the trap of superficial fixes that overlook the real issues. Have you ever fallen into this trap? Let me know in the comments.
Keep Your Tools in Optimal Condition
As an auto repair enthusiast or professional, maintaining your toolkit is essential for consistent results. I personally swear by using high-quality socket sets like the snap-on 3/8-inch drive because of their durability and precise fit, which reduces the risk of stripping bolts. Regularly inspect your tools for wear or damage, especially after extensive projects, and replace any that show signs of fatigue. A well-maintained set not only speeds up repairs but also prevents potential safety hazards.
Invest in Reliable Diagnostic Software
In recent years, diagnostic technology has evolved rapidly. I recommend Autel scan tools for their comprehensive coverage and user-friendly interface. These tools allow me to quickly identify issues like misfires or sensor failures, saving time and preventing misdiagnosis. Keeping your software updated ensures compatibility with the latest vehicle models and the newest diagnostic protocols.
How do I maintain my diagnostic tools over time?
Regular calibration and calibration checks are crucial. I periodically reset the calibration of my scanners using manufacturer-specific procedures or by sending them back to the manufacturer for professional servicing. Proper storage in a clean, dry environment prevents dust and corrosion, which can impair functionality. Investing a little time in maintenance pays off by extending the lifespan of your equipment and ensuring accuracy during diagnostics.
Long-Term Benefits of Proper Tool Care
Consistency and accuracy in repairs hinge on your tools’ condition. Well-maintained equipment reduces repair times and enhances safety, especially when dealing with critical components like brake rotors or suspension systems. Additionally, reliable tools give you confidence, enabling you to tackle more complex projects, such as transmission repairs or detailed fuel injector cleaning.
Scaling Your Auto Repair Operations Smartly
If you’re considering expanding your repair shop, prioritize investing in scalable tools and software. Modular diagnostic kits that grow with your needs are a smart choice. As your client base grows, so does the complexity of the jobs. Having the right advanced diagnostic tools, like those tested in industry publications, allows for efficient troubleshooting, ultimately increasing your profit margins and client satisfaction.
The trend in auto repair is moving toward integrated, tech-driven solutions. Staying ahead involves continuous learning about new tools and maintaining your current ones diligently. For example, regularly checking and replacing corroded battery terminals with proper tools enhances starting reliability—learn more about this here. Practice one of these maintenance routines today to keep your toolkit ready for any challenge!
Throughout my auto repair journey, I’ve learned that some of the most frustrating moments come from overlooked details—like that stubborn brake warning light after a pad replacement. It’s easy to assume that once you’ve swapped out the brake pads, the warning light will extinguish on its own. But, as I discovered, system recalibration is crucial for your vehicle to recognize the work you’ve done and communicate that to you clearly.
Three Lessons That Transformed My Approach to Brake Repairs
- Skipping calibration can mask real issues: I once ignored the need to reset sensors, only to find the warning light flickering again weeks later. Now, I always double-check system resets, saving me time and potential costs.
- Tools matter more than you think: Investing in a quality OBD-II scanner changed everything. It’s offered precise diagnostics and made resets straightforward, especially for newer vehicle models.
- Understanding your vehicle’s manual unlocks confidence: Each car has its quirks. Familiarizing myself with the manual meant I could tackle resets without guesswork, avoiding unnecessary trips to the mechanic.
Tools and Resources That Boost My Repairs
- Autel Diagnostic Scanners: I trust these for their comprehensive coverage and user-friendly interface, giving me insights beyond basic codes.
- Official Vehicle Manuals: They are invaluable for model-specific reset procedures, ensuring I follow the exact steps every time.
- Online Forums and Guides: Community wisdom on sites like GlassFixAuto has saved me from common pitfalls, especially with newer systems.
Keep Moving Forward with Auto Repair Confidence
Remember, mastering the art of system resets and sensor calibration isn’t just about fixing warning lights—it’s about empowering yourself to maintain your vehicle effectively. Whether you’re replacing brake pads, managing strange engine codes, or fine-tuning your car’s sensors, every successful reset deepens your understanding and builds your skills. So, why not take that extra step today? Dive into your vehicle’s manual, invest in a reliable scanner, and stay curious about what your car can teach you. Have you ever struggled with resetting a warning light? Share your experience below—I’d love to hear your story and perhaps help you troubleshoot the next one.