
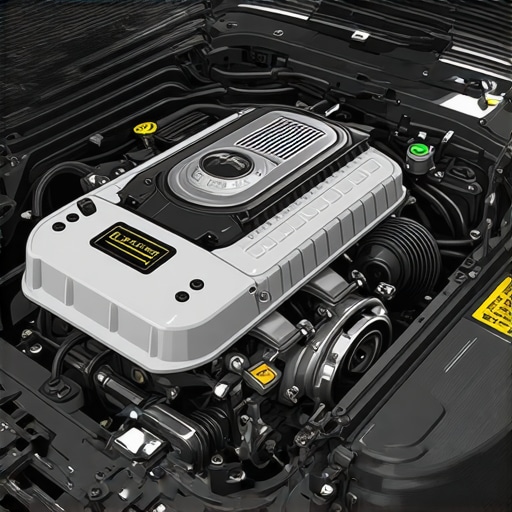
I remember the exact moment I realized my car was telling me something was seriously wrong. It was a cold morning, and as I started my engine, I was greeted not with the usual smooth roar but with a strange whining noise that sent a chill down my spine. Suddenly, my dashboard lit up like a Christmas tree, with warning lights flickering and dimming. That lightbulb moment made me realize: my alternator might be on its last legs. Have you ever experienced that sinking feeling when your car starts acting up out of nowhere, especially with odd noises that seem to come from nowhere? If so, you’re not alone.
The truth is, your vehicle often whispers before it screams—through certain sounds that signal a failing alternator. Ignoring these signs can leave you stranded when you’d rather be enjoying the open road or simply getting to work on time. Since I’ve been there, I want to share the essential noises to watch out for, backed by real-world auto repair insights. Recognizing these early warnings can save you from costly repairs and inconvenient breakdowns.
Let’s dig into the four most common sounds that point to an alternator nearing failure. Trust me, understanding what these noises mean will give you the power to act before it’s too late. If you’ve ever wondered whether that bizarre squeal or flickering dashboard light is a big deal, keep reading. We’ll also explore some common pitfalls, like my early mistake of dismissing a minor car squeal, which I now know could have been prevented with an expert diagnosis. For more detailed tips on auto repair warning signs, check out [this helpful post on brake service mistakes](https://glassfixauto.com/4-signs-your-2026-brake-service-was-done-wrong-tips). Now, let’s get into these warning sounds so you can be proactive and keep your vehicle running smoothly.
Perform a Visual Inspection of the Alternator and Belts
Start by opening the hood and locating the alternator, typically near the front of the engine connected via a serpentine belt. Check for loose or frayed belts, cracked pulleys, or signs of corrosion. If you notice slipping belts or unusual wear, replace or tighten the serpentine belt before proceeding. Remember, a worn belt can mimic signs of alternator failure and delay proper diagnosis—see this guide on common belt issues that cause electrical problems.
Test the Battery Voltage
Using a digital multimeter, set it to DC volts. With the engine off, place the positive lead on the battery’s positive terminal and the negative lead on the negative terminal. A healthy battery should read around 12.6 volts. Start the engine; if the voltage doesn’t rise to about 13.8–14.4 volts, the alternator may not be charging properly. This simple test can prevent you from replacing a good alternator—learn more at auto repair tips.
Use a Battery Load Test or Alternator Tester
If you have access to a specialized tester, perform a load test on the battery and alternator. For a DIY approach, turn on headlights, radio, and AC; then start the engine and observe if the lights dim or flicker. A failing alternator struggles to supply adequate power under load. For precise results, visit an auto shop that can perform this test—see comprehensive assessment methods.
Inspect the Alternator’s electrical connections
Check all wiring harnesses and connections leading to the alternator for signs of corrosion, disconnection, or damage. Tighten loose connections and clean corrosion with an electrical contact cleaner. A loose or corroded connection can cause charging issues often mistaken for alternator failure—refer to electrical diagnostics for more details.
Listen for Unusual Noises During Operation
With the engine running, listen carefully for whining, grinding, or squealing sounds coming from the alternator area. These noises often indicate bearing failure or internal damage. An early warning sound can be a sign to replace the alternator before it causes more extensive damage—check out auto repair insights on unusual engine noises.

Illustration of a mechanic inspecting an alternator with a multimeter to diagnose charging issues.
Decide Whether to Repair or Replace
If these tests suggest the alternator is faulty, evaluate the cost of replacement versus repair. Often, a replacement is more straightforward and ensures reliability. Remember, a bad alternator can cause a cascade of electrical problems, affecting safety and vehicle performance—see professional advice on component replacement.
Follow Up with Proper Maintenance
After replacing or repairing your alternator, make sure to check the entire charging system periodically. Keep belts tight, connections clean, and electrical systems in good condition to prevent future failures. Regular diagnostics can save money and frustration in the long run—learn about routine checks at auto maintenance tips.
Many car owners operate under misconceptions about routine maintenance, especially concerning brake service, tune-ups, and overall auto repairs. A common myth is that replacing brake pads once is enough to last the vehicle’s lifetime; in reality, neglecting proper inspection can lead to uneven wear and costly rotor damage, which isn’t always apparent without professional diagnostics. Experts emphasize that brake components should be checked regularly for even pad wear, corrosion, and caliper function—see this guide on brake service shortcuts that damage rotors.
Another frequent mistake involves believing that all auto repairs are straightforward and inexpensive if handled quickly. However, quick fixes or shortcuts—like delaying a transmission diagnosis when symptoms appear—often result in compounded issues. For example, a slipping transmission, if ignored, can severely damage internal components, increasing repair costs significantly; learn to spot these early signs at this link.
What about tune-ups? Many drivers think that a basic spark plug replacement and fluid top-off are sufficient, but advanced vehicle systems now require nuance. Modern engines have variable valve timing and sophisticated sensors, which need precise calibration during a tune-up. Ignoring these nuances can cause unintended engine performance issues, like hesitations or surges. This is why understanding the complexity behind these systems is crucial for effective maintenance.
Have you ever fallen into this trap? Let me know in the comments.
## Why the One-Size-Fits-All Approach Fails in Car Maintenance
A significant oversight among DIY enthusiasts is assuming that standard procedures suit every vehicle identically. For instance, while changing brake pads is routine, failing to replace or service associated components like rotors, calipers, and sensors can lead to uneven braking and premature wear. Moreover, some car models require specific lubricants or calibration procedures during a tune-up, which generalists may overlook, risking damage or reduced performance. Check out this post on 4 brake service shortcuts that damage rotors to see how shortcuts can backfire.
## The Hidden Dangers of Ignoring Sensor Signals
Modern cars are equipped with numerous sensors providing real-time diagnostics. Enthusiasts often dismiss alert lights, thinking they’re non-urgent, but ignoring these indicators can lead to severe issues. For example, a silent transmission slipping issue might be communicated only through a warning light or subtle shifts, and neglecting it can cause transmission failure. Proper diagnostics, including understanding the nuances of sensor data, are vital to avoid costly repairs. For advanced insights, see this article on transmission problems.
## Are Tune-Ups Still Relevant Today?
Absolutely. But they are no longer just about spark plugs and oil changes. Modern engines require a detailed understanding of electronic systems and precise adjustments—like adjusting fuel injection or sensor calibration—to optimize performance and fuel economy. Overlooking these details during a simple tune-up can leave your vehicle running inefficiently or even lead to engine damage. This is why comprehensive diagnostics and modern tune-up techniques can never be skipped.
Being aware of these nuances helps you make smarter decisions and extend your vehicle’s lifespan. Stay proactive, and remember that what seems like a minor issue today could be a major overhaul tomorrow. Have you encountered any surprises during your maintenance process? Share your experience below.Maintaining a vehicle’s optimal performance requires more than just basic knowledge—having the right tools and adopting precise methods can make all the difference. I personally swear by a good digital multimeter, like the Fluke 117, because it provides accurate readings of your battery and alternator, ensuring you diagnose electrical issues correctly the first time. For spotting hidden problems in brakes, a borescope camera allows me to inspect calipers and rotors without dismantling everything, saving time and avoiding unnecessary parts replacement. When it comes to software, OBD-II scanners like the Autel MaxiCOM are indispensable for reading error codes and monitoring real-time data; I recommend the MaxiCOM MK808 for its detailed diagnostics and user-friendly interface. These tools help me catch issues early, preventing costly repairs and ensuring my vehicle runs smoothly long-term.
Predicting where auto repair tools are headed, I see a trend toward integrated smart diagnostics—wireless tools connected via apps that automatically analyze data and suggest repairs. Embracing these innovations can streamline maintenance, especially as vehicle electronics grow more complex.
How do I keep my brake system in top shape over time? Regular inspections are key. I check the brake fluid level and clarity monthly; a cloudy or low fluid indicates potential issues. I also verify brake pad thickness during tire rotations; most pads have wear indicators that make this easy. About once a year, I replace brake fluid, following the manufacturer’s interval, to prevent corrosion and ensure proper pedal feel. For detailed guidance, many trust this resource to avoid common brake service errors that could damage rotors.
When working on brakes or other critical systems, precision matters. I use a torque wrench like the Tekton Digital Torque Adapter to ensure bolts are tightened to specs, avoiding future safety hazards. Using high-quality lubricants is also essential—synthetic brake lubricants resist moisture and heat better, extending component life.
In terms of scaling older systems, I recommend upgrading your diagnostic tools first. Investing in a professional-grade scanner allows for comprehensive system checks and updates, which is crucial as vehicle tech advances. Maintaining a routine schedule—say every 10,000 miles or 6 months—ensures long-term reliability.
If you want to elevate your auto repair game, try calibrating your brake sensors with a specialized scan tool before replacing pads. Proper calibration prevents sensor misfires and squealing, which can be perplexing and lead to unnecessary part replacements. For more insights, check out detailed guides on brake sensor troubleshooting. Consistent use of reliable tools and thoughtful methods are your best bet to keep your car working flawlessly over the years.
What I Learned the Hard Way About Listening to My Car
One of the most valuable lessons I gained was realizing that early signs of mechanical issues often hide in plain sight. Ignoring a faint squeal or subtle dashboard indicator can cost you more down the line. Taking the time to inspect and diagnose the vehicle early on can prevent costly repairs and safer driving experiences.
How Proper Tools Elevated My Auto Diagnosis Game
Investing in quality diagnostic tools like a reliable multimeter or an advanced OBD-II scanner transformed how I approached repairs. These tools provided precise data, enabling me to make informed decisions rather than guesswork. Personally, I trust brands like Fluke for accuracy and Autel for comprehensive diagnostics because they save me time and money.
Building a Maintenance Routine That Works
Developing a consistent maintenance schedule—checking belts, testing voltage, inspecting connections—has made all the difference. Regular inspections can catch issues early, like worn belts or weak connections, and keep my vehicle running smoothly. Remember, staying proactive with routine checks is the best way to avoid unexpected breakdowns.
Embracing the Complexity—And Mastering It
Auto repair isn’t as simple as it once seemed; modern vehicles come with intricate electronics requiring nuanced attention. Learning about sensor diagnostics, calibration, and software updates has empowered me to handle more in-house repairs confidently. If you’re serious about keeping your vehicle in top shape, diving into these complexities pays off immensely.
Taking Ownership and Staying Curious
Ultimately, the most impactful insight was adopting a mindset of ownership over my vehicle’s health. Asking questions, researching symptoms, and never settling for quick fixes helped me develop a deeper connection with my car. This curiosity fosters not just better repair outcomes but also greater appreciation for the engineering marvels beneath the hood.
Explore These Tools and Resources for Better Auto Care
For anyone looking to elevate their auto repair skills, I recommend starting with a quality multimeter like the Fluke 117 for electrical diagnostics. An OBD-II scanner such as the Autel MaxiCOM MK808 can provide valuable system insights. Additionally, books like “Auto Repair for Dummies” or online resources like repair forums offer practical guidance. Investing in these tools and knowledge sources encourages confidence and precision, making vehicle maintenance less intimidating.
Keep Pushing Forward and Stay Vigilant
Your vehicle’s health is an ongoing journey, not a one-time fix. Embrace learning, use trusted tools, and cultivate a routine that prioritizes inspection. Doing so not only saves money but also enhances safety and driving enjoyment. Remember, every noise or warning light is a signal—listen closely, learn continually, and enjoy the ride.