
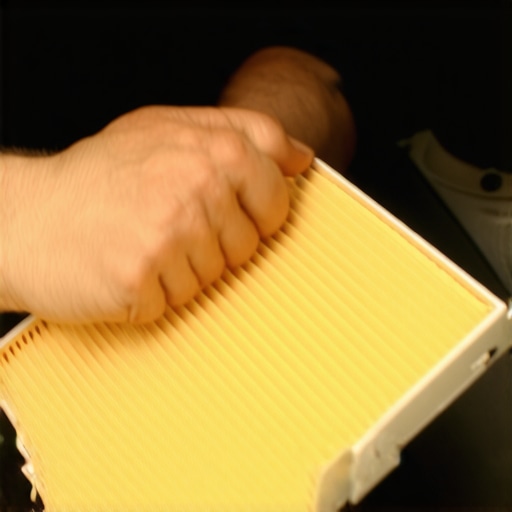
It was a hot summer afternoon when I finally realized I had been throwing money away on cabin air filters for years. Every time I visited the shop, I’d leave feeling ripped off, knowing I was paying way more than I should. The truth was, I didn’t even need to spend half that much — and the whole process took just a couple of minutes. The lightbulb switched on, and I wondered: why aren’t more people talking about this?
Why Spending Big on Cabin Air Filters Doesn Necessary
Let me tell you: I used to think that replacing my cabin air filter was a complex, costly chore. The auto shops made it sound like a job best left to the pros, with some claiming it could cost upwards of $50 or more. But here’s the thing — a clean cabin filter isn’t a luxury; it’s a necessity for good air quality, especially if you suffer from allergies or asthma. Plus, a clogged filter can strain your HVAC system and lead to costly repairs down the line.
The kicker? You can swap out this tiny filter yourself in less than two minutes. It’s straightforward, saves you money, and improves the air you breathe every day. No more hiding in your car during a rainstorm, dreadfully thinking about the bill to replace a simple filter.
But a lot of folks don’t realize how easy it really is. Early in my auto repair journey, I made the mistake of trusting that dealer or shop to do basic maintenance that I could easily handle myself. Turns out, many auto technicians have trained for years, yet a simple filter change is often just a few clips and a quick pull. Learning to do it yourself not only saves cash but teaches you a bit more about your car.
Today, I want to walk you through how to confidently replace your cabin air filter in just a couple of minutes, so you’re never overpaying again. And if you’ve ever wondered whether all those fancy air purifiers or air-quality packages are truly worth the hype — well, I’ll clear that up too.
Ready to save money AND breathe better? Let’s dive into how you can do it yourself, without the shop’s price tag.
Locate the Cabin Air Filter
Start by opening the glove compartment or the panel beneath the dashboard. For many vehicles, the filter is behind or above the glove box. To access it, gently remove any retaining clips or screws. Once exposed, you’ll see the filter housing. A good analogy is thinking of it as a simple sandwich bag inside a small box—easy to access and replace.
Remove the Old Filter
Carefully pull out the existing filter, noting its orientation—usually marked with arrows indicating airflow direction. During my first attempt, I once left the filter behind a cluttered glove box, making it look more complicated than it is. Remember, patience is key. If dust, leaves, or debris cling to the old filter, clean the housing with a damp cloth to prevent dirt from circulating again.
Inspect the New Filter
Compare the new filter with the old one to ensure correct size and type. Pay attention to the airflow arrows to install it correctly. I once accidentally reversed the filter, which reduced airflow. Installing it upside down is like putting on your socks inside out—obvious once you check the arrows. Proper orientation ensures the filter functions as designed, trapping dust and allergens effectively.
Install the New Filter
Slide the new filter into the housing, aligning arrows with the airflow direction. Carefully fit the panel or compartment back into place, securing any clips or screws. Think of it as fitting a key into a lock—you need the correct orientation for everything to click smoothly. If you feel resistance, double-check the alignment before forcing anything.
Test Your Work
Close the glove compartment or panel, start the vehicle, and turn on your A/C or heat. Check for proper airflow and listen for any unusual noises. A quick ride around the block confirms the filter’s effectiveness. If you notice reduced airflow or strange smells, revisit the installation steps. Remember, a well-installed filter ensures cleaner air and better comfort inside your vehicle.
Extra Tips for Success
Keep your vehicle’s manual handy; it often shows the filter location and replacement intervals. Regularly replacing your cabin air filter—every 15,000 to 30,000 miles—improves air quality and extends your HVAC system’s life. For more information on vehicle maintenance, visit our car maintenance checklist. And if you encounter recurring issues or need professional advice, don’t hesitate to reach out to us. Proper care makes every drive safer and more comfortable.Many car owners believe that auto repair is a straightforward, foolproof process—just follow the manual or trust the mechanic to handle the rest. But as I delve deeper into the intricacies of vehicle maintenance, I’ve uncovered some nuanced truths that challenge common myths. For example, a frequent misconception is that all brake pads wear evenly; however, uneven wear patterns are often signs of underlying issues like warped rotors or caliper problems, which can lead to premature replacements if not properly diagnosed. To truly understand brake service, it’s essential to grasp these subtle clues and not rely solely on surface appearances.
Why do so many car owners get caught off guard during tune-ups?Investing in Quality Tools for Auto Maintenance
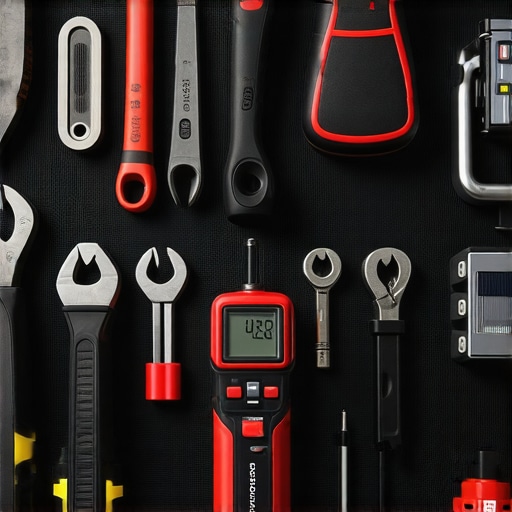
One of the smartest decisions I made early on was assembling a set of reliable, professional-grade tools. For example, a torque wrench ensures your lug nuts are tightened to manufacturer specs, preventing issues like warped rotors or warped wheel hubs. I personally favor the Snap-on Digital Torque Wrench because of its precision and durability, which makes a real difference during brake service and suspension work. A good brake system depends on proper torque, so investing here saves time and money over the long haul.
Using Diagnostic Software to Stay Ahead
Beyond physical tools, diagnostic software has revolutionized auto repair. I recommend the Autel MaxiCOM scanner for its extensive vehicle coverage and user-friendly interface. These tools help identify issues before they escalate—say, a subtle misfire or a developing sensor fault—so you can plan maintenance proactively. With real-time data at your fingertips, you avoid unnecessary repairs and extend your vehicle’s lifespan. As the industry moves toward more complex electronics, having a diagnostic toolkit is becoming indispensable—think of it as a health monitor for your car.
Routine Checks for Longevity and Performance
Regular visual inspections are underrated but crucial. Checking your belts, hoses, and fluid levels monthly can catch problems early. Tune-up strategies involve more than just oil changes; they encompass an overall dashboard of vehicle health. Maintaining a consistent check schedule based on your car’s mileage and usage guarantees that components like the timing belt or spark plugs remain in optimal condition, preventing breakdowns and costly repairs down the line.
Planning for Long-Term Maintenance
Creating a long-term maintenance plan can seem daunting, but I’ve found that scheduling major services like transmission fluid flushes or cooling system inspections every 30,000 miles keeps everything running smoothly. For detailed guidance, consult the ultimate car service guide. Using a maintenance tracker app or a simple calendar reminder helps keep these tasks on track, turning car care from an afterthought into a steady routine.
Scaling Up as Your Skills Grow
As your confidence and expertise grow, so should your toolkit and knowledge base. Upgrading to an air-powered impact wrench or a reliable ball joint separator can streamline complex jobs like suspension work or brake rotor replacements. Moreover, staying informed about auto repair trends for 2025 ensures you’re using cutting-edge methods and tools, maintaining your vehicle efficiently for years to come.
How do I maintain my tools and process over time?
Proper storage, regular calibration, and cleaning are keys to keeping your tools in top shape. Check your torque wrench’s calibration periodically—most manufacturers recommend every 1,000 cycles—by testing it against a known standard. Keeping your work area organized prevents accidental damage to tools and helps you work faster. Remember, well-maintained tools and a consistent routine form the foundation of effective, long-lasting vehicle care. For a more comprehensive approach, consider consulting our car maintenance checklist and scheduling regular tune-ups to prolong your car’s life.
Want to take your auto care to the next level? Try implementing a diagnostic scan every few months to detect issues early, or invest in a quality magnetic tool holder to keep your equipment organized. Being proactive with your tools not only saves money but transforms the maintenance process into a rewarding, hands-on experience. For personalized advice tailored to your vehicle, don’t hesitate to reach out to us.
What I Wish I Knew When I Started Fixing Cars
One of the most valuable lessons I learned early on was that auto repair isn’t as intimidating as it seems. I used to rely solely on mechanics, thinking I could never handle even simple tasks like changing a cabin air filter. But once I discovered how straightforward some of these jobs are—like replacing filters or topping off fluids—I realized I was missing out on both savings and confidence. The key is embracing the learning curve and recognizing that many problems are DIY-friendly, saving you money and giving you a sense of accomplishment.
Tools and Resources That Changed My Approach
Investing in quality tools, such as a reliable torque wrench or a user-friendly diagnostic scanner, made all the difference. I trust these industry-leading tools because they’ve proven to last and deliver precision. Additionally, comprehensive guides and tutorials—like our car maintenance checklist—have become my go-to references, making complex tasks approachable and ensuring I don’t overlook critical steps.
Embracing the Process and Sharing the Journey
Taking charge of your vehicle’s maintenance might seem daunting at first, but the rewards—cost savings, better understanding of your car, and peace of mind—are well worth it. Remember, every expert was once a beginner; the secret is in consistent practice and staying curious. I encourage you to start with small tasks, build your toolkit, and don’t hesitate to reach out for professional advice when needed. Your journey to confident, budget-conscious auto care begins here.
Your Turn to Make a Change
Have you tried any DIY auto repairs that surprised you? Share your experiences below and let’s inspire each other to take control of our vehicles!
,