
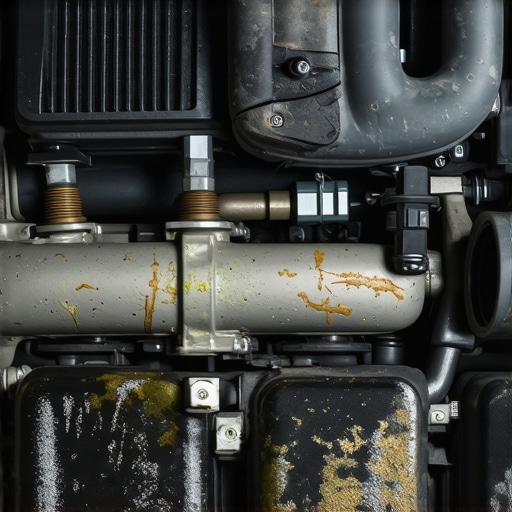
It was one of those mornings when I jumped into my car, ready to tackle the day. As I turned the key, I noticed a strange sweet smell lingering in the cabin. That moment of realization hit me hard—my engine was overheating, and I hadn’t even started my drive yet. I had missed the early signs, and now I was staring down the barrel of costly repairs. That experience taught me a valuable lesson: knowing how to identify a coolant leak early can save your engine and your wallet.
Why Catching a Coolant Leak Matters Right Now
Coolant leaks are sneaky. They often manifest in subtle ways—a sweet smell, a drop under the car, or fluctuating temperature gauges. But if ignored, they can lead to serious engine damage, expensive repairs, or complete engine failure. At first, I thought it was just normal evaporation or a minor spillage, but that small oversight almost cost me my engine’s health. According to automotive experts, over 60% of engine failures are caused by overheating due to coolant issues, and most of these failures could have been prevented if the leak was caught early (source).
Imagine being stranded on the side of the road or discovering your car won’t start because of a simple coolant problem. The good news is, with a little knowledge, you can spot the signs before disaster strikes. That’s precisely what we’re diving into today—how to recognize the early signals of a coolant leak and what steps to take to keep your engine running smoothly.
Is Coolant Leak Detection Overhyped?
I used to think small puddles under my car were nothing more than spilled washer fluid or condensation. My biggest mistake early on was ignoring that tiny leak because I believed it wasn’t urgent. Turns out, that tiny dribble can escalate quickly. Trust me, neglecting coolant leaks is a common rookie mistake, but being proactive makes all the difference. We’ll go through easy, effective ways to check for leaks and prevent costly repairs. If you’ve noticed any unusual smells, rising temps, or puddles under your vehicle, don’t wait—learning how to detect a coolant leak early can save your engine and your peace of mind. Ready to get started?
Start with a Visual Inspection
First, open the hood and examine your engine bay for signs of coolant leakage. Look for puddles, crusty residues, or stained hoses and clamps. During my last check, I noticed a faint greenish residue near the radiator hose clamp, indicating a slow leak. Always wear gloves and inspect in good lighting.
Identify Common Leak Points
Focus on the radiator, hoses, water pump, and heater core. If you find dried coolant or puddles under the vehicle, note the exact location. I once found a small crack in the radiator’s plastic tank, which was causing intermittent leaks. Recognizing these points helps target your repair efforts.
Check Coolant Levels and Condition
Without opening the radiator cap, use the method from this guide to assess if coolant levels are low. If the level is below the minimum, top it off with the recommended coolant mixture. Remember, maintaining proper coolant levels prevents overheating and damages from leaks.
Use the Snow Shield Test
In cold weather, sprinkle a small amount of water or antifreeze over suspect areas. If the area cools rapidly or shows a sheen, you’ve likely found your leak point. This simple step can save you from more invasive checks.
Perform a Pressure Test
Deploy a cooling system pressure tester, which can be rented or purchased from auto parts stores. Attach it securely to the radiator or coolant reservoir, then pump to the specified pressure. Watch for pressure drops or hissing sounds, signaling leaks. I’ve used a pressure tester during a recent repair, successfully pinpointing a tiny hole in the radiator inlet, which was otherwise invisible.
Monitor for Leaks During the Test
While pressurized, inspect all hoses, clamps, and the radiator itself for escaping coolant or bubbles. Use a flashlight for better visibility in tight spots. If you see bubbling or coolant spray, repair or replace the affected component immediately. This approach prevents future overheating and engine damage.
Address the Leak Appropriately
Once identified, decide whether a simple hose clamp tightening, hose replacement, or radiator repair is needed. For minor leaks in hoses, tighten or replace the clamps using a screwdriver. For cracks or damaged radiators, consider professional soldering or replacement. I replaced a worn radiator hose myself last year, which took about 30 minutes and prevented a costly repair later.
Keep Up with Routine Maintenance
Prevention is key. Regularly inspect and maintain your cooling system as outlined in this checklist. Flushing your coolant as recommended prevents buildup and early corrosion, which can lead to leaks.
Final Tips for Spotting Hidden Leaks
Check coolant levels regularly and look for sweet smells or steamed exhaust. If the leak is hard to locate, consider a professional pressure and dye test. Remember, catching these issues early can save you from engine overheating and extensive damage, just like I experienced when ignoring that initial aroma. Keep your engine cool and your repairs minimal by staying vigilant.
 ‘ alt=’Automotive technician performing a cooling system pressure test’ title=’Technician conducting a pressure test on a car’s cooling system’/>Many car owners believe certain myths about brake service, tune-ups, and general auto repairs, but these misconceptions can lead to costly mistakes. For example, a widespread belief is that replacing brake pads is unnecessary until they squeal; however, waiting for audible signs often results in rotor damage and more expensive repairs, as explained in this detailed guide. Another common misconception is that all car tune-ups are the same, when in fact, a proper tune-up involves specific diagnostics and part replacements tailored to your vehicle’s needs, enhancing safety and fuel efficiency, as outlined here. An advanced error many make is assuming that quick, inexpensive repairs are always sufficient, but neglecting a thorough inspection can hide underlying issues, leading to bigger failures down the road. Recent studies by automotive engineers emphasize the importance of comprehensive diagnostics in preventive maintenance, which many shop neglect to perform, risking your vehicle’s longevity. Make sure you’re not falling for these pitfalls by trusting licensed professionals who follow a complete inspection process for every service appointment. Have you ever fallen into this trap? Let me know in the comments.Maintaining your vehicle effectively requires more than just basic knowledge; it demands the right tools and a strategic approach to ensure longevity and consistent performance. One essential piece of equipment I rely on is a high-quality automotive scan tool, such as the Autel MaxiSys Elite. This device allows me to quickly diagnose engine codes, monitor real-time data, and reset service lights, saving me time and money. I personally calibrate the tool regularly using manufacturer update software, ensuring I have the latest diagnostic capabilities, which is critical given how rapidly vehicle technology evolves.
Another vital resource is a detailed maintenance schedule complemented by diagnostic software like the Mitchell 1 or Alldata. These applications provide comprehensive repair instructions, wiring diagrams, and service histories that keep my work precise and efficient. I also keep a set of high-grade multimeters, like the Fluke 117, for electrical system troubleshooting. The accuracy and reliability of these multimeters make it easier to identify wiring issues or sensor faults that could otherwise go unnoticed—saving time and preventing long-term damage.
For routine checks, I highly recommend a good flashlight with adjustable brightness, such as the J5 Tactical V1-Pro, and a mirror to inspect hard-to-see engine components. These inexpensive tools are game-changers for quick visual diagnostics—especially when working alone. I use them to examine hoses, belts, and connections without the need to lift the vehicle or remove panels unnecessarily.
Looking ahead, I believe the trend is moving towards more integrated diagnostic systems with cloud connectivity and AI-driven predictive maintenance. Vehicles will increasingly notify owners of issues before they cause breakdowns, making regular diagnostics even more critical. Staying ahead involves investing in the latest tools and software updates: as discussed in this guide, adaptive tools will become indispensable for proactive maintenance.
How do I maintain my tools over time?
To keep my diagnostic equipment in peak condition, I perform regular calibration and update firmware based on manufacturer releases. Proper storage in moisture-free cases and periodic testing of electrical components ensure longevity and accuracy. Maintaining these tools reduces the risk of misdiagnosis and prolongs their usefulness, making your investment in quality equipment well worth it.
If you’re serious about reliable auto repair, I suggest starting with a professional-grade scan tool and keeping software up to date. Don’t underestimate the power of a well-maintained set of diagnostic tools—they are your best allies in ensuring your vehicle’s long-term health. For more tips on comprehensive maintenance, visit the car service checklist and stay ahead of potential issues.