
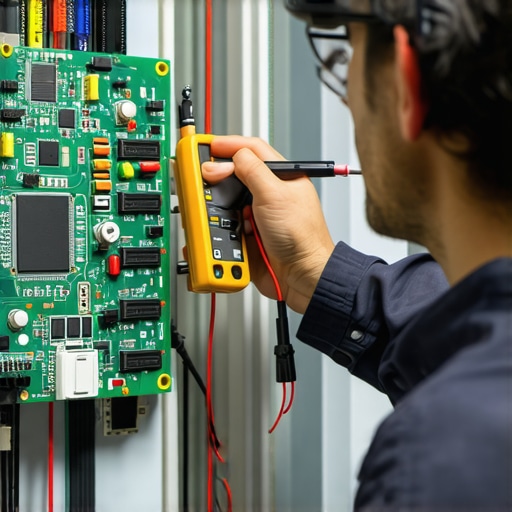
Ever been stuck in a parking lot, frustration bubbling up, wondering why your car’s accessory suddenly stopped working? I remember that lightbulb moment when I realized a tiny relay was the culprint—but I had no clue how to test it, especially without expensive diagnostic tools. That sinking feeling of uncertainty? Yeah, almost everyone who tinkers with cars has been there. But what if I told you that you can confidently test relays with just a simple multimeter? No need for fancy electronics shop visits—all it takes is a bit of patience and know-how. Today, I’ll walk you through a straightforward way to diagnose your relayed circuits, saving you time and money and reducing that dreaded “is it the relay or something else?” guesswork.
Why Testing Relays Matters More Than You Think
Relays are like the gatekeepers of your vehicle’s electrical system. They control everything from your headlights to your fuel pump. If one acts up, it can spell trouble for your entire ride. Yet, they’re often overlooked until something stops working or, worse, causes a breakdown. Knowing how to test a relay isn’t just for mechanics—it’s a lifesaver for everyday car owners who want to troubleshoot like pros. A failing relay can mimic more severe issues, leading you down a rabbit hole of unnecessary repairs. That’s why getting familiar with your multimeter and learning a couple of quick tests can be a game-changer. Trust me, I learned this the hard way early on, when I replaced a perfectly good relay because I *assumed* it was faulty—a mistake many make before discovering the real culprit.
Is Testing a Relay Actually Worth the Hype?
Let’s address the elephant in the room. Skeptics often ask, “Do I really need to test relays myself, or is that just overkill?” Honestly, I used to think the same until I realized how much time and cash I saved by diagnosing the issue myself. A simple multimeter can tell you if a relay’s coil is getting power or if the switch inside is working. No, it’s not magic—just good old-fashioned electrical test methodology. And as I soon found out, many relay problems are easier to spot than you’d imagine. Plus, with proper guidance, you can avoid the common mistakes that homeowners make—which I’ll point out later to help you dodge frustrations.
So, if you’ve ever faced the annoyance of a non-responsive window or a stalled fuel pump, stick around. We’re about to turn you into a relayed circuit testing ace, with minimal fuss and maximum confidence. And to give you more peace of mind, check out this latest auto repair trends—knowing what’s coming keeps you ahead of the game. Ready to jump right in? Let’s get started with the essentials—because understanding how your relay works is the first step toward keeping your car in top shape.
Locate the Relay and Gather Your Tools
Start by finding the specific relay you want to test. Usually, relays are in a dedicated fuse box or relay panel under the hood or in the cabin. Consult your vehicle’s manual to pinpoint its exact location. Once identified, gather your multimeter—ensure it’s set to measure resistance (ohms) or continuity—and wear gloves for safety. I remember the time I tested a relay for my headlights; locating it was tricky, but once I had it, the rest went smoothly.
Remove the Relay Carefully
Use needle-nose pliers or a relay removal tool to gently pull out the relay without damaging the socket. Apply steady pressure, wiggling slightly if necessary. Think of it like unplugging a stubborn USB device—without forcing it, you might damage the connector or socket. Once out, inspect the relay for physical damage or corrosion, which can indicate failure even before testing.
Identify the Coil and Switch Pins
Look at the relay’s schematic—often printed on the side or in the manual—to identify the coil and contact pins. Typically, a relay has four or five pins: two for the coil and two or three for switching. Visual diagrams help clarify this. Remember, testing the relay in your car without understanding these connections is like trying to fix a watch without knowing how it works; you need to know what you’re testing for accurate results.
Test the Coil for Continuity
Set your multimeter to measure resistance. Touch the probes to the coil pins; a good coil should show low resistance, generally between 50-200 ohms. If the multimeter reads open (OL) or infinite resistance, the coil is broken, indicating a failed relay. I once tested a relay, saw infinite resistance, and replaced it—saving a lot of head-scratching later. This test is akin to checking if a lightbulb filament is broken.
Check the Switching Circuit
Apply 12V power to the coil pins using a 12V supply or your car’s battery. While the coil is energized, test continuity between the common terminal and normally open terminal. The multimeter should beep or show zero resistance when the relay clicks—indicating the internal switch has closed. If there’s no change, the switch is faulty, and the relay needs replacing. This step is like flipping a switch and hearing the click—signaling the relay’s internal switch is functioning.
Reinstall and Verify Functionality
If tests pass, reinstall the relay securely into its socket, ensuring proper contact. Turn on the vehicle’s system or component that the relay controls to observe if it operates correctly. If it still doesn’t work, double-check wiring and fuse connections. Remember, sometimes a relay tests fine but still causes issues due to wiring problems—it’s like a gate that opens, but the path is blocked further downstream. For comprehensive checks, consider inspecting related components or consulting your vehicle’s manual for specific testing procedures, like the ones discussed in troubleshooting common auto repair issues.When it comes to maintaining your vehicle, many car owners operate under myths that can lead to costly mistakes. One widespread misconception is that all auto repairs are straightforward and that DIY fixes always save money. However, automotive systems are complex, and diagnosing issues without proper knowledge can do more harm than good. For example, assuming that brake noise is only due to worn pads might overlook underlying caliper problems or rotor warping, which require professional attention. Relying solely on routine oil changes as a catch-all maintenance strategy ignores the nuanced needs of modern engines, which benefit from tailored service schedules outlined in car service checklists. Another common trap is believing that older cars don’t need regular tune-ups; in reality, neglecting periodic tune-ups can cause decreased fuel efficiency and increased emissions—issues that are explained comprehensively in how tune-ups improve performance.
A subtle nuance many overlook is the importance of understanding your vehicle’s brake system beyond just replacing pads. Brakes aren’t just about stopping; they’re integral to safety and longevity. Experts warn that neglecting minor issues like spongy pedal feel or unusual vibrations can lead to rotor damage or even brake failure. Before jumping into repairs, consider consulting a professional or comprehensive guides to prevent selecting the wrong service, which can escalate costs and risks. For instance, replacing a brake rotor prematurely due to misconceptions about wear may be unnecessary if the issue is warped rotors caused by uneven pad material deposition.
Make yourself aware of these pitfalls and avoid common pitfalls that compromise safety and performance. The auto industry is always evolving—staying ahead with the latest trends, like those discussed in auto repair trends for 2025, can help you make informed decisions. Remember, proper maintenance isn’t just about reacting to problems but proactively preventing them. Curious about how to spot the signs of hidden issues before they become costly repairs? Share your experiences or doubts in the comments!
Ultimately, the goal is to strike a balance between DIY knowledge and professional intervention. Knowing when to roll up your sleeves and when to consult a trusted mechanic is key to extending your vehicle’s lifespan and ensuring safety. For more insights on how expert tune-ups can boost your car’s efficiency, visit maximize your car’s lifespan. Stay savvy, stay safe—your vehicle (and wallet) will thank you.
Maintaining your vehicle over time isn’t just about replacing worn parts—it’s about deploying the right tools and adopting proven methods that extend your car’s lifespan and performance. As a seasoned DIY enthusiast, I rely on a combination of precise diagnostic equipment and methodical routines to keep my ride running smoothly. Today, I want to share insights on the tools I recommend and how they can help you achieve reliable, long-term results. This approach not only saves money but also empowers you to understand your vehicle better, enabling proactive maintenance rather than reactive repairs.
Investing in a Quality Multimeter and Keep It Calibrated
First and foremost, a dependable multimeter is my go-to tool for diagnosing electrical issues, from testing relays to checking battery health. I personally prefer a digital multimeter with auto-ranging capabilities—like the Fluke 115—which provides accurate readings and durability. Regular calibration is key; even slight inaccuracies can lead you astray. I check my multimeter against a known voltage source every few months, ensuring my tests stay precise. This consistency allows me to spot corrosion, bad connections, or failing sensors early—saving me from costly breakdowns. As electric systems become more complex, a good multimeter remains your best friend in diagnosing issues that can otherwise be elusive.
Master the Use of OBD-II Scanners for Deep Insight
An advanced yet accessible tool I recommend is an On-Board Diagnostic scanner, such as the BlueDriver Bluetooth OBD2 Scanner. Unlike basic code readers, this device translates error codes into understandable language, offers live data streaming, and helps identify underlying problems before they escalate. I’ve used mine to diagnose emissions issues or monitor engine parameters during tune-ups. With software updates that keep pace with vehicle technology, these scanners are future-proof. They enable you to stay ahead of repair needs and optimize your car’s performance—an essential strategy as auto repair trends evolve towards more digital integration for 2025 and beyond.
Routine Visual Inspections and Use of Inspection Mirrors
Preventive maintenance isn’t solely about electrical diagnostics; regular visual checks can preempt major failures. I utilize a magnetic inspection mirror to peek into hard-to-see engine bays or undercarriages—identifying leaks, worn belts, or rust issues early on. Incorporating these simple routines into your maintenance schedule can reveal silent problems that standard checks might miss. Car service checklists recommend these steps regularly, making a mirror a versatile, low-cost addition to your toolkit. Paired with a good flashlight, they empower you to diagnose problems like a pro without climbing under the vehicle unnecessarily.
Why Long-Term Maintenance Requires Consistent Checks
Incorporating these tools into your routine isn’t a quick fix; it’s a sustainable approach. Over time, consistent diagnostics—using your multimeter and scanner—help track vehicle health trends, enabling timed interventions that prevent costly repairs. Expect to see increased reliability and lower maintenance costs when you adopt a proactive mindset. Looking ahead, as vehicles continue to incorporate advanced electronics, mastering these tools will become even more crucial. Staying updated with auto repair trends for 2025 ensures you’re using the latest technologies and methods to care for your car — visit this resource for insights.
To get started, I challenge you to perform an electrical system check using your multimeter today—test your battery voltage or verify the continuity of essential relays. This small step can dramatically improve your understanding of your vehicle’s health and set the foundation for reliable, long-term performance. Remember, investing in proper tools and routine diagnostics is the best way to keep your car working perfectly for years to come.
What I Didn’t Know About Relay Failures Until I Made My Own Mistakes
One of the most eye-opening lessons I encountered was realizing how easily a faulty relay can mimic more serious engine or electrical problems. I once spent hours chasing down complex wiring issues, only to discover it was an underperforming relay causing intermittent errors. That humbling experience taught me that understanding the nuances of relay behavior can save countless hours and unnecessary expenses. It’s a reminder that sometimes, a simple multimeter test can prevent a cascade of wrong repairs and help you pinpoint true faults — something I now swear by rather than guesswork.
My Favorite Tools That Turn DIY Troubleshooting Into Confidence
Over time, I’ve curated a toolkit that turns complex electrical diagnostics into manageable tasks. The first is a quality digital multimeter—like the Fluke 115—that provides reliable resistance and voltage readings. A dependable OBD-II scanner, such as the BlueDriver, has become indispensable for quickly accessing error codes and live data. Using a compact inspection mirror, I can peek into tight spots for visual clues, which often reveal corrosion or damaged wiring. These tools have transformed my approach from trial-and-error to precise diagnostics, and I firmly believe they can do the same for you in your auto repair journey.
Don’t Wait Until It’s Too Late: Act Now for Safer, Smarter Maintenance
The most powerful thing you can do is start incorporating routine electrical checks into your regular maintenance schedule. Testing your relays, inspecting wiring, and staying ahead of potential issues keeps your vehicle running smoothly and reduces the risk of breakdowns. It’s about empowering yourself, so you’re not caught off guard by sudden failures on the road. Stay committed to learning and applying these troubleshooting skills, and your car will thank you with enhanced reliability. For ongoing insights and expert advice, check out the latest auto repair trends—keeping informed is key as technology advances towards 2025 and beyond. Ready to take the next step? Share your experience or ask questions below, and let’s keep your vehicle in top shape together.