

Ever been behind the wheel and felt that strange pull to one side, or experienced a wobble that just won’t go away? I remember the first time I noticed my steering wheel vibrating unexpectedly—my heart sank. I had just grown accustomed to my car’s rhythm and suddenly, everything felt off. Turns out, small misalignments can sneak up on us, and honestly, I realized I had no clue how to check my own alignment without fancy equipment.
But here’s the good news: you don’t need a mechanic’s toolkit or diagnostic machine to get a decent idea of your vehicle’s alignment status. As someone who’s tinkered on my own cars for years, I discovered that with some basic tools and a little know-how, I can spot potential issues before they become expensive problems. And trust me, catching alignment issues early saves money—and makes driving safer and more comfortable.
Why Checking Your Car’s Alignment Matters More Than You Think
When your vehicle isn’t properly aligned, it can cause uneven tire wear, reduce fuel efficiency, and even compromise safety by affecting handling. The problem often begins with small misalignments that can be detected and addressed without a professional lift or advanced diagnostic scanner. Regular checks can ensure your car drives straight, tires wear evenly, and you get the most bang for your buck at the gas pump.
Early on, I made the mistake of ignoring unusual tire wear patterns, assuming it was just a bad batch of tires. That oversight nearly cost me a new set of tires and a steering overhaul. Learning how to do simple alignment checks at home not only saved me money but also gave me peace of mind. If you’re like me, eager to maintain your vehicle but wary of the costs, you might be wondering: “Can I really check my own alignment with basic tools?” The answer is yes—and I’ll show you how.
Before we dive into the step-by-step methods, it’s worth noting that being proactive goes a long way. According to industry insights, about 70% of vehicles that have alignment issues go unnoticed until they cause bigger problems, like suspension damage or poor fuel economy (source). So, rolling up your sleeves and doing a quick check now and then isn’t just a good idea; it’s a smart move.
Ready to get your hands dirty and learn how to spot steering and wheel alignment issues on your own? Let’s move from theory to practice with some straightforward tools and techniques that any DIY’er can master.
Gather Your Tools and Prepare Your Space
Before diving into the actual alignment check, assemble basic tools like a tape measure, a friend to assist, and some chalk or masking tape. Find a flat, level surface—your driveway or garage floor works well—and ensure your tires are properly inflated to the recommended pressure. This setup is like preparing your kitchen before cooking; everything needs to be in place for a smooth process.
Check Your Tire Wear Patterns and Visual Cues
Start with a visual inspection, looking for uneven tread wear, feathered edges, or excessive inner or outer wear. For example, I once noticed my front tires wearing faster on the inner edge, indicating possible alignment issues. This eye-opener prompted me to perform a more precise check. It’s like noticing a weird sound in your car—starts a path to troubleshooting.
Mark Your Tire Position and Measure Camber and Toe
Use chalk or masking tape to mark the front and back edges of your tires’ footprints. This helps track how tires are wearing or shifting. For a basic toe check, measure the distance between the fronts of the tires and compare it to the distance at the rears. For example, I placed tape at wheel centers, then measured width at front and back, discovering my wheels were slightly toe-in, which explained the pulling sensation. Think of it as measuring the width of a door to confirm if it’s skewed.
Set Up a Straight-Edge and String for Alignment
To check for alignment relative to the vehicle, stretch a string tightly along the sides of your car, aligning it with the tires’ centerlines. Adjust the string so it runs parallel to the vehicle’s width, then measure the distance from the string to each tire’s face at the front and rear. A discrepancy indicates misalignment. I once spent an afternoon adjusting my steering wheel so that the measurements were even, improving handling significantly. This step is akin to aligning a picture frame on a wall—attention to detail makes a difference.
Interpret Your Measurements and Decide on Repairs
If measurements show uneven toe or camber, or if your tires are wearing unevenly, it’s time to consider professional suspension work or a full alignment at an auto shop. Regular checks like these can catch issues early. For instance, I caught a slight misalignment before it caused excessive tire wear, saving me money. Think of it as catching a small leak before it floods your basement—early detection is key.
Additional Tips for Accurate DIY Checks
Ensure your steering wheel is centered when parked straight, as a misaligned wheel can skew your measurements. Also, have someone turn the steering wheel slightly while you observe the tires for any abnormal movement. Remember, this method is for basic detection; for precise alignment, a professional service is recommended. Still, performing these checks regularly keeps you informed and empowered, much like knowing how to change your oil or check tire pressure.
Incorporating these simple steps into your car maintenance routine can prolong tire life, improve handling, and save money. For more maintenance tips, check out this comprehensive checklist. Remember, a little effort goes a long way in keeping your vehicle running smoothly on the road.
When it comes to maintaining our vehicles, there’s a common misconception that a simple tune-up or brake service is just a matter of swapping out parts and sending you on your way. But as an automotive enthusiast and seasoned mechanic, I can tell you that most people get the fundamentals wrong—often unknowingly. For example, many believe that replacing spark plugs alone will restore optimal performance, yet neglecting to check the ignition coils or fuel injectors can leave your car running inefficiently. According to industry experts, a holistic approach to tune-ups, which considers the vehicle’s entire ignition and fuel system, leads to better fuel efficiency and fewer breakdowns—something many overlook. One trap I see frequently is the assumption that new brake pads automatically fix squealing; in reality, incorrect installation or neglected brake fluid condition often cause noise. Never forget, the braking system is complex, and ignoring the nuances can compromise safety.
What Advanced Techniques Can’t Owners Easily Detect?
Even seasoned car owners might struggle with subtle signs of transmission slip or developing suspension issues. Relying solely on visual inspection or basic checks misses complex problems like differential wear or internal engine timing anomalies. This is why understanding diagnostic codes and sensor readings becomes invaluable—tools that many DIY enthusiasts haven’t mastered but are crucial for accurate diagnoses. For instance, taking a car to a professional for a diagnostic scan when you notice slight vibrations can save hundreds in future repairs, as some issues are embedded deep within the systems and are not visible to the naked eye. Remember, the key is not just fixing what’s obvious but addressing underlying causes that could lead to bigger failures.
The Oops Many Make When Servicing Their Cars
One classic mistake is ignoring fluid conditions; a dark, gritty transmission fluid or contaminated brake fluid can cause uneven wear and component failure. Regularly checking and replacing these fluids, even if not due, can dramatically extend component lifespan. Another common error is neglecting to recalibrate or replace sensors after repairs; a misaligned ABS sensor can cause warning lights and impaired braking functions, which might be mistaken for a simple sensor failure. For insights into how regular tune-ups contribute to safety and efficiency, check out this guide on how consistent tune-ups help your vehicle. Don’t fall into the trap of thinking that automobile maintenance is just based on parts replacement—it’s a nuanced science that, when done correctly, ensures longevity and reliability. So, next time you’re planning a service, make sure to look beyond the surface and consider these hidden aspects. Have you ever fallen into this trap? Let me know in the comments.<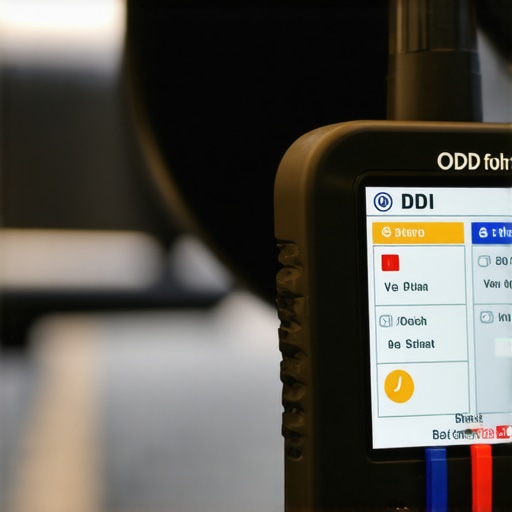 >Maintaining your vehicle’s health isn’t just about quick fixes; it’s about building a reliable system that keeps your car running smoothly for years. When it comes to auto repair and regular service like tune-ups or brake work, having the right tools isn’t optional—it’s essential. I swear by a few specific equipment and methods that have helped me diagnose and address issues early, saving significant money and headaches.
High-Quality Diagnostic Scanners and Why They Matter
I rely on an OBD-II scanner like the BlueDriver, which pairs with my smartphone via Bluetooth. It’s far more accurate and user-friendly than generic code readers, giving me real-time sensor data and detailed trouble codes. This allows me to identify issues like misfiring ignition coils or fuel system errors before they escalate. As vehicle electronics become more complex, investing in a reputable scanner directly correlates with better maintenance outcomes. Experts forecast that diagnostic tools will incorporate even more AI-driven insights, making early detection more accessible for DIY enthusiasts—read more about future trends in auto repair trends for 2025. I recommend you get a reliable scanner and make it part of your maintenance routine. It’s like having a mini mechanic right in your garage.
Precision Multimeters for Accurate Troubleshooting
An analog multimeter might seem old school, but I prefer a digital one with auto-ranging capabilities. When diagnosing electrical issues, testing sensors or checking battery health, these multimeters provide quick, accurate readings. Using one diligently ensures that you’re not replacing parts blindly. In fact, I once identified a failing alternator early because my multimeter detected irregular voltage fluctuations—a move that prevented a roadside breakdown. For those wanting to step up their game, understanding how to use a multimeter effectively will become essential as vehicle systems grow increasingly intricate. Check out this guide to testing circuits with a multimeter. Incorporate it into your toolkit and troubleshoot with confidence.
How to Keep Your Tools Working for the Long Haul
Regular calibration and cleaning are the keys. Storing sensors and electronic devices properly, avoiding moisture, and testing tools before use prevent inaccuracies. For example, I periodically verify my multimeter against a known voltage source to ensure reliable readings. This proactive approach extends the lifespan of your equipment and maintains their precision. As technology advances, tools will become more sophisticated and interconnected—think of diagnostic tools that sync with cloud databases for software updates. Staying ahead means investing in quality gear now and embracing continuous learning.
Stay Ahead with Smart Maintenance Habits
Besides high-tech tools, adopting consistent maintenance routines like regular fluid checks and tire inspections remains fundamental. For instance, upgrading your approach with accurate tools saves you from unnecessary repairs, or worse, safety risks. Try integrating a diagnostic check before your next brake service or tune-up. It can be as easy as running a quick scan when you notice a dashboard warning or strange vehicle behavior. This small step can reveal underlying issues that could develop into costly repairs later. When you stay proactive, you’re not just reacting to problems—you’re preventing them. For more tips, explore expert strategies to extend your car’s lifespan. Remember, the right tools combined with consistent habits form the backbone of reliable auto care.
3 Lessons I Wish I Knew When I Started Maintaining My Car
One of the most eye-opening lessons I learned early on was that not every noise or warning light demands immediate replacement. Sometimes, simple diagnostics with quality tools reveal underlying issues that, if addressed promptly, can save a ton of money and prevent breakdowns. Another lesson was the importance of understanding your vehicle’s manual and maintenance schedule—knowing what to check and when makes all the difference. Lastly, I realized that investing in good diagnostic equipment and learning how to interpret its data empowers you to take control of your auto maintenance, leading to more confidence and significant cost savings.
Tools That Transformed My Approach to Car Repairs
My go-to resource has become the BlueDriver OBD-II scanner; it provides detailed error codes and real-time data, much like what professionals use. For electrical troubleshooting, a reliable digital multimeter with auto-ranging saved me from unnecessary replacements, enabling precise fault localization. When it comes to routine checks, a quality tire tread gauge and shop lights help me spot issues early. These tools aren’t just gadgets—they’re game-changers that help me maintain my car efficiently and confidently without relying solely on mechanics.
Embracing Action: A Car Owner’s Call to Care
Now is the perfect time to take a proactive stance on your vehicle care. Regular DIY checks, combined with the right tools, can extend your car’s lifespan, improve safety, and reduce unexpected expenses. Whether you’re tackling a simple tire rotation or diagnosing engine vibrations, the more involved you are, the better you understand your car’s needs. Remember, every small effort adds up—making car maintenance less daunting and more rewarding. For tailored tips and reliable tools, visit this essential guide on tune-ups. How will you start taking better care of your vehicle today?