
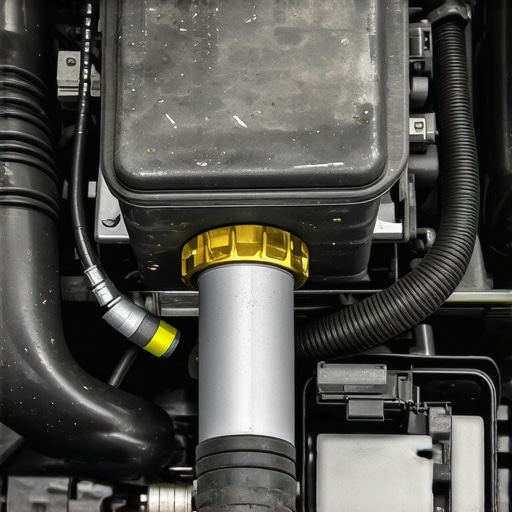
I remember the first time I struggled to stop my car and wondered if my brakes were just as tired as I was after a long day. That moment of uncertainty—when your vehicle feels different, almost like it’s resisting your commands—can be genuinely unsettling. It’s a lightbulb moment for many car owners who realize their brake system isn’t functioning properly, and often, the culprit is a leaking brake booster vacuum.
Today, I’ll guide you through detecting if your brake booster is leaking vacuum and how to handle it before it turns into a costly repair. Trust me, catching this problem early can save you a lot of headaches and money down the line.
Why Breaching the Brake Booster Vacuum Matters for Your Safety
Your brake booster is a vital part of your vehicle’s braking system, amplifying your foot pressure so you can stop smoothly. When it starts leaking vacuum, your braking performance can suffer. You might notice a hard pedal, a spongy feel, or even that your brake pedal sinks to the floor—terrifying signals that something’s wrong.
Understanding these signs is crucial because a faulty brake booster can compromise your safety. It’s not just about brake feel; it’s about stopping reliably in an emergency. Recognizing the symptoms early allows you to schedule repairs before something serious happens.
Is diagnosing a leaking vacuum booster worth the effort or just another hype?
Now, I’ll admit, I used to ignore minor brake issues, thinking they’d clear up on their own. But I learned the hard way that neglecting a leaking vacuum can lead to a complete brake failure. Early on, I made the mistake of assuming that a soft pedal was just normal wear and tear, which delayed proper diagnosis and repair. That delay almost cost me more than I’d like to admit.
Getting familiar with common signs—like difficulty building brake pressure or unusual hissing sounds—can prevent you from falling into similar traps. For a more detailed understanding, check out [this resource](https://glassfixauto.com/understanding-brake-system-repairs-a-guide-for-vehicle-owners) which explains how brake system repairs can impact your safety.
If you’re questioning whether your brake issues are just minor or potentially dangerous, stay tuned. We’ll cover how to test your brake booster for leaks and what steps to take next, empowering you to take charge of your vehicle’s health.
Test Your Brake Pedal Like a Pro
Start by turning off your engine and pumping the brake pedal several times until it feels firm. Then, press it down and hold for about 30 seconds. If the pedal slowly sinks to the floor or feels unusually hard to press, it indicates a leak in the brake booster vacuum. I once performed this test on my own vehicle after noticing a spongy pedal, and the pedal’s gradual sinking confirmed my suspicion of a vacuum leak, leading me to inspect and replace the faulty brake booster.
Listen for Hissing Sounds During Engine Idle
Start the engine and listen closely around the brake booster area, typically near the driver’s side firewall. A hissing noise suggests vacuum loss. I remember when I heard this gentle hissing during a routine drive; it was a clear sign that my brake booster was leaking, prompting me to check it thoroughly.
Inspect for Visible Cracks and Leaks
Carefully examine the brake booster and vacuum hoses for cracks, tears, or disconnected hoses. Use a flashlight to spot tiny leaks or damage. In my experience, a torn vacuum hose was the culprit, and replacing it fixed the hard brake pedal issue. This step is quick and can save you from more extensive repairs later.
Apply Soapy Water to Identify the Leak
Mix soap and water in a spray bottle and spray it around the brake booster and hoses while the engine is running. Bubbles forming indicate a leak. I found a tiny crack in my booster after spraying and observing bubbles, which was a satisfying discovery that led to a full replacement.
Perform a Vacuum Hold Test
Connect a vacuum pump to the brake booster and check if it holds vacuum for at least 30 seconds. If the vacuum drops quickly, the booster is leaking. While this test requires some basic tools, it provides definitive proof of the issue. I used a hand-held vacuum pump during a repair, which confirmed the leak and prevented me from wasting money on unnecessary parts.
Replace or Repair the Faulty Component
If you identify a cracked booster or damaged hoses, replace them promptly. Remember, a leaking vacuum booster can severely impair your braking performance, risking safety. When I replaced my defective booster, the improvement in brake feel was immediate and reassuring.
Consider a Professional Inspection
If you’re unsure about the diagnosis or lack the tools, consult a trusted auto repair shop. They can perform a thorough inspection and ensure your braking system is safe. Regular tune-ups and inspections can also prevent future issues; I recommend [tune-up strategies](https://glassfixauto.com/maximize-your-cars-lifespan-with-expert-tune-up-strategies) for optimal vehicle performance.
Many car owners approach auto repair and maintenance with misconceptions that can lead to costly mistakes. One common myth is that all repairs are straightforward and can be tackled at home with minimal knowledge. In reality, some issues require expert diagnosis and specialized tools; attempting DIY fixes without proper training often results in incomplete repairs and further damage. For example, replacing a brake fluid reservoir might seem simple, but neglecting the precise bleeding procedures can compromise your braking system’s safety, as discussed in [this comprehensive guide](https://glassfixauto.com/brake-service-myths-what-you-need-to-know-before-your-next-stop). Another misconception revolves around tune-ups. Many believe they are only necessary when the engine isn’t running smoothly, but regular tune-ups—guided by expert strategies—prevent performance degradation and fuel inefficiency, which you can learn more about [here](https://glassfixauto.com/tune-up-your-car-for-peak-performance-essential-maintenance-tips). A dangerous trap is ignoring the subtle signs of wear, such as a slight pull during braking or unusual vibrations, assuming they are insignificant. Overlooking these cues can escalate minor problems into major repairs; for example, a worn-out brake rotor can cause vibrations that reduce stopping power and increase safety risks. It’s vital to recognize the hidden nuances, like how subtle brake pedal pulsations often indicate uneven rotor wear, as outlined in [this article](https://glassfixauto.com/the-difference-between-brake-fade-and-failing-rotors). For those seeking advanced insights, understanding the importance of proper fluid dynamics in your vehicle’s systems can save lives. Studies show that neglecting optimal fluid levels and quality—such as brake fluid or coolant—can alter vehicle handling unexpectedly. If you think all auto fluids are interchangeable or neglect regular inspections, you’re mistaken. Maintaining high standards in these areas is essential for safety and longevity. Have you ever fallen into this trap? Let me know in the comments! Remember, proactive maintenance and expert guidance are your best allies on the road.
Keep It Running: My Essential Tools for Auto Care
Maintaining your vehicle’s performance hinges on having the right tools and knowing how to use them effectively. I personally swear by a quality set of diagnostic scan tools like the Autel MaxiScan MS300—it’s affordable yet robust enough to read and clear engine codes, helping me catch issues early before they escalate. For brake system diagnostics, a vacuum pump is invaluable; I use the BlueDriver Vacuum Pump Kit because it allows me to perform leak tests on the brake booster and other vacuum-dependent components with precision, saving time on guesswork.
When it comes to routine maintenance like oil changes or inspecting belts and hoses, a combined mechanic’s toolkit that includes wrenches, screwdrivers, pliers, and a mechanic’s mirror has proven indispensable. The mirror helps me get a clear view of hard-to-reach areas, ensuring thorough inspections.
Embracing Digital Tools for Better Results
Beyond physical tools, software plays an increasingly vital role. I rely on OBD-II interface devices that connect to my smartphone, giving me instant access to detailed diagnostic data and live sensor readings. Apps like OBDLink Live or TOAD Pro transform my phone into a portable diagnostic station, enabling me to monitor engine health and perform troubleshooting on the go. As vehicle electronics become more complex, embracing these digital tools ensures I stay ahead of potential issues and schedule maintenance proactively.
How Do I Maintain Auto Tools for Long-Term Reliability?
Proper maintenance of your tools prolongs their lifespan and guarantees accuracy. Regularly clean and lubricate mechanical parts, store electronic devices in dry, dust-free environments, and calibrate diagnostic equipment annually. For example, I keep my vacuum pump’s seals lubricated and inspect electrical connectors periodically to prevent failures. Investing in quality storage cases minimizes damage and keeps your toolkit organized, making maintenance tasks faster and more efficient.
The Future of Auto Maintenance Tools
Looking ahead, the trend points toward smarter, interconnected diagnostic systems. Manufacturers are developing tools with AI-driven analysis, predictive maintenance alerts, and enhanced wireless connectivity. Staying updated with the latest equipment—like auto repair trends for 2025—will empower you to diagnose problems more accurately and perform repairs with confidence. I recommend trying out a sophisticated OBD-II scanner with laser measurements or thermal imaging capabilities to identify issues early, before they become serious.
How do I keep my tools functioning optimally over time?
In my experience, routine calibration and gentle cleaning after each use are key. For electronic devices, updating firmware and software as recommended by the manufacturer keeps diagnostics accurate. For mechanical tools, replacing worn-out parts and lubricating moving components prevents breakdowns. Remember, investing time in maintaining your tools pays off with fewer surprises and more reliable repairs. Want to elevate your auto care game? Try calibrating your diagnostic scanner using manufacturer guidelines—it’s a simple step that improves diagnostic accuracy significantly, as detailed in this comprehensive brake system guide.
The Hardest Lessons I Learned About Brake Repairs and Safety
One of the most valuable lessons I uncovered is that neglecting subtle brake issues can lead to dangerous situations. Early signs like a soft or sinking pedal shouldn’t be ignored—these often point to vacuum leaks that compromise safety. Recognizing these signs early, through personal experience, has saved me from costly repairs and kept my family safe. My biggest tip is to listen for sounds and test your brake pedal regularly; it’s simple yet powerful in early detection.
Tools That Turn Auto Maintenance Into Confidence
My essential toolkit for brake system diagnoses includes a quality vacuum pump—like the BlueDriver Vacuum Pump Kit—which helps me perform leak tests with precision. Pairing this with a good diagnostic scanner such as Autel MaxiScan MS300 allows me to keep tabs on my vehicle’s health. Using these tools not only makes repairs easier but also more accurate, ensuring peace of mind after every fix. Trust me, having the right equipment transforms a daunting task into a manageable process.
Keep Your Car in Top Shape—Every Step Matters
Regular inspections, immediate attention to warning signs, and using trusted repair guides are keys to longevity. For more on routine tune-ups that prevent issues like vacuum leaks, check out these maintenance tips. Staying proactive and informed can make all the difference in your auto care journey, turning frustrations into confidence and ensuring your vehicle is always ready to roll.
Your Turn to Take Action
Have you ever noticed subtle signs of braking issues before they became major problems? Share your experiences below, and let’s learn from each other’s journeys to safer, more reliable driving!
,