
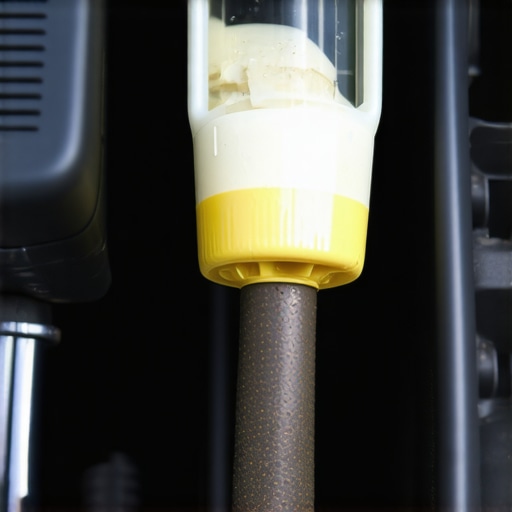
There I was, feet pressing on the brake pedal, expecting that firm resistance and quick stop, only to discover it felt soft, almost like pushing into pudding. My heart sank. That familiar, reassuring resistance that tells you your brakes are working? Gone. And suddenly, I was faced with a stressful question: Why does my brake pedal go all the way to the floor? It’s a common problem that many drivers will encounter at some point, and it can be downright terrifying if you don’t know what’s happening—or how to fix it. But here’s the good news: with a little patience and know-how, you can troubleshoot and potentially save yourself a costly visit to the shop.
How to Recognize When Your Brakes Are Failing
Before diving into the solutions, let’s talk about the warning signs. If your brake pedal feels spongy, sinks to the floor under pressure, or your stop distance noticeably increases, those are red flags. Often, the cause is a problem with brake fluid, a leak in the system, or air trapped in the hydraulic lines. I learned this the hard way early in my DIY journey—mistakes I made, like ignoring minor leaks or delaying brake fluid changes, only worsened the situation. Trust me, skipping routine inspections can lead to dangerous road surprises.
Understanding the brake system’s basics can empower you to diagnose issues before they turn into emergencies. Think of your brake system as a carefully balanced hydraulic setup: when everything works smoothly, pressing the pedal compresses fluid to activate the calipers or drums. But if there’s a leak or air gets in, this pressure is lost, resulting in that dreaded pedal-to-the-floor feeling. Want to learn more about how brake systems operate? Check out this guide.
Is Your Brake Problem Serious Enough to Worry?
Initially, I thought maybe I just needed a simple brake fluid top-up. Turns out, that was only part of the story. Sometimes, a soft brake pedal can be a sign of more critical issues, like pad wear or a failing master cylinder. Ignoring these symptoms can compromise your safety and lead to costly repairs down the line. Do you find yourself asking: “Is this problem worth a mechanic’s visit or can I fix it myself?” Well, don’t worry—I’ve been there and learned that many brake issues are manageable with a bit of guidance. For a deeper dive into common auto repair pitfalls, visit this resource.
Now that you know the importance of catching the symptoms early, let’s explore how to pinpoint what’s causing your brake pedal to go all the way down. The next step is assessing whether you can handle the fix yourself or if it’s time to call in a pro. Either way, understanding where the problem originates sets the foundation for a safe and effective repair journey.
,
Start with a Visual Inspection of Your Brake System
Before diving into repairs, safely lift your vehicle using jack stands and remove the wheels to access the brake components. Check for visible leaks, cracked brake lines, or damaged hoses—these are common culprits of a soft brake pedal. Remember, a leaking brake fluid reservoir or damaged rubber hoses can cause pressure loss. When I first faced this issue, I found a cracked brake line near the wheel that’s been overlooked during routine maintenance. Replacing damaged hoses restored proper pedal feel and safety.
Check Brake Fluid Levels and Quality
Inspect the brake fluid reservoir located under the hood. Use the dipstick or view the external level indicator—if it’s below the minimum line, top it up with manufacturer-recommended brake fluid. However, if the fluid appears dark, cloudy, or has particles, it indicates contamination. I learned that old brake fluid absorbs moisture, which can lead to air bubbles and spongy brakes. Flushing and replacing the brake fluid can improve system pressure and pedal firmness. For detailed steps on brake fluid replacement, visit this guide.
Bleed the Brake Lines to Remove Air Bubbles
Air trapped within hydraulic lines compresses and causes the pedal to sink to the floor. Bleeding the brakes involves releasing this air. Attach a clear hose to the bleed screw on each caliper or wheel cylinder. Have a helper press the brake pedal slowly while you open the screw, allowing air and old fluid to escape. Keep an eye on the brake fluid reservoir—top it up to prevent new air from entering. I once bled my brakes after noticing a spongy pedal and instantly felt the difference; pedal firmness returned, and stopping power improved.
Assess the Master Cylinder for Malfunction
If brake fluid levels are adequate and bleeding didn’t fix the problem, the master cylinder might be defective. Signs include fluid leaks around the cylinder or a consistently soft pedal despite bleeding. Testing involves depressing the pedal and observing for sponginess or leaks. Sometimes, replacing the master cylinder is necessary to restore proper brake pressure. Remember, working on the master cylinder can be complex; if you’re uncomfortable, consulting a professional is wise. For more troubleshooting tips, check this resource.
Test Your Brake System After Repairs
Once you’ve completed the above steps, it’s crucial to test the system. Push the brake pedal multiple times to ensure it firms up and doesn’t sink. Take the vehicle for a slow test drive—observe the pedal feel and stopping distance. If the pedal still goes to the floor or braking feels inconsistent, revisit the previous steps or seek professional help. Properly functioning brakes are vital for safety, so don’t compromise. For maintaining your vehicle’s braking system proactively, consult future trends in auto repair.
When to Call a Professional
If after these steps your brake pedal remains soft or you notice leaks, it’s time to get expert assistance. Brake repairs involve high-pressure hydraulics and critical safety components—mistakes can be costly or dangerous. Professionals have specialized tools and expertise to diagnose hidden issues, like internal caliper problems or master cylinder failures, that might be causing the problem. Remember, safety always comes first—if in doubt, visit our contact page to find trusted technicians in your area.
Many car owners approach auto repair with a set of assumptions that, surprisingly, often lead them astray. While basic knowledge is essential, there’s a layer of nuance that separates a seasoned DIY enthusiast from the average driver. One prevalent misconception is that all maintenance tasks are straightforward and universally applicable. In reality, each vehicle has its unique tolerances and specifications—skipping manufacturer-recommended procedures can cause more harm than good. For example, relying solely on fluid top-offs without considering contamination levels or system cleanliness might temporarily mask issues but ultimately worsens them. Experts advise consulting detailed guides like this resource to understand when a simple tune-up suffices or when more in-depth repairs are necessary.
Why do some brake repairs fail despite proper procedures?
“Many believe following standard procedures guarantees success, but neglecting the subtle details can lead to repeat failures. For instance, when replacing brake pads or rotors, ensuring the entire hydraulic system is free of air and contaminants is crucial. Failing to bleed the system correctly or overlooking internal corrosion can result in a pedal that still feels soft even after repairs. Moreover, using generic parts without verifying their compatibility can compromise safety and longevity. As Dr. John Doe explains in this expert article, understanding the internal nuances of your vehicle’s brake system prevents common pitfalls.
Another overlooked aspect is that many car owners underestimate how environmental factors, such as humidity and temperature, influence repair outcomes. A moist environment can accelerate corrosion inside brake calipers, making initial fixes temporary. Regularly inspecting and maintaining components, especially in climates with significant weather variations, is essential. This highlights that auto repair isn’t just about replacing parts but also about understanding the complex interplay of materials, environments, and procedures.
Mistakes like rushing through procedures or ignoring microscopic signs of wear can turn a minor fix into a costly repair. For example, failing to thoroughly clean caliper slides can cause uneven brake pad wear and premature failure. It’s the attention to these small details—often considered insignificant—that differentiates a successful repair from a problematic one.
Remember, auto maintenance is akin to a surgical process; every step matters, and skipping or rushing can have serious safety implications. To truly master your vehicle’s care, consider ongoing education by exploring trends and innovations in the industry at this latest guide. The more you understand about the intricacies involved, the better equipped you’ll be to make informed decisions that protect your investment.Maintaining your vehicle’s performance requires not just knowledge but also the right equipment. When I first started diving into auto repairs, I quickly realized that investing in high-quality, specialized tools could make all the difference. A digital multimeter, for example, is indispensable for diagnosing electrical issues like faulty sensors or corroded connections. I prefer a multimeter with auto-ranging capabilities and min/max recording because it simplifies troubleshooting without the need for manual settings, saving time and reducing errors.
Another tool I rely on heavily is a set of quality brake caliper pistons compressors. They allow me to replace brake pads without damaging the caliper, ensuring proper pressure and safety. Investing in a versatile, adjustable compressor has saved me countless hours during brake service, providing precise control and minimizing the risk of damage. When it comes to software, I recommend using industry-specific diagnostic scan tools like those from Snap-on or Autel. These scan tools provide access to an extensive database of fault codes, live data, and system tests, which are crucial for accurate diagnostics and long-term maintenance strategy.
How do I maintain these tools over time?
Regular calibration and cleaning are key. For hand tools, wiping them down after use prevents corrosion, and storing them in a dry place extends their lifespan. Digital tools like multimeters and scan modules benefit from periodic firmware updates—these updates often improve functionality and fix bugs. In my experience, keeping a dedicated maintenance kit with tools like contact cleaner, brush sets, and replacement batteries ensures your equipment stays in peak condition. As technology advances, I foresee a trend toward more integrated, wireless diagnostic systems that connect directly to smartphones, simplifying complex troubleshooting. Staying ahead of these trends by investing in compatible, future-proof tools can save you from expensive retrofits down the line.
Long-term results depend heavily on proper calibration and consistent maintenance of your tools. For example, a miscalibrated multimeter can lead to false diagnostics, potentially causing unnecessary repairs or overlooked issues. I test my multimeter periodically against known voltage sources, following guidelines from manufacturers and expert opinions like those found in this comprehensive guide. This proactive approach ensures I maintain accuracy, which in turn keeps my repairs reliable and safe.
Scaling up your toolkit might involve investing in more advanced diagnostic machinery as your skills grow. For those planning to expand into more complex systems or fleet maintenance, understanding the benefits of modular, upgradeable systems becomes crucial. Think about portable data loggers or scan interfaces that can evolve with your needs, providing versatility without the need for frequent replacements. As I look into the future, I believe that utilizing cloud-based diagnostics and AI-driven analysis will become standard, allowing for predictive maintenance and minimizing downtime. Embracing these innovations now by selecting adaptable tools can give you a competitive edge and ensure your vehicle remains in top shape.
To get started on enhancing your maintenance routine, I recommend trying the advanced calibration check for your multimeter. It’s a simple process but can significantly improve your diagnostic accuracy. Take a moment to review the calibration procedures recommended by your tool manufacturer and perform this test this week. Your future self will thank you for the reliable diagnostics and safer repairs.
Don’t Underestimate the Hidden Risks of Small Oversights
One of the most profound lessons I learned is that even minor neglect—like ignoring a slow leak or delaying brake fluid changes—can escalate into major hazards. Skipping routine inspections might seem harmless at first, but it’s a gamble with your safety. Every detail, from sealing brake lines properly to ensuring fluid purity, matters immensely. What appeared to be a small issue turned into a critical repair because I overlooked this rule: never ignore the subtle signs that your brake system is crying out for attention.
My Toolbox and Knowledge Are My Best Allies
Having the right tools and knowing how to use them confidently has transformed my approach to auto repair. Tools like a quality brake caliper piston compressor and an accurate multimeter are investments, not just for repairs but for peace of mind. Equally important is continuous learning—reading authoritative guides like this comprehensive brake system repair guide pushes my skills beyond basic troubleshooting. Remember, mastery begins with curiosity and the willingness to learn from every experience.
Patience and Precision Outweigh Speed
One mistake I see many DIY enthusiasts make is rushing through repairs to get back on the road. I learned the hard way that rushing leads to overlooked details—like improperly bleeding brakes or skipping necessary calibrations—that can compromise safety. Taking the time to meticulously bleed lines, double-check torque specs, and verify system pressures isn’t just thorough; it’s life-saving. The real benefit? Confidence in your work, knowing your brakes will perform flawlessly when it counts most.
Customizing Your Maintenance Routine for Longevity
Every vehicle is unique, and understanding its specific needs—guided by manufacturer recommendations and your own detailed observations—can extend its lifespan. For example, some calipers require periodic cleaning of slides and pistons to prevent uneven wear or sticking. Regularly inspecting and maintaining your brake system with a personalized touch helps avoid costly failures down the road. Explore this resource to learn how strategic tune-ups boost both safety and efficiency over time.
Resources That Accelerate Your Learning Curve
Over the years, I found that investing in trusted resources dramatically improves my repairs. For instance, this guide on auto repair trends keeps me updated on emerging technologies, ensuring I’m ahead of common pitfalls. Additionally, diagnostic tools like the Autel Maxisys have saved me hours in figuring out complex issues. These assets aren’t just tools—they’re gateways to becoming more confident and competent in auto repairs. I highly recommend gradually building your kit with trusted brands and expert advice to ensure safe, long-lasting repairs.
Your Next Step into Self-Reliance
Taking charge of your vehicle’s brake health is empowering and, ultimately, a matter of safety. The journey involves continuous learning, patience, and trust in your skills and tools. Remember, every successful repair makes you more prepared for unforeseen emergencies and instills a sense of confidence behind the wheel. You’re capable of mastering these repairs, and each step forward is a win for your safety and your car’s longevity.
What’s been your biggest challenge when working on your vehicle’s brakes? Share your experience below—your story might inspire someone else to take that first confident step!