
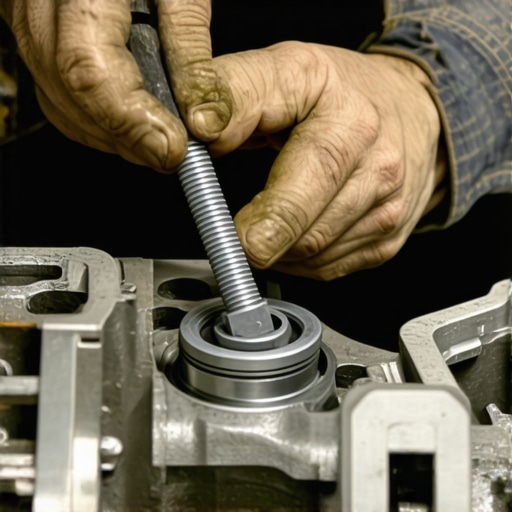
Have you ever been deep into a car repair, feeling confident… and then hit a wall? That’s exactly what happened to me one sweltering summer day when I was replacing my engine’s thermostat. Everything was going smoothly until I tried to remove a stubborn bolt, and suddenly, it snapped halfway out. My heart sank. That terrible moment when a bolt shears off inside your engine is more common than you think, and honestly, it can turn a simple job into a frustrating nightmare.
Why a Broken Bolt Can Halt Your Car’s Performance in Its Tracks
That broken bolt might just seem like a minor inconvenience, but it can lead to serious engine issues if left unaddressed. From oil leaks to compromised structural integrity, a stuck or sheared bolt can cause turbulence in your car’s performance and safety. The good news? With the right approach, you can tackle this problem head-on without calling in a professional every time. I’ve learned that patience and the right tools make all the difference—I’ve even seen precious engine components saved thanks to a few clever tricks.
Is Removing a Broken Bolt Really Worth the Hassle?
Some car owners worry that attempting to remove a broken bolt might cause more damage than good. Trust me, I made this mistake early on by rushing in without proper knowledge, which led to more threading issues. However, knowing the right methods can make all the difference. Proper removal not only saves money but also ensures your engine remains in top shape. According to automotive experts, neglecting broken fasteners can escalate into costly repairs down the line. So, yes—it’s absolutely worth learning how to handle this situation properly.
Secure the Area and Assess the Damage
Before attempting to remove the broken bolt, ensure the vehicle is parked on a flat surface and the engine is cooled down. Disconnect the battery to prevent any accidents. Use a flashlight to examine the bolt, checking for corrosion or damage that might affect removal. In my experience, a thorough inspection prevents surprises mid-process and helps determine if special tools are needed.
Gather the Essential Tools and Materials
Equip yourself with a set of quality penetrant spray, small chisels, punch tools, screw extractors (also called bolt removers), a hardened drill bit set, and safety gear like goggles and gloves. I once neglected the proper extractor for a stubborn bolt, leading to a damaged socket. Using the right tools streamlines the process and minimizes risks.
Apply Penetrating Oil and Wait
Spray the penetrating oil generously on the bolt and let it sit for at least 15-30 minutes. This step is crucial, especially if rust is involved, as it helps loosen corrosion bonds. I remember soaking a rusted bolt overnight, which made extraction significantly easier—saving hours of frustration.
Start with the Right Drilling Technique
Use a center punch to create a small indentation on the bolt’s top to guide the drill bit accurately. Select a drill bit slightly smaller than your bolt’s diameter. Proceed with slow, steady pressure to avoid damaging surrounding threads or components. I once drilled too fast and cracked the housing—teaching me the importance of patience and precision.
Use a Bolt Extractor or Left-Handed Drill Bit
If the bolt refuses to turn, insert a bolt extractor into the drilled hole and turn counter-clockwise with a wrench. Alternatively, a left-handed drill bit can remove the bolt as it drills. When I successfully removed a sheared bolt with a bolt extractor, it felt like a small victory and kept my engine intact.
Address Residual Threads or Fragments
If parts of the bolt remain, carefully remove them using fine-tipped pliers or a specialized pick tool. Clean the threaded hole with compressed air or a brush to clear debris. Proper cleaning ensures new bolts will seat correctly, preventing future problems.
Optional: Re-tap or Replace the Threaded Hole
For heavily damaged threads, consider retapping the hole to restore its integrity or installing a threaded insert. This step solidifies your repair and prevents leaks or loosening. In my case, retapping saved me from costly component replacement, reinforcing the importance of proper thread repair techniques.
Final Checks and Testing
Once the new bolt is installed, tighten it to manufacturer specifications. Reconnect the battery, start the engine, and check for leaks or unusual sounds. Confidence in the repair comes from a thorough test. Remember, if you’re unsure or encounter unusual resistance, consulting a professional or exploring trusted guides like troubleshooting tips can save time and prevent damage.
Mastering bolt removal not only makes you more self-reliant but also extends your vehicle’s lifespan. Patience, proper tools, and a methodical approach are your best allies in this common but manageable challenge.
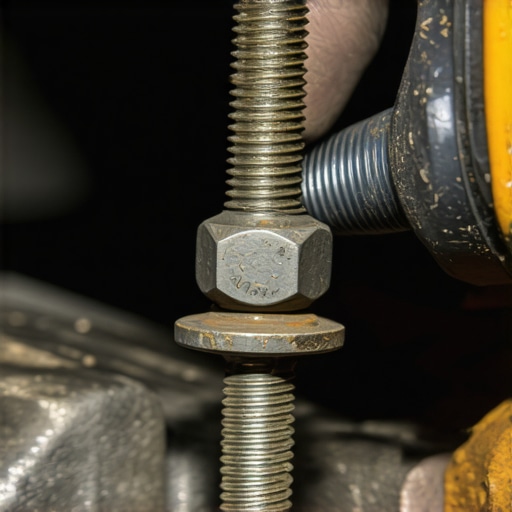 Many vehicle owners believe that a standard tune-up or car service is a simple checklist, but in reality, there’s much more beneath the surface. One widespread misconception is that all mechanics follow the same procedures, leading to trust in generic recommendations that overlook your car’s unique needs. For instance, while some suggest that replacing spark plugs alone boosts performance, neglecting other vital components like the air filter or fuel injectors can limit results. Advanced technicians know that a comprehensive approach—considering fuel system cleaning, timing adjustments, and sensor calibrations—can significantly extend vehicle lifespan and efficiency. Moreover, many drivers underestimate the importance of diagnosing underlying issues before performing routine maintenance. An unresolved problem, such as a failing ABS sensor, might cause brake performance issues that a standard brake service won’t fix unless properly diagnosed beforehand.
Are We Over-Simplifying Auto Repairs by Following Myths?
Studies show that untrained or misguided advice can lead to costly repairs or safety hazards. For example, replacing brake pads without inspecting the rotors might be a waste of time, as warped rotors require resurfacing or replacement—an insight highlighted in detailed guides like Understanding Brake System Repairs. Instead of sticking to common myths, vehicle owners should seek information from trusted sources that emphasize diagnostic precision and tailored maintenance strategies. This nuanced understanding ensures you avoid the ‘oops’ factor—like guessing when your steering wheel vibrates or your brakes squeal—and instead, taking action that preserves safety and performance. For comprehensive advice, explore expert tune-up strategies that focus on personalized solutions rather than generic fixes. Have you ever fallen into this trap? Let me know in the comments.
Keep Your Vehicle Running Smoothly with the Right Tools
Maintaining your car over the long term requires not just knowledge, but also the right equipment. One tool I swear by is a high-quality digital code reader like the BlueDriver Bluetooth Pro OBDII Scan Tool. It provides instant diagnostics directly from your smartphone, saving me trips to the mechanic for simple issues and allowing me to understand underlying problems thoroughly. This device helps me stay proactive by catching problems early, such as pending sensor failures or emission system glitches, before they turn into costly repairs.
Another essential is a set of precision torque wrenches. I opt for a GearWrench Click Torque Wrench because it ensures components like brake calipers or suspension bolts are tightened to manufacturer specifications. Over-tightening can lead to parts failure, while under-tightening compromises safety. Using a calibrated torque wrench guarantees adherence to those specs, keeping my vehicle in top shape for thousands of miles.
Implementing Software and Maintenance Schedules
Modern vehicles often benefit from dedicated maintenance apps. I use MyCarfax to track service intervals, recall notices, and maintenance reminders. This helps me plan proactive tune-ups, fluid changes, and part replacements based on my car’s specific needs. Consistent scheduling based on real data means fewer surprises and a longer vehicle lifespan. Exploring expert strategies can further optimize your maintenance routine.
Preparing for the Future of Auto Upkeep
As automotive technology advances, tools like AI-driven diagnostic systems and remote monitoring are becoming commonplace. In the near future, I predict a shift toward fully integrated vehicle health management, where sensors constantly transmit data to your smartphone, alerting you to issues in real-time. Staying ahead involves investing in adaptable tools and staying informed about emerging trends, like upcoming innovations.
How do I Maintain My Car Over Time?
Routine inspections and preventive measures are key. I recommend regularly checking your fluid levels, brake pads, and tire condition using basic tools like a dipstick, a flashlight, and a properly calibrated tire tread gauge. Don’t forget to consult trusted guides to interpret your findings—such as this comprehensive guide. Implementing a scheduled maintenance plan and using diagnostic tools can dramatically extend your vehicle’s lifespan and keep it performing optimally.
To get started, try integrating a diagnostic scan tool into your routine maintenance. Even a simple check of engine codes can reveal issues before they become costly repairs. Remember, staying informed and prepared is the secret to reliable, long-term vehicle performance.
< >
>
Image Description: Close-up of a mechanic using a digital OBDII scanner on a car dashboard, highlighting modern diagnostic tools in auto maintenance.
The Hardest Lesson I Learned About Tune-Ups and Auto Repairs
One crucial insight I wish I had embraced sooner is that rushing through repairs often leads to costly mistakes. Patience and meticulousness save time and money in the long run, especially when dealing with stubborn bolts or complex systems. Adopting a methodical approach, such as properly diagnosing issues before jumping into fixes, has transformed my automotive maintenance routine, preventing unnecessary damage and ensuring reliable performance.
Tools and Resources That Truly Make a Difference
Over the years, I’ve found that investing in quality diagnostic tools like the expert tune-up strategies guide or a reliable code reader such as the BlueDriver Bluetooth Pro not only saves me trips to the mechanic but also deepens my understanding of my vehicle. Additionally, trusted books on car maintenance and online tutorials from reputable sources equip me with knowledge that boosts confidence during DIY repairs. These resources have proven invaluable in transforming what used to be intimidating tasks into manageable projects.
Embrace the Challenge and Enjoy the Growth
Auto repair is more than just fixing parts; it’s about becoming more self-reliant and understanding your vehicle’s language. Each repair, especially tackling stubborn bolts or diagnosing mysterious noises, deepens your expertise and satisfaction. Remember, every professional mechanic started somewhere—your willingness to learn and improve can lead to a more rewarding and cost-effective driving experience. So, don’t hesitate to dive in, explore, and refine your skills—your car and your wallet will thank you.
What was the most surprising lesson you learned while repairing or maintaining your vehicle? Share your story below!