
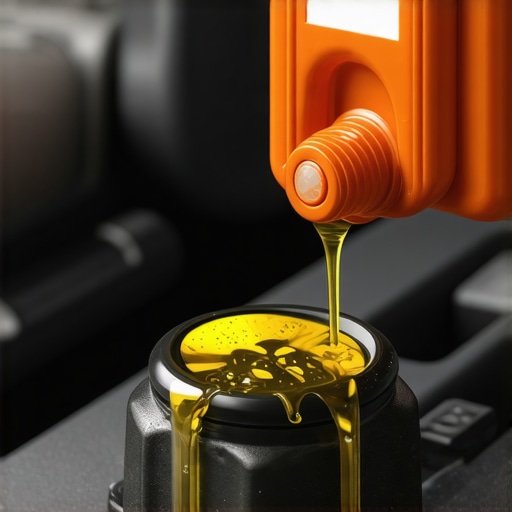
Ever jacked up my car, ready for a quick oil change, only to realize I had added an extra quart instead of the right amount? That sinking feeling in my gut reminded me how easy it is to make a small mistake with big consequences. Believe me, I learned the hard way — overfilling might seem harmless, but it can lead to serious engine problems down the road.
Why One Quart Too Much Can Wreak Havoc on Your Engine
Many car owners, including myself early on, think that topping off a bit more oil won’t hurt — how bad could one extra quart be? Unfortunately, that’s a misconception. Overfilling your engine oil can cause increased pressure within the crankcase, leading to oil foaming, which diminishes lubrication effectiveness. Moreover, excess oil can splash onto engine components, causing foaming and aeration, which ultimately leads to poor engine performance and even damage over time.
Interestingly, a study from the Engineering Toolbox highlights that overfilled oil can cause increased wear and tear, reducing the lifespan of engine parts. This is why it’s crucial to get the quantity just right. From personal experience, I once neglected to check my oil level after topping off, and it resulted in a subtle knocking sound that took months to diagnose — a costly reminder to be precise.
So, why does overfilling happen so often? Sometimes it’s due to rushing or misjudging the initial fill, but more often, it’s because people assume a bit more oil won’t make a difference. If you’ve ever faced engines running rough after a quick oil change, overfilling might be the culprit. Today, I want to help you avoid that mistake with some practical, proven tips.
Are You Wasting Your Money or Damaging Your Engine? The Real Risks of Overfilling
The reality is, a simple mistake like adding just one extra quart can lead to costly repairs. It’s a mistake I made early in my auto repair journey, and it taught me to always double-check my work. Trust me, neglecting this small detail can lead to increased oil consumption, engine overheating, and even seal failures.
Curious if you’ve ever overfilled your oil? Or whether a small mistake actually warrants a trip to the mechanic? Let’s explore how to avoid this common pitfall and keep your engine running smoothly for miles to come. For more tips on general vehicle maintenance, consider visiting our comprehensive car service checklist.
Check Your Oil Level Regularly
Before starting any oil topping process, park your vehicle on a level surface and turn off the engine. Wait at least five minutes to allow the oil to settle. Pull out the dipstick, wipe it clean with a lint-free cloth, then insert it back fully and remove again to check the oil level. Make sure to read the markings carefully; aim for the ‘full’ or ‘max’ line, but never exceed it. During my first oil change, I learned this the hard way when I overlooked the level after topping off, resulting in overfilling. Now, I always double-check to avoid that mistake.
Use the Correct Measurement Tools
Employ a quality funnel for adding oil to prevent spills and overpouring. When dealing with quarts or liters, use a measuring cup with clear markings to control the exact amount being added. For example, I once added oil directly from a large container without measuring, and it spilled onto my engine bay. Using a measuring device ensures precise addition, especially when topping off after a partial oil change.
Follow Manufacturer Recommendations Strictly
Consult your vehicle’s owner manual to determine the exact oil capacity and recommended oil type. This information helps you avoid adding too much or too little. For instance, if your manual states the capacity is 4.5 quarts, add oil in small increments—1 quart at a time—and check the level after each addition. This method prevents accidental overfill, which I experienced during a previous oil top-up when I underestimated the total required amount.
Incremental Filling and Monitoring
Pour oil gradually—about half a quart or one liter at a time—and continuously check the level with the dipstick. Allow the engine to idle for a minute after each addition to let the oil circulate. This step reminded me of a time when I added oil too quickly, causing a spill and overfill. Taking it slow and monitoring the level ensures precise filling and prevents engine damage from over- or under-filling.
Maintain a Consistent Check Routine
Make it a habit to check your oil level monthly or before long trips. Consistent monitoring helps catch overfilling early if it occurs. When I started this routine, I noticed a tiny excess after a refill and had to drain some out, saving me from potential damage and costly repairs. Regular checks also help you become familiar with your vehicle’s oil consumption pattern, making overfill detection easier.
Properly Remove Excess Oil When Overfilled
If you accidentally fill beyond the recommended level, drain the excess oil promptly. Use a suction gun or drain plug, if accessible, to remove the surplus without having to remove the oil fill cap again. During one recent service, I used a turkey baster to siphon out the excess oil through the dipstick hole. This quick action prevented possible engine problems caused by overfill, ensuring lubrication remains optimal.
While most car owners believe that replacing brake pads or performing routine tune-ups is straightforward, there’s a often overlooked layer of complexity that can mean the difference between a smooth ride and costly repairs. Many fall prey to common myths, such as thinking that all brake pads wear evenly or that a simple oil change resolves all engine issues. In reality, the nuances of auto service demand attention to detail and understanding of underlying systems. For instance, assuming that new brake pads are always the fix ignores the importance of properly inspecting brake rotors, calipers, and hydraulic fluid, which can all compromise braking performance if neglected. A frequent mistake is neglecting to check for uneven wear patterns that signal deeper problems like warped rotors or caliper sticking—issues often missed if one relies solely on surface-level repairs. For advanced enthusiasts, understanding the subtleties of brake fluid hygroscopicity and its impact on brake efficiency is critical. Studies, such as those from the National Highway Traffic Safety Administration, emphasize that degraded brake fluid not only reduces stopping power but also accelerates corrosion within brake components. This highlights how critical proper diagnosis and maintenance are beyond just replacing parts. Have you ever fallen into this trap? Let me know in the comments. To ensure your vehicle’s safety, it’s essential to go beyond the basics and recognize when issues are symptoms of larger system problems. Regular comprehensive inspections and understanding the interconnectedness of auto components can save you money and keep you safe on the road. If you’re curious about the latest trends in auto repair and how to stay ahead, check out auto repair trends to watch in 2025. Remember, a well-informed driver is a safer driver.Maintaining your vehicle’s optimal performance demands more than just basic tools; it requires precision equipment and reliable methods that ensure safety, accuracy, and longevity. Over the years, I’ve integrated a curated selection of tools that help me handle everything from routine tune-ups to complex repairs with confidence. For instance, a high-quality digital multimeter like the Fluke 115 allows me to accurately diagnose electrical issues, preventing unnecessary part replacements and saving time. When dealing with brake systems, I swear by a durable caliper piston tool, which makes replacing brake pads or fluid less messy and more precise—more info on brake system maintenance can be found here. For fluid changes, I use a vacuum pump to extract old oil or coolant, ensuring no air gets trapped and contaminates new fluids. This technique, recommended by industry experts, significantly improves system reliability and performance. Additionally, I rely on an infrared thermometer for quick temperature checks of engine components, which helps in diagnosing overheating issues accurately—an invaluable step I learned from automotive thermal diagnostics studies. Looking ahead, I anticipate that the integration of smart diagnostic tools and wireless sensor systems will revolutionize maintenance routines, making early detection of issues more accessible. And here’s a tip to elevate your maintenance game—try using a digital torque wrench during bolt tightening to ensure components are secured precisely according to manufacturer specs. This small step can prevent over-tightening or under-tightening, both of which lead to long-term problems. To deepen your understanding, I recommend exploring the latest auto repair trends at this page. Investing in the right tools and techniques not only preserves your vehicle’s health but also builds your confidence as a do-it-yourselfer. Regularly reviewing your toolkit and adopting advanced methods will keep your car running smoothly for years to come.
Lessons From the Garage That Changed My Approach to Auto Care
- One of the most impactful lessons I learned was never to underestimate the importance of precise measurement. Just adding a quart without checking could lead to overfill problems I hadn’t anticipated. Now, I always measure my oil in increments and double-check the level before sealing the cap.
- Another revelation was understanding that not all oil is created equal. Using the recommended grade isn’t just a suggestion—it’s essential for the health of your engine. Trusting the manufacturer’s advice has saved me from costly repairs and extended the lifespan of my vehicle.
- Beyond tools and tips, I realized that integrating a regular check-in routine transforms the way I maintain my car. Making oil level checks a monthly ritual helps catch issues early, avoiding surprises on the road and ensuring peace of mind.
- Finally, embracing patience during oil top-offs makes all the difference. Slow, controlled pouring coupled with consistent level monitoring prevents overfilling. This small adjustment in my process has been a game-changer for my engine’s longevity.
Tools and Resources That Do The Heavy Lifting
- Digital Dipstick and Level Indicator: Investing in a reliable digital oil level indicator has been invaluable. It provides instant, accurate readings, eliminating guesswork that can lead to overfill or underfill.
- Graduated Measuring Cup: Using a measuring cup with clear markings ensures I add the right amount of oil without spills or excess. It’s a simple tool that offers big peace of mind.
- Owner’s Manual and Manufacturer Guides: Never underestimate the power of consulting your vehicle’s manual. It’s the most authoritative source for oil capacity and specifications, helping you avoid mistakes that could damage your engine.
- Online Forums and Tutorials: Platforms like our comprehensive car service checklist help refine your maintenance routine and stay updated with the latest best practices.
Take Charge and Keep Your Engine in Top Shape
Remember, mastering simple yet crucial maintenance steps like properly checking and filling your oil can prevent unexpected breakdowns and extend the life of your vehicle. Every time you pop the hood, think of it as an opportunity to connect with your car and ensure it runs smoothly for miles to come. Don’t let a small oversight turn into a costly repair—stay vigilant, stay informed, and take pride in your auto care routine.
Have you ever struggled with exactly measuring your oil? Share your experience below and let’s learn from each other’s wins and mishaps!