
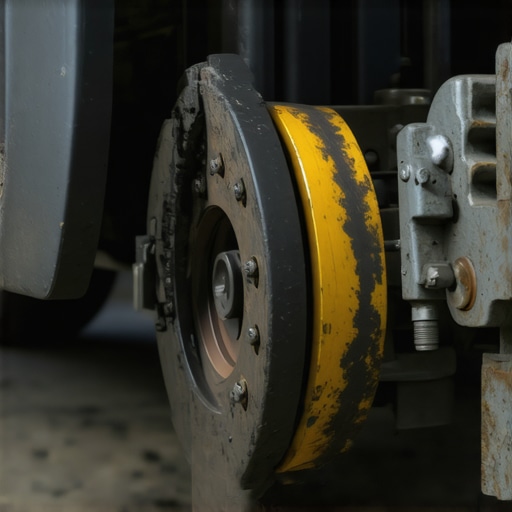
Ever had that unsettling moment when you hit the brake pedal in reverse, and a loud, grating squeal greets you? One day, I was backing out of my driveway when I suddenly heard that maddening grind, making me question if I’d just worn out my brake pads overnight. That lightbulb moment pushed me to dig deeper, and I realized I wasn’t alone—many drivers experience this exact issue but dismiss it as normal. Well, let me tell you, it’s not just about noise; it could be a sign of something more serious lurking beneath the surface.
The Hidden Causes Behind That Reverse Brake Noise
This problem may seem minor at first, but ignoring it can lead to more costly repairs down the line or even compromise your safety. Today, we’re going to explore exactly why your brakes grind only when you’re backing up and what you can do about it. I’ll share personal insights, common mistakes I made early on, and how you can avoid falling into the same traps. Ready to keep your car running smoothly and safely? Let’s get started.
Is Your Brake Squeal Just Normal Wear or Something More Serious?
In my earlier days of car maintenance, I thought a squeal was just the normal sound of brake pads wearing down. Turns out, that was a mistake. Some noises are innocent, but others warn of impending trouble. Early on, I overlooked that metallic grinding noise in reverse, assuming it was nothing. But it wasn’t long before I had to replace my rotors and pads altogether. Remember, catching the problem early can save you money—so don’t dismiss strange noises. For more detailed info on brake system issues, check out this guide on brake repairs and learn what warning signs to watch for.
Inspect Brake Pads and Rotors Carefully
Begin by safely lifting your vehicle using a jack and securing it with jack stands. Remove the wheels to access the braking system. Examine the brake pads for uneven wear or thinning—if they appear less than a quarter inch thick, replacement is necessary. Check the rotors for deep grooves, rust buildup, or warping; these can cause grinding noise during reverse. Remember, like tuning a guitar, proper adjustment and replacement restore harmony to your brakes.
Clean and Lubricate Key Brake Components
Use a brake cleaner spray to remove dust, rust, and debris from pads, rotors, and calipers. Pay special attention to the caliper slides and pins; these allow smooth movement of the brake components. If these parts are corroded or stuck, they can cause uneven pad contact, leading to grinding. Apply a high-temperature brake lubricant to the caliper slides to ensure free movement—think of it as oiling hinges to prevent squeaks and sticks. Personal experience: after cleaning and lubricating, I noticed a significant reduction in noise and improved braking feel.
Replace Worn-out Brake Pads and Damaged Rotors
If inspection reveals excessively worn pads or damaged rotors, replacement is your best course of action. When installing new pads, consider using anti-squeal shims and high-quality brake grease for longevity and quieter operation. For rotors with minor surface imperfections, resurfacing might suffice; however, severely warped or grooved rotors need replacing. This step is crucial to prevent costly damage to other components. For detailed guidance on choosing the right parts, visit brake service myths.
Check Brake Fluid Level and Condition
Low or contaminated brake fluid can impair hydraulic pressure, resulting in inconsistent braking and noise. Remove the brake fluid cap and inspect the level—if it’s below the minimum mark, top it up with the recommended type. If the fluid appears dark or contains debris, consider flushing and replacing it. Regularly maintaining fluid quality enhances brake responsiveness and longevity, just like changing the oil keeps your engine running smooth.
Test the System and Observe Results
Once repairs are complete, reassemble the wheels and lower your vehicle. Carefully test the brakes in a safe area, applying gentle reverse pressure to confirm the grinding issue has resolved. If noise persists, revisit the inspection steps or consult a professional. Using this methodical approach saves money and extends your brakes’ lifespan—think of it as fine-tuning an instrument to hit every note perfectly.
Many car owners operate under the misconception that a basic tune-up or brake service is a simple checklist—change the oil, replace the pads, and you’re good to go. However, as an experienced mechanic, I’ve seen how overlooking certain nuances can lead to costly mistakes and persistent issues. For instance, a frequent myth is that all brake pads wear evenly, but in reality, uneven wear can be caused by caliper sticking or seat issues, which are often ignored by amateurs. Rushing into replacements without diagnosing the root cause can result in recurring grinding noises or reduced braking efficiency.
Why do some brake components compound the problem instead of fixing it?
Experts highlight that using low-quality replacement parts or neglecting proper lubrication can accelerate wear and compromise safety. In fact, a study published in the Journal of Automotive Engineering emphasizes that improper installation and overlooked adjustment are leading causes of premature component failure. So, what pitfalls should you avoid? One common trap is neglecting the importance of detailed inspections, especially of critical components like caliper slides and rotors, which require precise cleaning and lubrication to prevent sticking and noise. Failing to do so often results in recurrent squeals or grinding, even after new pads are installed. Another mistake I see is assuming that brake fluid can last forever; in truth, contaminated or low brake fluid levels can cause hydraulic pressures to fluctuate, leading to inconsistent braking or noises. Regularly flushing brake fluid is an often-underrated maintenance step that can save you from sudden brake failure. When it comes to tune-ups, many overlook the impact of fuel system cleanliness and air filters on overall performance. Dirty filters or clogging injectors can cause hesitation, increased fuel consumption, and engine knocking—problems that no amount of spark plug replacement will fix alone. The key is adopting a holistic approach that addresses all potential contributing factors rather than focusing solely on superficial components. For advanced insights on maintaining your vehicle’s peak performance, check out the comprehensive tune-up guide. Remember, these hidden nuances are what differentiate a quick fix from lasting maintenance, ultimately saving you money and enhancing safety. Have you ever fallen into this trap? Let me know in the comments.
Toolbox Choices That Make a Difference
Personally, I swear by a high-quality digital multimeter for diagnosing electrical issues—it’s precise, reliable, and saves me hours troubleshooting. I use a torque wrench calibrated to manufacturer specifications; it ensures that fasteners like lug nuts and brake components are tightened exactly right, preventing under-tightening or over-stressing parts. An infrared thermometer also became an invaluable addition; it helps me monitor engine operating temperatures and identify cooling issues without guesswork. When it comes to cleaning brake components, a wire brush set designed specifically for calipers and rotors helps remove rust and debris efficiently, extending component life. As for software, consider an OBD-II scanner with live data streaming, so you can monitor your engine’s health in real time and catch problems early—saving money and ensuring safety. I recommend investing in reliable tools that you trust; cheap alternatives often lack precision and can do more harm than good in the long run. Trends suggest that DIY auto maintenance tools are becoming smarter, integrating apps and wireless data transfer, making diagnostics accessible to everyday car owners. Looking ahead, expect these tools to incorporate AI-driven diagnostics, guiding even less experienced users through complex repairs.
How do I maintain these tools over time?
Proper storage and regular calibration are key. Keep your tools in a dedicated toolbox, protected from moisture and extreme temperatures. Periodically calibrate your torque wrench and multimeter as per manufacturer instructions—this is crucial for maintaining accuracy. Clean your tools after each use, especially brake cleaners and wire brushes, to prevent corrosion. Replace parts like wires and sensors when they show signs of wear. For software tools, update firmware regularly to access new features and improve compatibility. A well-maintained toolkit doesn’t just last longer; it boosts your confidence during repairs, ensuring safer, more reliable results. For more insights into extending your car’s lifespan, check out this expert guide on tune-up strategies. To get started, try calibrating your torque wrench this weekend—it’s easy, and it makes a big difference in ensuring your safety and the longevity of your repairs.
Lessons I Wish I Learned Sooner About Brake Repairs
One of the most valuable lessons I encountered was the importance of paying close attention to caliper slide pins. Over time, neglecting lubrication can cause sticking, leading to uneven wear and grinding noises. Discovering this early in my career taught me that small details make a big difference in brake performance.
I also found that not all brake pads are created equal. Choosing high-quality pads with proper shims and anti-squeal compounds can save you from frustrating noise and frequent replacements. Skimping on parts often results in recurring issues and higher costs in the long run.
Another lightbulb moment was realizing how much brake fluid condition impacts braking efficiency. Regularly checking fluid health and flushing when necessary prevents hydraulic problems that can manifest as squeals or spongy pedals—sometimes even lingering reverse grinding problems.
Tools and Resources That Changed My Approach to Car Care
My trusted digital multimeter has been a game-changer; diagnosing electrical issues related to brake sensors or ABS modules is now much more straightforward. I rely on high-quality wire brushes specifically designed for calipers to remove rust quickly and effectively, extending the life of brake parts.
For understanding complex brake system nuances, this comprehensive guide has been invaluable. It helps me stay updated on best practices and avoid common pitfalls, ensuring safer, more reliable repairs.
Investing in a good torque wrench ensures I tighten components to exact specifications, preventing issues such as warped rotors or loose calipers. Coupling this with an OBD-II scanner provides real-time insights into brake-related sensors and codes—empowering me to troubleshoot ahead of trips.
Choose Growth—Your Car Will Thank You
Taking that first step in diagnosing and fixing your brakes might seem daunting, but remember—each repair deepens your understanding and confidence. Equip yourself with the right tools, leverage trusted resources, and don’t hesitate to seek expert advice when needed. Your vehicle’s safety, efficiency, and lifespan depend on your proactive care. Want to dig deeper into how regular tune-ups can boost your car’s overall health? Check out this detailed guide. Ready to give your brakes the attention they deserve and enjoy safer drives? Start today.