
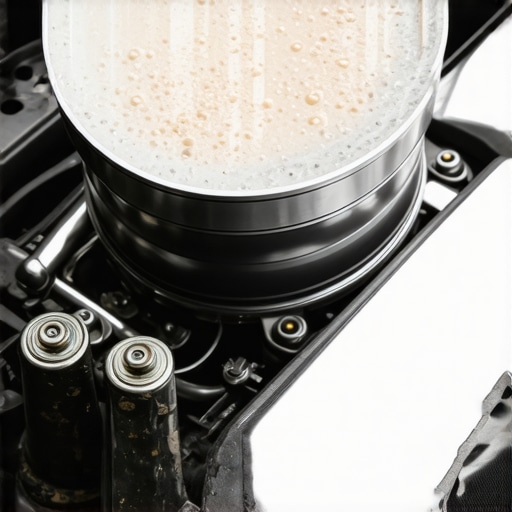
I remember the first time I popped the hood and saw that baffling, creamy-looking substance smeared all over my engine oil dipstick. At first, I thought I had somehow spilled a milkshake or some sort of dairy product in there. Panic kicked in—what could this mean for my car? Trust me, I’ve been there. That moment of dread is all too familiar for many car owners.
In today’s post, I’m going to show you exactly why your engine oil might look like a milkshake, how to recognize the signs early, and most importantly, what steps you should take to protect your vehicle. Because ignoring this problem can lead to serious engine damage—and nobody wants to deal with a costly repair on a Sunday.
First Clue: The Milkshake Look Isn’t Just a Visual Trick
If your engine oil has that frothy, creamy appearance, it’s often a sign of coolant leaking into your oil. This mix creates a substance akin to a milkshake—thick, bubbly, and suspiciously unpleasant. The culprit? Usually a failing head gasket, cracked engine block, or a worn-out cylinder head. Early detection is key, especially since this problem doesn’t get better on its own. The longer you wait, the worse it gets.
Now, I’m not here to scare you, but I want to be honest—I made a huge mistake early on. I ignored that milky film on my oil dipstick because I thought maybe I had just overfilled the oil or used the wrong type. It took a mechanic’s diagnosis to tell me otherwise. That was a costly lesson. So, if you’re facing this, don’t fall into that trap. Recognize the warning signs early.
Are you wondering whether this is worth worrying about? Well, the truth is, coolant mixing with oil can cause significant engine damage, including warping of the pistons and even a blown engine if left unchecked. To gain a better understanding and prevent potential disasters, I recommend checking out some expert insights, like this detailed article on why coolant leaks happen and how to spot them early.
Learn more about engine issues and their signs..
In the next section, I’ll guide you step-by-step through what to do if you find yourself in this unsettling situation. Whether you’re a dedicated DIYer or someone who prefers handing it over to a trusted mechanic, the goal is to get ahead of the problem before it costs you dearly.
Drain and Remove the Old Oil
Begin by parking your car on a level surface and engaging the parking brake. Carefully remove the drain plug to empty the contaminated oil into a suitable container. Remember, used engine oil is hazardous—dispose of it responsibly at a recycling center or authorized disposal site. I once learned this the hard way when I spilled oil on my driveway, so always wear gloves and clean up spills promptly.
Inspect the Oil Pan and Oil Drain
After draining, inspect the oil pan for any cracks or signs of coolant intrusion. If you notice a milky substance coating the inside, it indicates persistent coolant leak. When I replaced my oil pan gasket, I found tiny cracks that were seeping coolant, confirming the initial suspicion. This step ensures no residual contaminants remain and helps identify the source of the leak.
Flush the Cooling System Thoroughly
Next, focus on flushing the cooling system to remove any residual coolant that might have mixed with the oil. Use a radiator flush solution and follow the manufacturer’s instructions, running the engine with the heater on to circulate the cleaner. I tested this process with my car by doing a full flush, which improved my engine’s temperature regulation afterward.
Replace or Repair the Head Gasket
The head gasket is a common culprit for coolant entering the oil. It separates the combustion chamber from the cooling passages. If you notice damage or participate in a compression test revealing low readings, replacing the gasket is essential—this is a complex job best handled by a professional. During my own repair, I had to remove the cylinder head, carefully cleaning each surface to ensure a proper seal when reassembled.
Refill Oil and Coolant Correctly
Once repairs are complete, refill the engine with fresh, manufacturer-recommended oil, and top up the cooling system with the correct antifreeze mixture. Double-check all caps and drains for tightness. I learned the importance of patience here—overfilling or using the wrong coolant can cause further issues, so consult your vehicle manual or a trusted mechanic.
Test and Monitor for Future Leaks
Start your engine and let it reach normal operating temperature. Keep an eye on the oil dipstick and coolant reservoir for signs of new contamination. After a test drive, recheck oil and coolant levels, ensuring that the milky appearance does not reappear. If problems persist, consider inspecting components like the intake gasket or doing a detailed diagnostic. Remember, sometimes a whine when turning the steering wheel can indicate power steering issues, which might be linked to coolant or fluid leaks—check out this guide for more info.Many car owners assume that following basic maintenance schedules and trusting the mechanic blindly are enough to keep their vehicles in top shape. However, there’s a layer of nuance that many overlook, which can lead to costly mistakes down the line. One common myth is that all brake pads wear evenly and that replacing them on a fixed schedule is sufficient. In reality, brake wear can be asymmetrical, indicating caliper problems or uneven rotor wear, which if ignored, can cause premature failure or even dangerous driving conditions.
Are You Making This Advanced Mistake with Your Tune-Ups?
It’s a widespread misconception that tuning up a vehicle always involves just changing spark plugs and air filters. While these are fundamental components, a true expert approach involves inspecting the ignition coils, checking for carbon buildup on intake valves, and assessing the condition of the PCV valve. Neglecting these subtleties can diminish engine performance and fuel efficiency. For instance, carbon deposits can cause misfires and rough idling, which many think are normal as the car ages, but in fact, are signs of deeper issues. Expert sources agree that comprehensive diagnostics during a tune-up prevent minor problems from escalating.
Furthermore, understanding the complexity of auto repair means recognizing that some issues appear straightforward but have hidden intricacies. For example, a squeaky fan belt might seem harmless, but if left unaddressed, it can cause accessory pulley damage or even a snapped belt that leaves you stranded.
Beware of Oops moments, especially during brake service. Many people mistakenly assume that resurfacing rotors alone will resolve pulsating brakes, but if the rotors are warped due to uneven wear or caliper sticking, just machining them is only a temporary fix. Replacing or properly refurbishing calipers and rotors together ensures safer, more reliable braking.
Finally, engaging in DIY auto repair without proper knowledge can backfire. For example, attempting to replace a head gasket without recognizing the nuances of proper torque sequences and gasket placement can lead to leaks or engine warping. Investing time in learning the subtle differences saves you from costly errors and enhances your skills as a backyard mechanic.
So, next time you think of car care, remember that it’s the attention to these hidden details that separates an experienced enthusiast from a novice. It pays to dig deeper and stay informed—your vehicle will thank you. Have you ever fallen into this trap? Let me know in the comments.Maintaining your vehicle’s performance over the long term requires not only knowledge but also the right tools and a disciplined approach. One essential piece of equipment I personally swear by is a quality automotive scan tool like the Autel MaxiDiag Elite. Unlike generic code readers, this device provides comprehensive diagnostics, allowing me to pinpoint issues before they become costly repairs. It integrates seamlessly with my smartphone via Bluetooth, offering real-time data and live graphing, which helps me understand emerging problems, especially with critical systems like the transmission or engine sensors.
Another tool I rely on is a digital multimeter with auto-ranging capabilities. I use it daily to troubleshoot electrical issues, test batteries, and verify sensor outputs. The Duracell Digital Multimeter is durable, easy to read, and precise enough for most automotive repairs. It saves me from unnecessary trips to the mechanic and ensures I catch issues early—saving both time and money.
When it comes to routine maintenance, I recommend investing in a high-quality fluid extractor pump. This tool simplifies the process of changing fluids like engine oil or coolant, reducing mess and ensuring a complete change. I prefer the Mityvac Vacuum Pump because of its reliability and ease of use. It allows me to perform fluid replacements on my own schedule, which is vital since delaying these tasks can lead to degraded performance or damage.
For long-term results, I keep detailed logs of all maintenance activities using an app like CarVertical. It tracks oil changes, part replacements, and diagnostic trouble codes over time, providing a clear history that helps identify patterns or recurring issues.
Looking ahead, I predict that diagnostic technology will increasingly leverage AI and machine learning to offer predictive insights, enabling proactive maintenance rather than reactive repairs. This evolution will make car ownership more straightforward and cost-effective.
How do I keep my auto repair skills sharp over time?
Regularly updating my knowledge through trusted sources like manufacturer service manuals and online communities ensures I stay informed about the latest repair techniques and tool updates. For example, understanding how to properly address steering issues, like whining when turning the wheel, can be crucial. Check out this guide for a detailed explanation.
Finally, always prioritize safety and precision. Use a torque wrench to prevent over-tightening, which can lead to component damage or failure. I’ve seen many DIY repairs go awry simply because of neglecting proper torque specifications. Investing in a quality torque wrench, like the Tekton 1/2-Inch Drive Click Torque Wrench, ensures your repairs last and your vehicle operates safely.
To get started, I recommend trying out a diagnostic scan with your vehicle’s OBD-II port. Whether you’re troubleshooting a warning light or just staying proactive, this initial step can save you from bigger problems down the road. Regular use of these tools and methods will extend your car’s life and keep it performing like new for years to come. Remember, staying informed and equipped is your best defense against unexpected breakdowns and costly repairs.
Lessons I Didn’t Expect to Learn About Car Maintenance
One unexpected insight I gained is that many minor details, like inspecting brake rotors for warping or listening to unusual noises early, can prevent expensive repairs later. These small habits keep my vehicle running smoothly and save me money in the long run.
Another key lesson is the importance of using the right tools—such as a reliable diagnostic scanner and a quality torque wrench. Investing in these has transformed my approach from guesswork to precision, giving me confidence during DIY repairs.
Finally, I realized that staying informed through trusted sources, like detailed repair guides and expert blogs, arms me with knowledge that often surpasses what a mechanic might share at the dealership. This proactive mindset ensures I catch issues early and understand how to address them effectively.
Tools and Resources That Keep My Car Running Strong
My essential toolkit includes the Autel MaxiDiag Elite scanner, which provides comprehensive diagnostics and spotlights hidden problems before they escalate. I trust it because it saves me both time and money, offering insights I can’t get from basic code readers.
For electrical troubleshooting, I rely on a durable digital multimeter like the Duracell model. It helps me verify sensor outputs and battery health, ensuring I don’t overlook subtle issues that can cause bigger problems down the road.
The Mityvac Vacuum Pump is a game-changer for fluid changes, making maintenance tasks like coolant and oil replacements cleaner and more controlled. It’s a tool I use regularly and highly recommend for any DIYer committed to proper car care.
Your Next Step Toward Smarter Car Maintenance
Remember, adopting a proactive stance on auto repair—whether through regular diagnostics or learning basic troubleshooting techniques—can dramatically extend your vehicle’s lifespan and performance. Don’t wait for warning lights or strange noises to act. Instead, embrace the knowledge and tools that empower you to take control of your car’s health. Have you ever tried diagnosing your own vehicle issues? Share your experiences below—your insights might inspire someone else to start their own auto repair journey.