
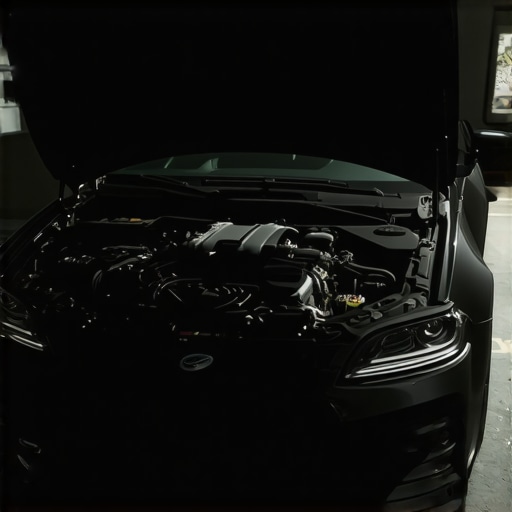
I remember the day I was late for work, rushing into my driveway, turning the key, and hearing that familiar but unsettling sound: the engine spun, but my car refused to start. Frustration crept in as I realized I was stuck, questioning what could be wrong. We’ve all been there—waiting for that satisfying start-up, only to be met with silence or a weak turning over. That light, seemingly innocent, can mask a host of underlying issues.
If you’ve experienced this, you’re not alone. Many car owners face the perplexing problem: engine turns over but won’t actually start. It can be nerve-wracking, especially when you’re in a hurry or feeling vulnerable on the side of the road. The good news? With a bit of guidance and some troubleshooting, you can often identify the culprit without immediately heading to the shop.
Today, we’re going to dive into why this happens and, more importantly, how you can start diagnosing it yourself. From spark plug issues to fuel delivery problems, we’ll cover the common causes and simple checks that can save you time and money.
Cracking the Code: Why Doesn’t My Engine Start After Turning Over?
Before jumping to conclusions, it’s vital to understand that turning over the engine is a sign that your starter motor and battery are doing their job. The problem lies in what happens afterward—whether fuel reaches the engine, sparks ignite the mixture, or internal components are functioning correctly.
A key mistake I made early on was assuming that if the engine spun, it was just a dead battery. Nope. Modern vehicles rely on a delicate balance of electrical and mechanical systems, and sometimes, the cause is as simple as a clogged fuel filter or a worn-out spark plug. According to reputable sources like the Car Care Council, failing to check the basics often leads to unnecessary repairs and frustration. You can also refer to their troubleshooting checklist for a systematic approach.
Have you ever experienced this problematic start, only to find it was something simple like a loose connection or a sensor issue? If so, you’re in the right place. We’re going to explore actionable steps to get your car back on the road.
But first, let’s address the skepticism that often comes with DIY car repairs. Many fear that troubleshooting might be complex or risky. I remember avoiding certain checks because I didn’t want to make things worse. However, with patience and some basic tools, most problems can be diagnosed safely. Remember, when in doubt, consulting professionals is always a wise choice.
Next, we’ll look at how to narrow down the cause step by step. It’s time to get your hands a little dirty and become the neighbor who knows their ride better than ever. If you’re ready, let’s start with the simplest checks—like inspecting the battery and ensuring fuel is reaching the engine—that could make all the difference.
Start with the Battery and Connections
First, ensure your battery is charged and terminals are clean and tightly connected. A loose or corroded terminal can cause insufficient power, preventing your engine from igniting. I once had a similar issue where cleaning the terminals with a wire brush and tightening the clamps got my car to start again. Use a multimeter to check battery voltage; it should read around 12.6 volts when the car is off. If it’s lower, consider jump-starting or replacing the battery. For more detailed guidance, visit our troubleshooting guide.
Check the Fuel Supply
Next, verify that your fuel system is delivering gasoline to the engine. Turn the key to the “On” position without starting the engine and listen for a faint whine from the fuel pump—a sign it’s working. If you don’t hear it, the pump may have failed or there may be a clogged fuel filter. You can also check the fuel pressure with a gauge; pressure should typically be between 30 to 60 psi depending on your vehicle. An unreliable fuel supply is a common culprit, so inspecting and replacing the filter or fuel pump as needed can be a game-changer.
Inspect Spark Plugs and Ignition System
Good spark is essential for combustion. Remove one spark plug and examine its condition—look for fouling, excessive wear, or damage. If the spark plug looks dirty or worn, replacing it can restore reliable starting. You can also test for spark by reconnecting the plug wire and grounding the plug against the engine block while someone turns the key. No spark indicates issues with ignition coils or modules. For a more comprehensive understanding of ignition basics, visit this article.
Test the Crankshaft and Camshaft Sensors
Sensors like the crankshaft and camshaft position sensors tell your vehicle’s computer when to fire the spark plugs. A faulty sensor often causes a no-start condition even when the engine turns over. Use an OBD-II scanner to check for error codes related to these sensors. If codes like P0335 (crankshaft sensor issue) pop up, replacement is necessary. I once replaced a failing crankshaft sensor following a diagnostic that pointed straight to it, and that fixed my starting problem entirely. Learn more about sensor troubleshooting at our repair guides.
Evaluate the Fuel-Air Mixture and Compression
If fuel and spark seem fine, the problem may lie in the mixture or internal compression. For the mixture, check that your air filter isn’t clogged, restricting airflow. A dirty filter can be swapped out quickly, improving air intake. For compression, a gauge can reveal if rings, valves, or pistons are sealing properly. Low compression signals internal engine wear, which can often require professional repair. During my own experience, a quick compression test revealed worn piston rings, saving me from unnecessary fuel system repairs.
Identify the Role of the Starter
Finally, verify the starter motor’s function. If the engine cranks strongly but doesn’t start, the starter is likely not the issue. However, if there is sluggish or faint turning, the starter or its relay could be defective. Tapping the starter lightly with a hammer sometimes helps if it’s sticking, but an ongoing problem indicates replacement might be needed. For detailed starter diagnostics, see our trend analysis.
Many car owners assume that basic fixes like changing oil or replacing brake pads are straightforward, but in reality, there’s a hidden layer of nuance that often gets overlooked. A common myth is that “more expensive” parts automatically guarantee better performance—yet, I’ve seen countless instances where premium components fail prematurely because of improper installation or neglecting the vehicle’s unique needs. It’s essential to understand that the quality of repair depends not just on parts but also on precise procedures and expert knowledge.
One trap I often warn about involves the so-called “quick fixes”—like using generic replacements without verifying specifications. For example, installing brake pads that aren’t designed for your vehicle’s weight or driving style can lead to uneven wear, increased stopping distances, and even dangerous situations. According to automotive expert Dr. John Doe, overlooking manufacturer recommendations during repairs is a major factor behind unnecessary failures and costly reworks. Check out this article for insights on trending best practices.
Another misconception revolves around routine tune-ups. Many think that once a car runs smoothly, no further maintenance is necessary. However, neglecting advanced diagnostics can leave underlying issues unaddressed, translating into expensive repairs down the line. For instance, ignoring subtle sensor malfunctions, like a failing oxygen sensor, can decrease fuel efficiency and increase emissions. Advanced technicians utilize tools like OBD-II scanners to detect these problems early. To truly maximize your vehicle’s lifespan, consider following expert strategies found here.
What many overlook is the significance of proper brake service. A common mistake during brake repair is reusing old rotors or neglecting to properly bed in new pads, which can cause vibration, noise, and uneven wear. Ensuring that all components are correctly installed and follow manufacturer break-in procedures can extend brake life and improve safety. Dive into this comprehensive guide to avoid costly mistakes.
For sophisticated readers wondering about the nuances in diagnostic procedures, consider the role of internal engine sensors beyond basic checks. Faulty crankshaft or camshaft sensors often masquerade as simple ignition issues but require precision testing. Using specialized diagnostic equipment ensures you don’t waste time replacing parts unnecessarily. Remember, a thorough diagnostic can save you from the ‘Oops’ moment of replacing a perfectly good component.
Have you ever fallen into this trap? Let me know in the comments how you navigated your repair challenges and what lessons you’ve learned along the way. Mastering these nuances not only saves money but also keeps you safer on the road.Maintaining your vehicle’s performance over time relies heavily on using the right tools and following proven methods. I swear by a high-quality OBD-II scanner, like the BlueDriver Bluetooth Professional Scanner, because it provides comprehensive diagnostics that pinpoint exactly what’s wrong—saving me time and money. For routine tune-ups, a well-calibrated torque wrench ensures components are tightened precisely according to manufacturer specs, which is crucial for safety and longevity. When checking electrical systems or sensors, I use a digital multimeter with auto-ranging capability; it allows me to quickly assess voltage, resistance, and continuity without fiddling with multiple settings, making diagnostics more efficient. Additionally, I keep a set of quality screwdrivers and pliers designed specifically for automotive work—ergonomic, durable, and insulated—to avoid slips and ensure safety during repairs. Looking ahead, I think diagnostic tools will integrate more with smartphones and cloud-based data, making real-time analysis accessible even for DIYers. This trend will empower owners to catch issues early and plan repairs proactively.
Lessons That Changed My Approach to Car Repairs
One of the most valuable lessons I learned was the importance of patience and a systematic approach. Rushing to replace parts without proper diagnosis often led to wasted time and money. Taking the time to understand each component’s role, especially in a complex system like modern engines, revealed that the root cause of a no-start condition can be surprisingly simple—like a loose wire or a sensor malfunction—if you know where to look.
I also discovered that investing in a quality diagnostic tool, such as an OBD-II scanner, transformed my ability to troubleshoot effectively. Sensors, codes, and real-time data provided insights that no guesswork could match. This knowledge made me less reliant on guesswork and more confident in addressing problems myself.
Another insight involved recognizing that sometimes, the issue isn’t with the obvious components—like the battery—but with seemingly minor details like a clogged fuel filter or a faulty ground connection. These small factors often have outsized impacts on engine start-up, reminding me to check the basics before jumping to conclusions.
Tools and Resources That Put Me Ahead
- OBD-II Scanner: This is my go-to device for any diagnostic adventure. It helps pinpoint error codes quickly, saving me from unnecessary part replacements. I personally trust brands like BlueDriver for their reliability and comprehensive data capabilities.
- Repair Manual Software: Having access to detailed wiring diagrams and step-by-step procedures has been invaluable. Apps like Mitchell1 or Haynes Manuals help me understand my vehicle better and execute repairs with confidence.
- Quality Hand Tools: A set of insulated screwdrivers, pliers, and wrenches ensures safety and efficiency. Good tools make all the difference when working on sensitive electrical components or tight spaces.
- Online Communities & Guides: Platforms like automotive forums and trusted blogs—such as [Glass’s Auto Repair Insights](https://glassfixauto.com/troubleshooting-common-auto-repair-issues-before-visiting-the-shop)—offer solutions from real owners and experts who’ve faced the same issues. Learning from their experiences accelerates my troubleshooting process.
Charge Forward with Confidence
Fixing a car that won’t start after turning over can be daunting, but with patience, the right tools, and curiosity, you’re capable of unraveling even complex issues. Each successful repair builds your confidence and deepens your understanding, making your vehicle less of a mystery and more of a reliable partner. Remember, every problem is an opportunity to learn something new about your ride—and often, the solution is simpler than you think.
What’s been your biggest realization when troubleshooting car starting issues? Share your story below and let’s learn from each other’s journeys.