
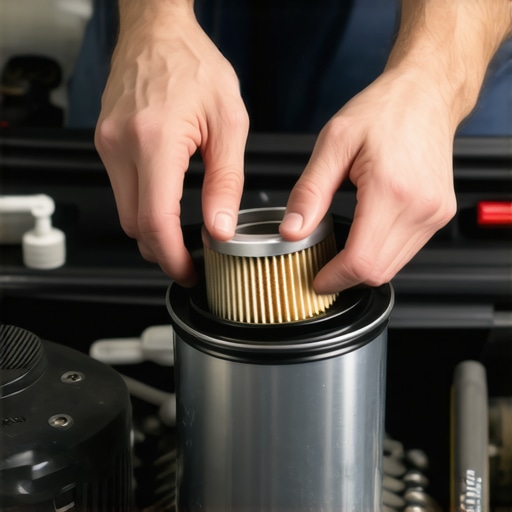
Ever been under your car, wrench in hand, only to realize that the oil filter simply refuses to budge? I remember my first time tackling this nightmare—armed with just a standard wrench and a lot of confidence, only to find myself stranded, looking like I had fought a greased pig. The filter was so stubborn that it almost felt welded on. Frustration bubbled up, and I questioned whether I needed special tools or a professional to handle it.
The Big Reveal: There’s a Smarter Way to Handle a Stuck Oil Filter
Fortunately, after several failed attempts and a few scraped knuckles, I discovered a straightforward trick that doesn’t require any fancy equipment. Today, I’ll share my tried-and-true method to remove that stubborn filter safely, cheaply, and with minimal fuss. If you’ve faced this frustrating obstacle, stick around—I promise, this will turn your DIY oil change from a nightmare into a quick project.
Is It Really Worth Your Time to Try DIY Removal?
At first, I thought I would just call in a mechanic—after all, tools designed for oil filters aren’t exactly commonplace. But then I realized that many of the ‘special’ tools are costly and not always necessary. Plus, some of these tools can damage the filter or the surrounding parts if used incorrectly. I made a mistake early on, tightening the filter too much, which only made it harder to remove later. Learning from that mistake, I approached the problem differently, and so can you. Did you know that according to automotive experts, a common reason filters get stuck is because of over-tightening during installation? This simple mistake can make future oil changes a real pain (source), but the good news is that with a bit of know-how, you can fix it yourself.
Now, let’s get into the details of how you can master this trick and save yourself time and money. Whether you’re a seasoned DIYer or just starting out, these tips will help you handle even the most stubborn filters with confidence.
Use Leverage to Break the Seal
My first successful attempt came when I remembered that a gentle but firm use of leverage can loosen even the most stubborn filters. I grabbed a sturdy rubber strap wrench from my toolbox—think of it as a giant rubber band that grips tightly. Around the filter, I wrapped the strap wrench and slowly turned counter-clockwise, applying steady pressure. It was a bit messy, with some oil dribbling down my arm, but within seconds, the filter cracked loose. This method works because it evenly distributes force and reduces the risk of crushing the filter or clogging your engine. Don’t forget to place a catch basin underneath and wipe away excess oil afterward to keep your workspace clean.
Applying the Right Technique
When I tackled my car, I learned that turning with quick, jerky motions only threatened to damage the filter or your hand. Instead, a slow, consistent twisting motion confirms the seal is breaking without damaging the threads or the housing. If the filter is seized tight, rubbing a bit of penetrating oil—like WD-40 or a dedicated automotive lubricant—around the seal for 10-15 minutes softens rust and gunk, making removal easier. Use a cloth to wipe off excess oil to prevent slipping. Remember, forcing a filter when it resists can strip threads or crack the housing, leading to costly repairs. For a visual guide, consult auto repair trend, which emphasizes patience and precision during removal.
Protect Your Skin and Surroundings
During my cleanup, I learned that oil filters are messy—oil and grime tend to splash everywhere. To prevent stains or injury, I wore gloves and old clothes—think of it as protecting yourself from a greasy battlefield. Placing paper towels or rags around the work area catches drips, making cleanup easier. Have a container ready to catch the oil as the filter releases, and avoid letting oil drip onto your driveway or garage floor. Proper disposal of used filters and oil is crucial—recycle them at authorized centers, not in regular trash. For more detailed oil change safety tips, visit car maintenance checklist.
Final Steps to Verify Success
Once you’ve freed the filter, inspect the threads and sealing surface for damage or debris. I once overlooked a damaged gasket, which caused a leak during my next oil change. Always ensure new filters have clean, intact seals, and hand-tighten them initially. If you need extra grip, a filter wrench can help, but avoid over-tightening—just snug is enough. Remember, a tight seal prevents leaks but overdoing it can damage the threads or crush the filter. For guidance on best practices, see tune-up strategies that emphasize proper tightening techniques. This approach guarantees a secure fit and a smooth ride ahead.Many car owners think they understand brake service, tune-ups, and general auto repairs, but in reality, several misconceptions could be costing you time and money. For instance, the popular belief that brake pads only wear out after a specific mileage is misleading. In truth, brake pad lifespan is highly dependent on driving habits, brake quality, and even climate conditions, making routine inspections more critical than arbitrary mileage intervals. Overlooking this nuance can lead to costly rotor replacements or compromised safety.
Are Your Brake Checks Enough? The Overlooked Details That Matter
Interestingly, many skip inspecting the entire brake system, focusing only on pads and neglecting components like the calipers, hydraulic lines, or rotors’ condition. A minor issue in any of these can reduce braking performance unexpectedly. According to a recent study by automotive experts, neglecting the piston seals or brake fluid quality during routine service diminishes braking efficiency faster than routine pad replacements alone. Therefore, a comprehensive brake system check is essential for safety and longevity. Furthermore, there’s a common myth that simply topping up brake fluid suffices. However, contaminated or degraded brake fluid can cause spongy pedal feel and brake fade, even if the fluid level appears adequate. Regular flushing and quality control are vital, as detailed in this auto repair resource. So, what’s the real trick to effective brake maintenance? It’s in understanding that each component plays a role beyond its basic function. Knowing when to seek professional advice versus attempting DIY fixes can save you from costly repairs or safety hazards. For example, replacing brake calipers or bleeding the hydraulic system involves more expertise than changing pads. Invest in an expert inspection at recommended intervals, especially if you notice unusual noises or pedal feel changes. Wondering if your current maintenance routine covers these nuances? Check our car service checklist for guidance. Remember, a well-maintained brake system not only ensures safety but also prolongs the life of your entire vehicle. Don’t fall for common myths—staying informed can make all the difference on the road. Have you ever fallen into this trap? Let me know in the comments.
Keeping It Working: Essential Tools for the Serious DIYer
Maintaining a vehicle over the years requires more than just basic tools; it demands precision equipment that can handle the nuances of auto repair and tune-ups. I personally rely on a set of specific tools that not only make tasks easier but also ensure long-term reliability and safety. One such indispensable item is a high-quality digital multimeter. I use a Fluke 115 because its accuracy for diagnosing electrical issues, like faulty sensors or wiring faults, is unmatched, and it features auto-ranging capabilities that save time. When dealing with complex electrical systems, having a reliable multimeter is critical for diagnosing problems early and avoiding costly repairs down the line.
For brake services and suspensions, I prefer a torque wrench with a digital readout, like the Tekton 1/2-inch drive model. Proper torque application is vital in these components to prevent over-tightening or damaging parts. I recommend setting it meticulously to manufacturer specifications, which you can find in the car maintenance checklist. This practice guarantees that your repairs last and don’t cause issues down the road.
Our Future: Will These Tools Stay Relevant?
As automotive technology advances rapidly, especially with electric vehicles and onboard diagnostics, I predict a significant shift towards smart diagnostic tools integrated with smartphones and tablets. These digital devices will increasingly replace standalone testers, providing real-time data and troubleshooting guides. Yet, traditional physical tools like wrenches and torque drivers will always have a place; they form the foundation of any serious repair toolkit. Staying informed about emerging tech, like Bluetooth-enabled diagnostic scanners, will be key for DIY enthusiasts aiming to keep their vehicles in top shape for years to come.
How do I keep my tools in top shape over time?
Regular maintenance of your tools prolongs their lifespan and keeps repairs precise. For instance, I routinely lubricate my torque wrenches with manufacturer-recommended oils and calibrate my multimeter annually. Proper storage is essential—clean, dry, and organized in a toolbox designed to prevent moisture and dust ingress. Additionally, investing in quality tools, even if slightly more expensive initially, pays off because they withstand repeated use and maintain calibration longer. For comprehensive advice on extending your toolkit’s life, check these maintenance strategies.
Incorporating high-grade tools like a reliable multimeter and a precision torque wrench has transformed my approach to long-term vehicle maintenance. Not only do these tools help me diagnose issues early and execute repairs correctly, but they also save me money and stress over time. Upgrading your toolkit gradually—starting with a multimeter and a torque wrench—can make a notable difference in your ability to handle unexpected repairs at home. For instance, if you’re ready to optimize your car’s performance, try calibrating your torque wrench before your next brake job—it’s surprisingly satisfying and critical for safety.
Remember, as automotive technology continues to evolve, staying equipped with the right tools and knowledge ensures your vehicle remains reliable and efficient. Curious about the latest diagnostic tech? Check out auto repair trends for 2025. Keep your tools sharp, your skills sharpener, and your vehicle in top shape for the miles ahead!
The Lessons That Never Made It Into the Manual
One of the most valuable insights I gained was that patience outweighs brute force. Rushing to twist off a seized filter often leads to stripped threads or broken housing, escalating the problem instead of solving it. I also learned that a simple spray of penetrating oil, left to sit for a few minutes, can turn a two-hour struggle into a five-minute task. Sometimes, what feels like stubbornness is merely a stubborn gunk buildup, which proper lubrication can dissolve. Another lightbulb moment was realizing that over-tightening during installation is a common mistake that makes future removal nearly impossible. If I had known earlier that a snug fit is enough—just hand-tight plus a minor torque—my frustrations could have been avoided. These lessons taught me that respect for the process and available tools can transform a nightmare into an empowering DIY victory.
Tools and Resources That Make a Difference
My go-to tool for stubborn oil filters is a rubber strap wrench—it distributes force evenly and minimizes risk. I trust this over a standard wrench because it’s versatile and gentle but effective. For more complex electrical diagnostics, I rely on a Fluke 115 multimeter—its accuracy and auto-ranging capabilities give me confidence in troubleshooting. When it comes to torque, I use a digital torque wrench like the Tekton 1/2-inch drive model; proper tightening prevents leaks and future hassle. If you’re keen to expand your toolkit, check out resources like the car maintenance checklist for recommended tools and techniques that have served me well. Investing in quality gear not only makes repairs smoother but also keeps your car running safely for years to come.
Embracing the Challenge with Confidence
Taking on tough auto repairs, like removing a stuck oil filter, is more than just about the task—it’s about building trust in your abilities. Every time I successfully loosen a stubborn filter, I feel a surge of pride that motivates me to tackle other maintenance challenges. Remember, your vehicle is a complex machine, but with the right approach, patience, and tools, you can maintain and even improve it yourself. Don’t let fear or a lack of experience hold you back—every expert started as a beginner, and every repair is a chance to learn something new. So, gear up, keep a cool head, and turn these obstacles into opportunities for masterful DIY auto care. Ready to take your car maintenance to the next level? Your journey begins with that first twist—so why not start today?