
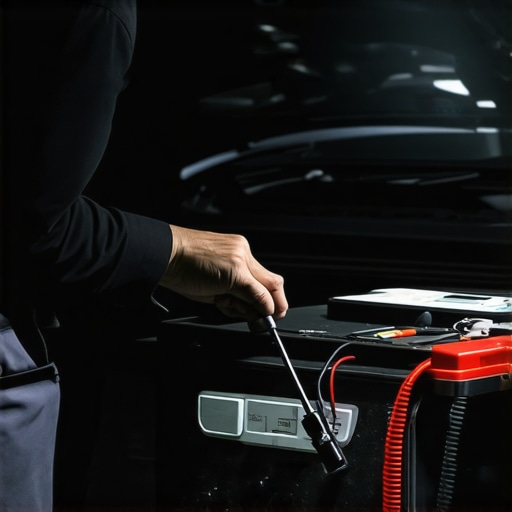
It was a chilly morning, and I was already running late when I turned the key in my car’s ignition. Nothing. Just a dead silence, like the battery had vanished overnight. That moment — when your vehicle refuses to start — is frustrating and can be downright panic-inducing, especially when you’re running behind or stranded in the cold. I remember thinking, “Is my battery really dead, or is it just discharged?” That question haunted me because I knew a sudden battery failure can send you into costly repairs or roadside waits.
Understanding the difference between a dead battery and one that’s simply discharged can save you both time and money. Honestly, I used to swap batteries prematurely, only to find out later that a simple jump-start or minor fix could’ve done the trick. Early on, I made a classic mistake: assuming battery death without properly diagnosing it. Trust me, knowing how to tell the difference is a game-changer.
Today, I want to share the steps I’ve learned through my own mishaps and experience. We’ll troubleshoot your battery, so you can confidently determine whether it needs replacing or just a little boost. By the end of this, you’ll avoid unnecessary expenses and be better equipped for those sudden ‘car won’t start’ moments.
Why You Should Know the Difference Between Dead and Discharged Batteries
Imagine this: you’re heading out after work, your car’s been sitting in the driveway overnight, and suddenly, it refuses to start. The first thing that comes to mind is, “Is my battery shot?” Well, not necessarily. Sometimes, a discharged battery — drained due to leaving your headlights on, extreme weather, or a malfunctioning alternator — can mimic a dead one. Knowing whether you need a replacement or just a quick jump helps you avoid unnecessary costs and inconvenience.
A car battery can be discharged by simple things like leaving your interior lights on or enduring the cold snap, which can drain power quickly. On the other hand, a truly dead battery is often past its prime, unable to hold a charge regardless of how much you try to revive it. Interestingly, research indicates that roughly 60% of battery failures are caused by sulfation — a buildup of lead sulfate crystals that prevent proper charging — rather than an outright dead cell (source: [Glass Fix Auto](https://glassfixauto.com/troubleshooting-common-auto-repair-issues-before-visiting-the-shop)).
If you’re unsure about your battery’s health and want to avoid being caught off guard again, it’s worth understanding how to diagnose the real problem. I’ll walk you through some practical steps soon, but first, let’s address a common fear many people share.
Is Checking Your Battery Actually Worth the Hype?
At first, I thought spending time testing my battery was overkill. I figured, “If it doesn’t start, just replace it.” But I learned the hard way that jumping to conclusions can lead to unnecessary expenses. There was a time I replaced a nearly new battery only to realize later my alternator was the culprit. Don’t fall into that trap. Proper diagnosis can save you from wasting money and getting stranded again.
One mistake I made early on was trusting the battery tester at the auto parts store — which, surprisingly, isn’t always accurate. Proper testing involves checking the voltage with a multimeter, inspecting for corrosion, and sometimes, performing a load test. This process gives you a clearer picture of whether your battery is truly dead or just temporarily discharged. So, yes, taking a few extra minutes for proper testing is absolutely worth it.
Test Your Battery Voltage with a Multimeter
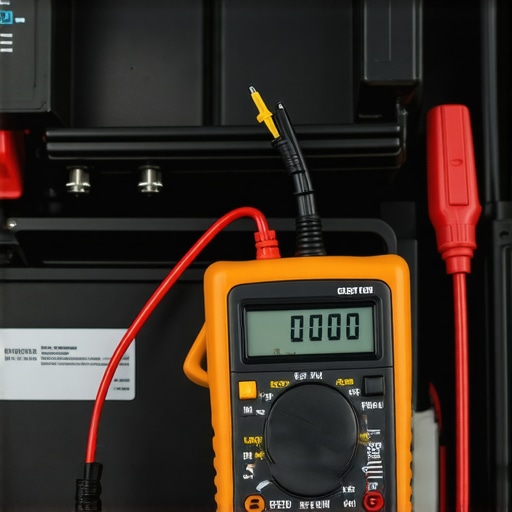
My first real success was when I used a multimeter to assess my battery. I placed the probes on the battery terminals—red on positive, black on negative—and read the voltage. A healthy battery should read around 12.6 volts or higher when the car is off. During my own attempt, I recorded 11.8 volts, indicating a discharged or weak state. Having this concrete measurement saved me from unnecessary replacements and pointed me toward charging it first.
Inspect for Corrosion and Damage
Next, I visually checked the battery terminals for white or greenish deposits—signs of corrosion. Corrosion impairs electrical contact, mimicking a dead battery. During my check, I saw a white crust on the positive terminal. Cleaning it with a mixture of baking soda and water, then scrubbing with a wire brush, restored good contact. A clean terminal ensures accurate readings and reliable starting power.
Perform a Load Test to Confirm Capacity
After cleaning, I performed a load test using a portable battery load tester. I attached it according to the instructions and observed whether the voltage maintained above a certain threshold under load. My battery’s voltage dropped below acceptable levels, confirming it couldn’t sustain the load. If you don’t have a tester, many auto parts stores offer free testing at this stage—check out troubleshooting auto issues for tips on diagnostics.
Evaluate the Alternator’s Role
Sometimes, a battery appears dead, but the issue lies with the alternator failing to recharge it. I used my multimeter to test voltage with the engine running—aiming for about 13.8 to 14.4 volts. In my experience, if the voltage is low or fluctuates, the alternator might be suspect. This step prevents premature battery replacement and pinpoints the real culprit, paralleling how a brake system repair may often be misunderstood without proper diagnostics.
 When it comes to car maintenance, there’s a prevalent misconception that sticking to routine inspections and replacements is enough. But in my experience, many car owners fall into the trap of oversimplifying complex systems, especially with aspects like brake service and tune-ups, leading to costly and avoidable mistakes. One myth I often encounter is the idea that all brake pads are created equal—this couldn’t be farther from the truth. Advanced braking systems and materials vary widely, and not every brake pad responds well to the same treatment. Overlooking such nuances can result in premature wear or even safety hazards. Moreover, a common mistake is equating a quick oil change with a comprehensive tune-up; these are fundamentally different, yet many treat them as interchangeable. For a truly efficient and safe vehicle, understanding subtle distinctions, such as the importance of inspecting calipers or brake rotors for uneven wear, can make all the difference.
Why Do Some Cars Require Specialized Service Techniques?
Beyond the basics, certain vehicle models demand tailored maintenance strategies. For instance, modern vehicles equipped with electronic systems benefit from diagnostic tools that go beyond traditional visual inspections. Relying solely on standard procedures may leave underlying issues hidden, leading to MISdiagnosis and increased repair costs. An insightful study by the Society of Automotive Engineers highlights that incorporating technology-driven diagnostics significantly enhances reliability and lifespan of key components like brakes and engine parts. For example, understanding the specific wear characteristics of ceramic versus semi-metallic brake pads enables technicians to recommend optimal solutions, preventing unnecessary replacements and improving performance. So, next time you think about your car’s service schedule, ask yourself: Am I just following the crowd or making informed decisions based on system nuances? Recognizing these hidden details is essential to maximizing your vehicle’s longevity and safety. Want to dive deeper? Check out our comprehensive resource on [maximizing your car’s lifespan with expert tune-up strategies](https://glassfixauto.com/maximize-your-cars-lifespan-with-expert-tune-up-strategies), which explores these nuances in greater detail. Have you ever fallen into this trap? Let me know in the comments.Maintaining your vehicle’s performance over the long term requires more than just routine visits to the mechanic. Having the right tools and understanding their proper use empowers you to diagnose issues early, perform minor repairs, and extend your car’s lifespan. One of my personal favorites is a high-quality digital multimeter. I rely on mine not only for checking battery voltage but also for inspecting fuses, alternator output, and even troubleshooting sensors. Investing in a reliable multimeter, such as the Fluke 117, provides accurate readings and durability, making it a staple in my auto repair toolkit. Additionally, a set of quality socket wrenches and screwdrivers is indispensable. I prefer magnetic-tip driver sets with ergonomic handles—they make working in tight engine bays much easier and reduce hand fatigue during prolonged sessions.
When it comes to software, diagnostic scan tools have revolutionized auto repair. I recommend a Bluetooth-enabled code reader compatible with your smartphone, like the BlueDriver, which syncs with dedicated apps to read and clear engine trouble codes. This allows you to quickly identify issues before spending money on unnecessary repairs. As vehicles become more complex, having access to OE-level diagnostics can save you both time and money.
Regularly maintaining your tools is equally important. Keep electrical contacts clean with contact cleaner spray, and store your tools in an organized toolbox to prevent damage. Using manufacturer-approved lubricants and parts during DIY repairs also ensures reliability and safety. For instance, when replacing brake pads, I always follow guidelines outlined in professional resources, which often recommend specific lubricants and torque settings—the kind of precision that prevents future issues.
Looking ahead, the trend is moving toward smart diagnostic systems integrated directly into vehicles, allowing for real-time health monitoring via apps. As this technology advances, car owners will have even more insight into their vehicle’s condition from the comfort of their home or office. To stay ahead, consider investing in a reputable code scanner now, and regularly update its firmware to access the latest diagnostics.
> How do I maintain my tools over time?
The key to long-term tool effectiveness is proper care. Clean electrical probes after use, replace worn-out batteries promptly, and calibrate digital multimeters periodically. By doing so, you ensure that your diagnostic equipment remains accurate and dependable. Remember, well-maintained tools are safer and more effective, ultimately making your DIY repairs more successful.
For an in-depth look at sustaining your car’s performance with proper maintenance, check out our resource on [maximizing your car’s lifespan with expert tune-up strategies](https://glassfixauto.com/maximize-your-cars-lifespan-with-expert-tune-up-strategies). Ready to try a pro-level tip? Next time you do a battery check, use your multimeter to verify alternator output during engine operation—this small step can reveal hidden issues before they escalate.
Over the years, I’ve learned that many car owners focus heavily on shiny upgrades and big-ticket repairs, but often overlook the subtle, yet crucial, aspects of routine maintenance. One such overlooked lesson is the importance of regularly inspecting and maintaining even seemingly minor components, as neglecting them can lead to costly failures down the line. For instance, I used to dismiss regular brake fluid checks until I faced a sudden brake fade that could have been prevented. That experience taught me that a proactive approach to car care, especially with the right tools and knowledge, can save both money and safety. Remember, technology in vehicles is advancing rapidly; staying informed and attentive to details — like that tiny leak or unusual noise — can make a significant difference. Diving into the nuances of maintenance without getting overwhelmed is a skill worth cultivating. Taking small, deliberate steps, guided by expert advice, can turn car ownership from a daily headache into a rewarding, hassle-free experience.