
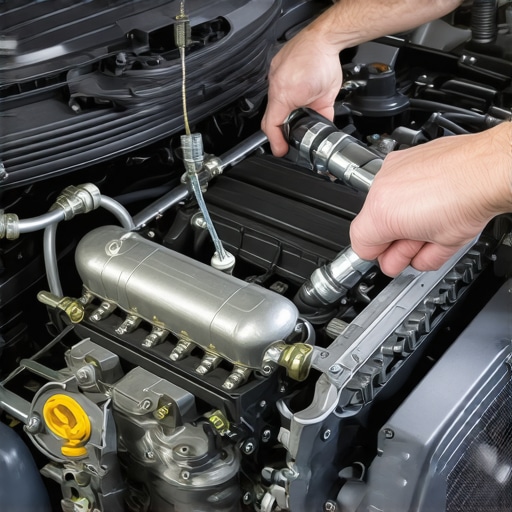
I remember the day I learned this the hard way. I was running late, turned into a filling station, and got distracted—next thing I knew, my car sputtered to a stop right in the middle of the road. No, I hadn’t left the tank empty intentionally; I just underestimated how quickly fuel can run out when you’re distracted by life. That moment was an awakening. Suddenly, I was faced with a question I didn’t expect: How do I get my fuel system back in gear after running out?
Getting Your Engine to Breathe Again After an Empty Tank
Running out of gas is more common than most drivers like to admit, but it can turn into a frustrating ordeal if you don’t handle the aftermath properly. The most important part? Priming your fuel system so the engine can start running smoothly again. You might think it’s a simple matter of refueling, but once the tank is full, there’s still work to be done. Residual air in the fuel lines can prevent your engine from igniting, leading to failed starts or rough idling.
From my own experience—and trust me, I’ve spent more time than I’d like troubleshooting this—I’ve learned that properly priming or bleeding the fuel system makes all the difference. It’s not just about cranking the engine repeatedly; it’s about ensuring that the fuel lines are filled with fresh fuel, and any trapped air is expelled. Otherwise, your engine might be starved for fuel, or worse, you could damage your fuel pump, which is designed to operate with liquid fuel, not air or vapor.
If this sounds familiar, don’t worry. Today, I’ll walk you through exactly how to prime your fuel system after your car runs out of gas—drawing from experience and trusted automotive tips. Plus, I’ll share some common pitfalls to avoid, so you don’t end up back at square one.
Have you ever been in a situation where your car just wouldn’t start after an empty tank? You’re not alone—and I’ve been there myself. Sometimes, I’ve rushed to turn the key, only to realize I forgot to bleed the lines properly. Early on, I made the mistake of assuming that age-old trick of just pressing the fuel pedal a few times while cranking would do the job. That little mistake cost me hours of troubleshooting, and I learned the hard way how critical it is to follow the right steps. Want to avoid the same misstep? Keep reading.
Open the Fuel Tank and Prepare
Start by ensuring your vehicle is on a level surface and the parking brake is engaged. Turn off the ignition to prevent accidental starting. For safety, wear gloves and eye protection, especially if you plan to inspect or disconnect components.
Relieve Fuel System Pressure Carefully
Locate the fuel pump relay or fuse in your vehicle’s fuse box and remove it. This prevents the pump from activating during this process. Turn the ignition to the “On” position for about 2 seconds, then back to “Off.” Repeat this cycle 2-3 times to depressurize the fuel lines safely, reducing the risk of spray or fire.
Add Fresh Fuel and Remove Air
Refill your tank with the recommended fuel type, filling it completely. To expel trapped air from the fuel lines, you might need to manually bleed the system—most modern vehicles have a bleed screw or a vent valve, often located near the fuel filter. If uncertain, consult your vehicle’s manual or this comprehensive guide.
Prime the Fuel Lines
For vehicles without an automatic priming feature, you’ll need to manually facilitate fuel flow. One method is to disconnect the fuel line at the filter or injectors and have an assistant turn the ignition to the “On” position briefly. The fuel pump will push fuel through the line, filling it and pushing out air. Be prepared for a small leak—use towels and proper safety gear.
Reconnect and Start the Engine
Once the lines are filled with fuel and air has been expelled, reconnect any disconnected hoses or components. Turn the ignition key to “Start” and listen: if the engine turns over smoothly and catches, you’ve successfully primed the system. If it sputters or doesn’t start, turn off the engine, recheck connections, and repeat the bleeding process.
Run the Engine and Check for Issues
Let the engine run for a few minutes, observing for irregular idling, stalling, or misfires. If everything runs smoothly, you’ve properly primed your fuel system. Otherwise, consult this troubleshooting guide or contact a professional mechanic to diagnose persistent issues.
 Many car owners fall prey to myths and misconceptions that can lead to costly mistakes if not addressed properly.
Why Do We Still Believe Old Auto Repair Myths?
Despite advances in automotive technology and the wealth of information available online, some outdated beliefs persist among drivers. For instance, the idea that changing your oil every 3,000 miles is always necessary is one such myth. Modern engines and synthetic oils have extended oil change intervals significantly, often up to 7,500 or even 10,000 miles, as supported by vehicle manufacturers and experts like those at GlassFixAuto. Clinging to old practices can lead to unnecessary service appointments, wasting your time and money.
One common trap is the misconception that brake pads should be replaced at the first sign of wear. Actually, many pads have a built-in friction indicator that warns you when they’re near the limit. Replacing your brakes prematurely isn’t just unnecessary—it could also cause you to overlook other critical components like rotors or calipers that may be under stress. Regular brake inspections, as explained in this guide, are key to avoiding such pitfalls.
Let’s talk about tune-ups. A lot of drivers think tuning up means replacing every component regardless of its condition. However, a professional tune-up involves diagnosing your vehicle’s specific needs, not just changing parts on a schedule. Over-tuning or unnecessary replacements can sometimes do more harm than good, especially if it leads to interference with sensors or emission controls. Check out this article for insights into effective tuning practices.
— But what about the hidden nuances most drivers overlook?
One advanced mistake—often missed by even seasoned owners—is neglecting the impact of environmental factors on vehicle maintenance. For example, not considering how cold weather affects your battery or how humidity influences brake corrosion can result in premature component failure. Modern diagnostics can detect these issues early, but many drivers dismiss the signs until a breakdown occurs. Using proactive measures, like seasonal inspections, can save you both money and inconvenience. Learn more about staying ahead of these nuances in auto repair trends.
Have you ever fallen into this trap? Let me know in the comments. Recognizing these misconceptions is the first step in practicing smarter, more cost-effective auto care. Remember, proper maintenance isn’t just about fixing problems—it’s about preventing them before they happen, ensuring your vehicle’s longevity and safety.When it comes to keeping your vehicle in top shape, having the right tools is essential. I personally swear by a high-quality automotive multimeter, like the Fluke 115, which offers precise diagnostics for electrical systems. It helps identify faulty sensors or wiring issues quickly, saving me time and preventing costly repairs. A reliable scan tool, such as the Autel MaxiCOM, is another must-have; it reads and clears diagnostic trouble codes, giving me immediate insight into engine and emission system health. I also regularly use a torque wrench, calibrated to manufacturer specs, ensuring that bolts—from wheel lug nuts to timing belts—are tightened correctly, which is critical for safety and durability. Using a grease gun with the proper lubricant tips helps maintain suspension components and prevent future squeaks or failures. For fluid management, I prefer a spill-proof funnel set to avoid messes when topping off fluids or bleeding systems during brake or coolant service.
Looking ahead, predictive maintenance tools are gaining popularity. Devices that connect to your smartphone can monitor battery health or even analyze engine vibrations in real-time, forecasting potential failures before they happen. This proactive approach is transforming auto care from reactive to preventive, and I recommend early adoption to any diligent car owner.
How do I maintain my tools over time?
Regular calibration and proper storage are key. For instance, keeping your torque wrench in a protective case prevents corrosion and maintains accuracy. Cleaning electrical contacts after use extends their lifespan, ensuring reliable readings when you need them most. Additionally, updating diagnostic software periodically ensures compatibility with new vehicle models and system updates. Investing in quality tools might seem costly upfront, but it pays off by reducing unnecessary trips to the mechanic and extending your vehicle’s lifespan.
If you’re serious about long-term auto maintenance, consider setting a dedicated tool kit, organized in a sturdy toolbox or bag, so everything is ready when repairs or inspections are needed. Moreover, stay informed about evolving technologies—like electric vehicle components—so your tools adapt alongside the industry. For example, understanding how to interpret data from advanced EV diagnostic platforms can make a significant difference in troubleshooting.
In conclusion, well-chosen, maintained tools empower you to perform accurate repairs, identify issues early, and save money over time. Try incorporating a professional-grade multimeter into your toolkit—it’s been a game-changer for me in diagnosing electrical problems efficiently. For even more expert advice on maintaining and upgrading your tools, check out our comprehensive car maintenance checklist.
Lessons That Took Me Beyond Basic Repairs
- Never underestimate the importance of priming your fuel system; I used to think a few cranks would do the trick, but I learned the hard way that proper bleeding saves time and prevents damage.
- Patience is key—rushing the process can lead to costly mistakes. I found that slow, deliberate steps get my engine back to life faster than hurried attempts.
- Every vehicle has its quirks. When I discovered specific bleed screws or vent valves in certain models, it changed how I approached fuel line priming permanently.
Tools and Resources That Keep Me Confident
- My favorite is the comprehensive car maintenance checklist. It keeps me proactive, helping avoid running out of fuel altogether.
- A reliable tune-up guide taught me the importance of routine checks—saving money and hassle in the long run.
- I trust high-quality tools like my experienced-level scan tool to detect hidden issues early, which is crucial before they become emergencies.
Fueling Your Vehicle’s Future with Confidence
In my journey of auto repair and maintenance, I’ve learned that true confidence comes from knowing you’re prepared. Whether it’s priming your fuel lines or understanding your vehicle’s unique needs, taking the initiative makes a real difference. Remember, preventative care saves money, prolongs your car’s life, and keeps you safe on the road. So, go ahead—equip yourself with knowledge and the right tools, and turn every repair challenge into an opportunity to become a more skilled, confident driver.
What’s the one auto care lesson you wish you had learned earlier? Share your story below—I’d love to hear it!