
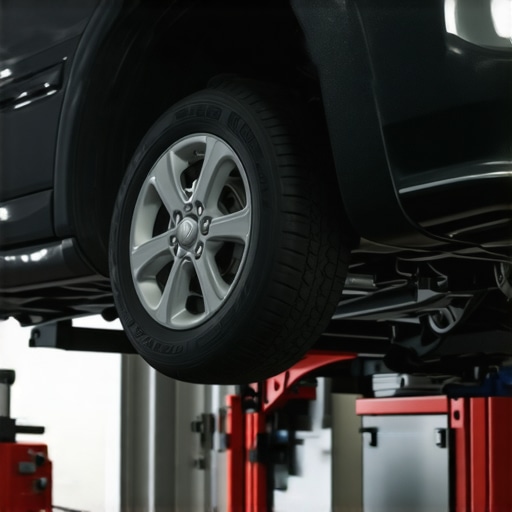
It was a morning like any other, car warmed up but suddenly, that dreaded rattling noise echoed from beneath. My heart sank—another repair, another expense. But as I jiggled the heat shield with a makeshift tool, a lightbulb went off. Why was I spending a fortune when a simple fix could do the trick? If you’ve ever been annoyed by that metallic clatter when you drive over potholes or speed bumps, you’re not alone. The good news? Fixing a rattling heat shield doesn’t need to drain your wallet or turn you into a mechanic. Today, I’m sharing how I managed to silence that noisy nuisance for less than ten bucks, and how you can do it too.
Why a Noisy Heat Shield Might Be Your Car’s Quietest Alarm
The heat shield is a vital but often overlooked part of your vehicle. It protects your car from the intense heat of the exhaust system, preventing damage and even fire hazards. But when it becomes loose or corroded, it starts to sing a loud, annoying tune every time you hit a bump or accelerate. This isn’t just an unpleasant symphony; left unchecked, a rattling heat shield can result in larger, more costly repairs down the line. In fact, according to auto repair experts, ignoring such a seemingly small issue can lead to exhaust leaks or damage to other components, which may cost hundreds or even thousands of dollars to fix later. So, catching and fixing it early is both smart and budget-friendly. Have you ever ignored that rattling, thinking it was just a harmless noise? I’ve been there, and I learned firsthand that sometimes, the simplest fix is all you need. Instead of rushing to the shop, I decided to take matters into my own hands. And here’s the kicker: all it took was a few dollars and a little bit of elbow grease. If you want to learn how I did it—and how you can quiet that stubborn rattle—keep reading. Before we jump into the step-by-step guide, let’s address one common concern I hear quite often.
Is this heat shield fix actually worth the hype?
Honestly, I initially doubted the DIY approach, fearing I’d end up making things worse. Early in my auto repair journey, I made the mistake of using cheap, low-quality parts, which only prolonged the problem. But once I learned to identify the root of the rattling and used the right tools, my car was quiet again in no time. Remember, a well-executed quick fix can save you hundreds, if not thousands, in repairs. Curious to know how I managed it? Let’s get into the practical steps, and I’ll guide you through every part of the process—no fancy tools needed. Want more tips on keeping your car in top shape? Check out my [car service checklist](https://glassfixauto.com/car-service-checklist-how-to-keep-your-vehicle-in-top-shape) to stay ahead. Now, let’s silence that noise and get your ride back to peaceful operation.
Secure the Heat Shield in Place
Start by locating the loose or rattling heat shield beneath your vehicle, which often looks like a thin metal panel attached near the exhaust pipe. Use a jack and jack stands to lift your car safely, ensuring you have clear access underneath. Relief came when I used a simple hose clamp from the local hardware store to tighten the heat shield’s mounting bracket. Place the clamp around the loose area, tightening it with a screwdriver until the shield sits firmly without excessive movement. Repeat this process for any other loose sections. This quick fix is effective because it restores the shield’s stability, preventing it from banging against the exhaust during drives, especially over bumps.
Identify the Problem Areas
When I first inspected the underside, I looked for corrosion or broken mounting brackets. Using a flashlight, I examined all the bolts and clamps securing the shield. Often, rust causes brackets to weaken or break, leading to looseness. For stubborn rusted bolts, applying penetrating oil and letting it sit for a few minutes made removal or adjustment easier. Remember, failing to fix loose shields not only causes noise but can eventually lead to exhaust leaks, which might cost you more to repair later.
Replace or Reinforce Mounting Hardware
If clamps or bolts are severely corroded, replacing them is essential. Use a socket wrench to remove damaged hardware and replace it with stainless steel screws or clamps for durability. During my experience, I found that replacing a rusted bolt with a new one solved the rattling immediately. To make the repair last longer, consider applying some high-temperature silicone or heat-resistant paint to metal parts, reducing future corrosion. Replacing worn-out brackets ensures the shield remains securely attached, eliminating the rattle at its source rather than just muffling the noise.
Test the Fix by Driving
After securing everything, lower the vehicle and take a short drive over familiar bump spots. If the rattling persists, double-check your clamps and brackets. Sometimes, re-tightening or adding an extra clamp to a particularly loose section is enough. I learned this lesson firsthand when my first fix was only partially effective because I overlooked a tiny corner not fully attached. Patience and thorough inspection are key to a silent, smooth ride.
Additional Tips for Long-Term Silence
To prevent future issues, regularly inspect the heat shield, especially after winter or heavy driving. Applying a high-temperature anti-rattle spray can also dampen vibrations that might develop over time. For more detailed insights on vehicle maintenance and preventing common auto repair issues, visit my article on troubleshooting common auto repair issues. Remember, small adjustments like these can save you hundreds in the long run, maintaining your vehicle’s performance and your peace of mind.Many car owners believe that routine tune-ups, brake services, and general auto repairs are straightforward tasks, but in reality, there’s a lot more complexity beneath the surface. One common myth is that all tune-ups are created equal; however, experts emphasize that a proper tune-up tailored to your vehicle’s specific needs can significantly boost performance and fuel efficiency, as discussed in [this comprehensive guide](https://glassfixauto.com/tune-up-your-car-for-peak-performance-essential-maintenance-tips). Another misconception involves brake service—many think that new brake pads alone solve the problem, but overlooking underlying issues like warped rotors or worn calipers can lead to costly repairs later, something I cover in detail [here](https://glassfixauto.com/understanding-brake-system-repairs-a-guide-for-vehicle-owners).Maintaining your vehicle efficiently requires the right tools that can handle various tasks, from routine inspections to unexpected repairs. Personally, I swear by a high-quality digital multimeter; it’s indispensable for diagnosing electrical issues like dead batteries or faulty sensors. I also recommend a reliable torque wrench—specifically, the Tekton 1/2 Inch Drive Click Torque Wrench—because proper torque settings prevent damage and ensure safety during brake or axle repairs. For fluid checks and refills, I use a funnel with a built-in filter to prevent contamination, a small but impactful gadget that saves time and effort. When it comes to cleaning parts or applying lubricants, I prefer a spray gun like the WD-40 Specialist Penetrant and Lubricant because it delivers precise application without excess waste. Using a microfiber inspection mirror can reveal hidden corrosion or cracks in hard-to-see areas, making early detection more accessible. For software diagnostics, I rely on the BlueDriver Bluetooth professional scan tool, which connects with my smartphone to read and clear codes instantly—saving me trips to the mechanic for minor issues. Looking ahead, the trend toward integrated digital diagnostics and smart tools suggests that future maintenance will become more intuitive, enabling even amateurs to perform complex tasks confidently. How do I maintain my tools to ensure longevity? I always clean them after use, store them in a dedicated toolbox with moisture control, and periodically calibrate my torque wrench according to the manufacturer’s guidelines. Regularly investing in proven equipment not only makes repairs safer but also extends the lifespan of your vehicle, ultimately saving money. For those interested in diving deeper, I recommend visiting the article on how to tell if your alternator is dying for insights on diagnosing electrical components accurately. A practical tip to get started: try calibrating your torque wrench now—it’s a small step that can prevent costly over- or under-tightening of critical parts like brake rotors or suspension components, ensuring your car stays safe for miles to come.
Lessons That Changed My Auto Approach
- Realizing that many car issues, like a rattling heat shield, are surprisingly simple to fix if you know what to look for, saved me hundreds of dollars and gave me a new sense of confidence in DIY auto repair.
- Understanding the importance of inspecting corrosion and mounting hardware early on taught me to prevent minor noises from turning into costly repairs—an insight I wish I had embraced sooner.
- I’ve discovered that patience and meticulous inspection are key; rushing or assuming the worst often leads to unnecessary expenses, whereas careful work offers immediate relief and long-term benefits.
- Learning to use basic tools like hose clamps and penetrating oil transformed my approach to vehicle maintenance, making regular DIY fixes both accessible and satisfying.
Tools and Resources That Make a Difference
- Quality Hose Clamps: Affordable and versatile, they can secure loose heat shields effectively—I’ve trusted the durability of hardware store options since my first fix.
- Penetrating Oil: Applying WD-40 or similar products made loosening rusted bolts effortless, prolonging the life of repair hardware and preventing damage.
- My Car Service Checklist: Staying organized with a comprehensive maintenance planner helped me catch issues early and prioritize fixes—check it out here.
- Online Repair Guides: Learning from trusted sources empowered me to tackle simple repairs confidently—one of my favorites is the article on how tune-ups improve safety and efficiency.
- Basic Hand Tools: A good socket wrench set and screwdrivers are essential—I personally rely on my trusted brands to ensure safety and reliability during repairs.
Gear Up for Your Own Repair Journey
Embarking on do-it-yourself auto repairs like fixing a rattling heat shield can be rewarding and cost-effective. With a little patience, the right tools, and trusted guidance, you can address many issues that once seemed daunting. Remember, small fixes today can save you from expensive repairs tomorrow. Don’t wait for mysterious noises to become costly problems—take action, learn as you go, and enjoy the satisfaction of keeping your vehicle in top shape. What’s the first DIY car repair you’ve been hesitant to try? Share your thoughts below and let’s learn together!