
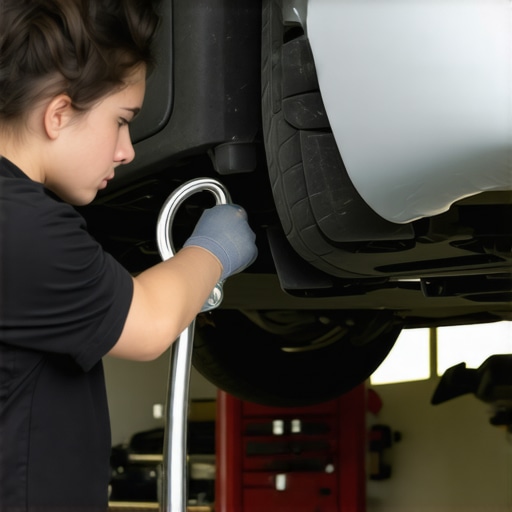
Ever been caught off guard by that annoying metallic rattle echoing from underneath your car? One moment, you’re cruising along peacefully; the next, that persistent clatter ruins your drive and makes you dread every stoplight. I’ve been there too. It’s the kind of noise that gnaws at your nerves and leaves you wondering if you need a mechanic — or just a miracle fix.
Why a Rattling Heat Shield Can Drive You Crazy (And Why You Should Care)
That seemingly harmless rattling often signals a loose heat shield—a little metal guard designed to protect your car from the intense heat of the exhaust system. When it wobbles and clangs, it’s not just annoying; it can also lead to more serious issues if ignored. Heat shields aren’t expensive parts, but the labor to fix them can rack up quickly. Fortunately, I found a surprisingly simple, do-it-yourself solution that requires just a hose clamp. This approach saved me both time and money, and I want to share my experience with you.
Now, you might be skeptical. How can a tiny hose clamp possibly fix a problem that sounds like the car is about to fall apart? Well, with a little understanding and the right tools, it’s a straightforward fix that can quiet down that relentless rattle. Plus, it sidesteps the costly labor charges from a shop, which, according to industry reports, can sometimes make auto repairs seem like a never-ending expense. A little DIY ingenuity can go a long way in keeping your vehicle’s sounds under control and your wallet intact.
Is this quick fix really reliable? My early mistake and what I learned
Full disclosure: I initially tried to tighten the heat shield bolts, thinking that was the culprit. Spoiler alert: they were tight. I overlooked that the shield was loose due to broken or missing clips. My mistake was not inspecting the shield’s stability thoroughly first; I assumed a bolt trick would solve everything. That’s a common pitfall among car owners. Instead, I quickly discovered that a simple hose clamp could secure the loosened part around the existing mounting points. This experience taught me that sometimes, the simplest tools do the best job—and that DIY solutions are worth a shot before costly repairs. If you’re curious about more DIY tips or other auto troubleshooting, check out our guide on troubleshooting common issues before visiting the shop. Or, for a broader look into future trends, have a glance at trends to watch in auto repair for 2025.
Remove the Obvious Debris and Inspect the Heat Shield
Start by safely parking your car on a flat surface, turning off the engine, and letting it cool down. Open the hood and locate the heat shield beneath your vehicle’s exhaust system. Use a flashlight if necessary. Gently shake the shield to see if it’s loose or rattling. If it’s loose, check for broken or missing clips or brackets. This initial visual inspection helps determine if a simple clamp can suffice.
Gather Necessary Tools and Supplies
You will need a durable hose clamp (preferably stainless steel for corrosion resistance), a screwdriver or pliers to tighten the clamp, and possibly a wrench if bolts are involved. Ensure the hose clamp size fits snugly around the shield and mounting points. Having these tools ready prevents multiple trips to the garage or store and streamlines the process.
Position the Heat Shield for Securing
Carefully align the loose or wobbly part of the heat shield so that it rests firmly against the mounting points. Avoid forcing or bending metal excessively, which could cause cracks. Think of this step as tightening a loose bicycle seat—muscular effort isn’t necessary, just gentle realignment to ensure stability.
Pro Tip:
If the shield is hanging because of broken clips, consider temporarily supporting it with a jack or a piece of wood for easier access.
Secure the Heat Shield with the Hose Clamp
Slip the hose clamp around the area where the shield contacts the mounting surface. Tighten the clamp gradually with your screwdriver or pliers, ensuring it’s snug but not overly tight to prevent damaging the metal. Imagine giving a gentle pinch to a loose screw—firmness is key, but avoid cranking to avoid deforming the metal.
Watch for Proper Clearance
As you tighten, verify that the shield isn’t pressing against other components like the exhaust pipe or wiring. Proper clearance prevents rattling and heat damage, much like adjusting a car seat to avoid chafing or discomfort during long drives.
Test the Fix and Make Adjustments
Start your engine and observe the heat shield for movement or rattling. Gently tap or shake the area to ensure it stays secure. If the rattle persists, tighten the clamp further or reposition it for better contact. Remember, a little patience during this testing phase saves you from repeated trips and potential road noise complaints.
Reassemble and Final Check
Close the hood, and take the vehicle for a short drive, listening carefully for any rattling. After the drive, inspect the clamp to confirm it hasn’t loosened due to high heat or vibrations. Regularly check the heat shield’s mounting point as part of your routine maintenance, particularly if you notice new noises or after rough driving conditions.
Securing a heat shield with a hose clamp is a practical, cost-effective solution that I personally used on a busy Saturday afternoon. It kept my engine bay quiet and prevented further damage, proving that sometimes, simple tools can have a big impact. For more DIY tips or troubleshooting tricks, explore our comprehensive guides on auto maintenance features like tune-ups and brake service techniques.
When it comes to car maintenance, a common misconception is that following the manufacturer’s recommended service intervals guarantees optimal vehicle health. However, experts warn that adhering strictly to these guidelines without considering driving habits, environment, or vehicle condition can lead to subpar results. For instance, many assume that a traditional 3,000-mile oil change is universally necessary, but recent studies show that synthetic oils and modern engines can often go much longer—up to 7,500 or even 10,000 miles—if the vehicle is used under typical conditions. Relying solely on mileage without factoring in real-world usage may actually harm the engine by neglecting necessary inspections and fluid replacements.
Another prevalent myth revolves around brake service. Some believe that replacing brake pads is all that’s needed to maintain braking performance. But this oversimplifies the situation; components like rotors, callipers, and brake fluid also require regular checks and replacements to ensure safety. Failure to address these details can result in uneven brake wear, reduced stopping power, or even complete brake failure. For example, contaminated brake fluid can cause spongy pedals and diminished braking response—issues that are often overlooked by DIY enthusiasts who only focus on pads.
In the realm of tune-ups, many think that they are only necessary when the engine performs poorly. In reality, timely tune-ups prevent minor issues from escalating into costly repairs. Modern vehicle sensors and complex electronic systems have made tune-ups more sophisticated than just replacing spark plugs; they include inspecting fuel injectors, sensors, and the exhaust system. Overlooking these tasks can lead to decreased fuel efficiency and increased emissions. An advanced mistake a lot of owners make is assuming that a smooth idle indicates everything’s okay, but underlying problems like clogged fuel filters or failing oxygen sensors may not manifest until they cause noticeable issues.
Beyond these misconceptions, one of the less obvious but critical nuances is the importance of tailored maintenance based on individual driving conditions. For example, urban stop-and-go traffic accelerates wear differently than highway driving, necessitating different service routines. Industry experts argue that a one-size-fits-all approach can be ineffective; instead, diagnostic tools and professional assessments are key to customizing maintenance schedules for longevity and safety. According to a study by automotive engineers, vehicles maintained with personalized care experience fewer breakdowns and longer lifespans.
Are you falling into any of these common traps? Understanding these nuances can save you money and frustration in the long run. If you’re unsure about your current maintenance practices, check out our troubleshooting guide to prevent minor issues from escalating. Staying ahead of trends in auto repair, like those forecasted for 2025, can also give you a crucial edge—”auto-repair trends to watch in 2025” provides insights for proactive maintenance.Maintaining your vehicle’s health over the years requires the right tools and consistency. I’ve personally found that investing in quality equipment makes a significant difference in diagnosing issues early and performing DIY repairs with confidence. One tool I swear by is a reliable automotive code reader. Not just any scanner, but a professional-grade diagnostic device like the Autel MaxiScan MS300, which allows me to read and clear error codes from my vehicle’s ECU easily. Having such a scanner helps me catch problems before they escalate, saving time and money, and understanding what the vehicle needs without guesswork.
Another game-changer in my toolkit is a good set of torque wrenches. When working on critical components like brake calipers or suspension parts, applying the correct torque ensures proper assembly and safety. I prefer digital torque wrenches like the Tekton 1/2-inch drive model because they give precise readings, reducing the risk of over-tightening or damaging parts. These tools have helped me maintain my vehicle properly, especially during brake service or suspension repairs.
For regular maintenance tasks, I rely on a portable, magnetic oil drain pan. It simplifies oil changes by catching used fluids and preventing messes. The flexibility to position it exactly where I need minimizes waste and cleanup efforts. Pairing this with a high-quality funnel allows me to refill oils neatly, reducing contamination risks.
Looking ahead, I predict that smart tools with integrated apps and connectivity features will become standard in auto maintenance. Devices that can connect to your smartphone via Bluetooth, like the FIXD sensor, provide real-time vehicle health updates, reminding you of upcoming service needs or detecting issues early. Embracing these technologies will make DIY maintenance more accessible and effective for everyone.
How do I keep my tools in top shape over time? Regular calibration of my torque wrench with a professional torque calibration service ensures ongoing accuracy. Maintaining your equipment is as vital as the tools themselves; well-calibrated tools provide reliable results, preventing potential damage during repairs.
If you’re ready to elevate your auto repair game, I recommend starting with a quality diagnostic scanner. It’s an investment that pays off by enabling you to troubleshoot issues swiftly and accurately. For a deeper look into future trends, check out the automotive industry forecasting at auto repair trends for 2025. Remember, the right tools combined with proper maintenance routines make all the difference in keeping your car running smoothly for years to come.
Secret Lessons That Changed How I Approach Car Repairs
- Sometimes, I discovered that my assumptions about what caused a noise were completely off. The lesson? Always verify visually and physically before jumping to conclusions about parts or causes, especially with elusive rattles or vibrations.
- Investing in simple diagnostic tools like a quality code reader transformed my maintenance routine. It’s remarkable how much you can learn about your car’s health without expensive equipment—saving both time and money in the long run.
- Trying quick fixes such as hose clamps taught me that often, the simplest solutions are the most effective. It’s easy to get caught up in complex repairs, but sometimes, a straightforward approach beats overcomplicating things.
- Understanding that regular visual inspections can preempt major breakdowns made me proactive rather than reactive. Developing a habit to check critical components periodically has extended my car’s lifespan significantly.
- Patience is key. Rushing through troubleshooting can lead to unnecessary replacements or overlooking small but crucial details. A methodical, calm approach yields better results and keeps the repair process enjoyable.
Tools and Resources That Keep Me Ahead
- Automotive Diagnostic Scanner: Devices like the auto repair trends for 2025 suggest that smart tools are becoming essential. A reliable scanner provides invaluable insights into your vehicle’s ECU, empowering you to fix issues promptly.
- Torque Wrenches: Precise torque application prevents parts from over-tightening or under-tightening, which can cause future problems. The best strategies for vehicle longevity emphasize accurate torque during repairs.
- Magnetic Oil Drain Pan: Cleanup becomes effortless, and ensuring proper oil disposal is better for the environment—plus, it keeps your workspace tidy.
- Online Guides and Communities: Forums and detailed guides, like our troubleshooting auto issues, offer peer support and proven tips that can help you navigate complex repairs confidently.
Your Next Move Towards Confident Car Care
Embarking on your own auto repair journey can feel daunting, but with the right mindset and tools, it transforms into an empowering experience. Remember, every small fix you master builds your confidence and deepens your understanding of your vehicle. The future of car maintenance is heading towards smarter, more accessible solutions—like those forecasted in auto repair trends for 2025. So, why not take the first step today? Whether it’s tightening a heat shield or decoding an engine light, each effort makes you a better car owner.
What repair challenge have you been hesitant to tackle? Share your story below and let’s learn together!
,