
I remember pulling my old Chevy into the driveway after a twenty-minute grocery run, only to be met with a scent that smelled like a burning chemistry lab. I walked around the back, and the heat radiating from the passenger-side rear wheel was so intense I could feel it through my jeans. I had made the classic mistake: I ignored that slight ‘heavy’ feeling in the gas pedal for weeks, thinking my old truck was just tired. In reality, my rear drum brakes were clamped down tight, cooking themselves from the inside out. It was a costly lesson in mechanical denial. Today, I am going to make sure you do not make that same mistake. We are going to pinpoint exactly how to tell if those stubborn rear drums are holding you back—literally—and how to catch it before you are staring at a melted wheel cylinder and a massive repair bill.
Are Drum Brakes Just Outdated Junk?
Many people think drum brakes are a relic of the past that should have stayed in the 1960s. While they are definitely old-school compared to discs, they are still incredibly common on the rear of trucks and budget-friendly commuters because they serve as great parking brakes. But because they are an enclosed system, you can’t just peek through the wheel to see if something is wrong. This ‘out of sight, out of mind’ nature is exactly why a understanding brake system repairs is so vital for anyone driving a vehicle with this setup. When a drum drags, it creates a feedback loop of heat and friction that can eventually cause your brake pedal to go to the floor in a panic stop.
Your Rear Wheels Shouldn’t Smell Like a Barbecue
The first sign is almost always the smell. It is a sharp, acrid, burnt-toast-meets-sulfur aroma. If you hop out of your car and notice one wheel is significantly hotter than the others, you have a problem. When a shoe fails to retract, it stays in constant contact with the drum. This creates massive amounts of kinetic energy turned into heat. According to the brake experts at Bendix, excessive heat can lead to ‘brake fade,’ where the components become so hot they can no longer generate the friction needed to stop the car. If you have ever felt your car pull to one side when you aren’t even touching the steering wheel, that is a huge red flag that one side is dragging more than the other. Beyond the safety risk, a dragging brake is like driving with a giant anchor behind you. You might notice your gas mileage plummeting, similar to how regular tune-ups improve fuel efficiency, a sticking brake does the exact opposite by forcing your engine to work twice as hard just to maintain highway speeds. Have you ever felt like your car was struggling to accelerate even though you were giving it plenty of gas? Tell me about it in the comments below; I want to know if you have smelled that ‘burnt brake’ scent lately! Sometimes the issues are subtle, like a weird grinding sound when you are backing up, which is often the first cry for help from a dry or sticking brake hardware kit. We are going to look at the physical checks you can do right now in your driveway to confirm your suspicions.
Jack Up the Rear to Find the Culprit
The most reliable way to confirm a dragging brake is to get the weight off the tires. Secure the front wheels with chocks, lift the rear, and place it on jack stands. Safety first—never trust a hydraulic jack with your life. This is the first step in troubleshooting common auto repair issues before visiting the shop. Once the car is secure, release the parking brake. If you forget this step, you will be fighting the system for nothing and potentially damaging the internal linkage.
The Spinner Test Never Lies
Grab the tire at the 9 and 3 o’clock positions and give it a hard shove to spin it. In a perfect world, it should spin freely for at least a full revolution or two. If it stops dead the second you let go, or if you hear a heavy scraping sound, you have found your anchor. A light, rhythmic ‘shh-shh’ sound is usually normal, but a constant grind indicates the shoes are pressing too hard. I have seen people ignore this, thinking the reason your brake pedal feels different after a tire change was just a fluke, only to find their drum turned blue from heat a week later.
Back Off the Star Wheel for Relief
If the wheel is stuck, the ‘star wheel’ adjuster is your primary suspect. This little geared screw expands the shoes to account for wear. Sometimes, it gets over-ambitious or rusted in place. Locate the small rubber plug on the back of the brake backing plate. Pop it out, and you will see the teeth of the star wheel. You will need a flat-head screwdriver or a brake spoon to click those teeth. I once spent an entire Saturday morning cursing at a stubborn drum on a friend’s old sedan. I had the sledgehammer out, ready to go to war, when I realized the auto-adjuster had seized in the ‘out’ position. It was not the drum being stuck on the hub; the shoes were physically locking the drum in place from the inside. Once I poked a screwdriver through the hole and backed off the star wheel, the drum slid off like it was greased. It is a vital part of any car service checklist to ensure these adjusters move freely.
#IMAGE_PLACE_HOLDER_B#
Look for the Hidden Leaks
While you have the drum off, pull back the rubber dust boots on the wheel cylinder. If brake fluid starts weeping out, the cylinder is toast. A leaking cylinder can actually cause a ‘drag’ by preventing the pistons from retracting properly, or it can contaminate the shoes, making them ‘grabby.’ Do not fall for brake service myths that say a little dampness is okay. It is not. Any moisture here means you are on the verge of total hydraulic failure. If you are following the ultimate car service guide, you know that catching a failing cylinder now is ten times cheaper than replacing a ruined set of shoes and drums later. Check the return springs too; if they look like they have been sitting in the Titanic’s hull, they probably do not have the tension left to pull the shoes back where they belong.
Common wisdom says that if your brakes are dragging, you just need new shoes. I used to believe that too, until I spent three days chasing a heat issue on a customer’s old truck that had brand-new friction material. Here is the contrarian truth: the shoes are rarely the actual problem. In my experience, the hardware kit—those cheap-looking springs and clips—is the most critical part of the system. If those springs lose even 10% of their tension due to heat cycles, they won’t pull the shoes away from the drum, leading to the exact drag we are trying to avoid. People often follow a car service checklist but skip the $10 hardware kit, which is the biggest mistake you can make. You are essentially putting a marathon runner in old, stretched-out sneakers.
Avoid the Trap of the ‘Perfect’ Pedal Feel
One major ‘oops’ factor I see with DIYers and even some pros is over-adjusting the star wheel to get a rock-solid brake pedal. It feels great for the first five minutes, but as soon as the drums get warm, the metal expands. If you didn’t leave enough ‘running clearance,’ that expansion turns a minor touch into a full-on lockup. This is one of the most persistent brake service myths—that tighter is always better. In reality, you need that microscopic gap to account for thermal expansion. Have you ever tightened something up only to have it fail a mile down the road? Let me know in the comments; I’ve definitely been there.
#IMAGE_PLACE_HOLDER_C#
Why Does High-Mileage Brake Fluid Kill Drum Performance?
Advanced drivers often overlook the chemistry happening inside the lines. According to the Car Care Council, brake fluid is hygroscopic, meaning it absorbs moisture from the air, which can lead to internal corrosion in the wheel cylinders. This rust creates a ‘shelf’ inside the cylinder that prevents the pistons from fully retracting. You might think you have a mechanical drag, but you actually have a hydraulic one. If you want to maximize your car’s lifespan with expert tune-up strategies, you have to flush that fluid. If you notice why your brake fluid is green, it is a sign that the internal copper coating of your lines is eroding, which will eventually seize your rear brakes entirely. Understanding these understanding brake system repairs nuances is what separates a backyard tinkerer from someone who truly knows their machine. Before you head to the shop, try troubleshooting common auto repair issues by checking the fluid color first—it might save you a fortune.
Once you have confirmed that the fluid isn’t a toxic swamp, you need to get the right steel in your hands. I spent years trying to manipulate return springs with a pair of needle-nose pliers and a flat-head screwdriver, and I have the scars on my knuckles to prove it is a bad idea. If you are serious about understanding brake system repairs, invest twenty dollars in a dedicated brake spring tool. It looks like a bizarre pair of pliers with a hook on one side and a socket on the other. This tool allows you to seat the return springs onto the anchor pin without them flying across the garage. I personally use a set of Lisle brake spring pliers because the pivot point is reinforced; cheaper versions tend to bend the first time you hit a heavy-duty truck spring. Having the right gear is a fundamental part of the car service checklist that professionals follow but amateurs often overlook.
How often should I pull the drums just to look?
I recommend pulling your rear drums every 30,000 miles, or at the very least, every time you are already in there for a tire rotation. This is the only way to perform a ‘dust out.’ Over time, the friction material wears down and creates a fine gray powder that gets trapped inside the drum. This dust acts like a sponge for moisture and can cause your components to rust prematurely. According to technical bulletins from Wagner Brake, failing to clean and lubricate the six specific contact points on the backing plate—where the shoes actually touch the metal—is the leading cause of ‘groaning’ noises. If you want to maximize your car’s lifespan with expert tune-up strategies, you need to apply a tiny dab of high-temperature ceramic grease to those spots. 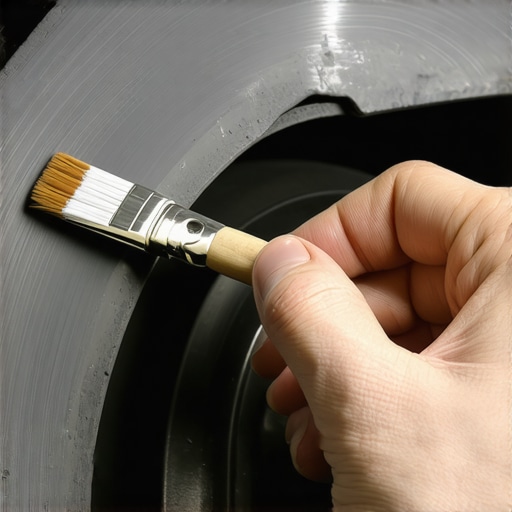
The Five Dollar Secret to Better Stopping
Do not underestimate the power of a five-dollar can of aerosol brake cleaner. When you are troubleshooting common auto repair issues before visiting the shop, spraying down the assembly to see the actual condition of the metal is vital. It removes the ‘glaze’ that builds up on the shoes, which can restore some of that lost stopping power. Just like how regular tune-ups improve fuel efficiency by ensuring clean combustion, clean brakes ensure that heat is dissipated correctly rather than trapped against the wheel cylinder.
The Shift Toward Electronic Rear Calipers
Looking ahead, the days of the manual star-wheel adjuster are numbered. As we see in auto repair trends to watch in 2025, more manufacturers are moving toward fully integrated electronic parking brakes (EPB) even on budget models. This means the ‘drag’ won’t be caused by a rusty spring, but by a software glitch or a failing actuator. For now, though, most of us are still dealing with old-fashioned mechanical systems. Before you call it a day, I want you to try this: next time you have the drum off, use a wire brush to clean the hub flange where the drum sits. A tiny bit of rust here can cause the drum to sit slightly crooked, leading to a phantom vibration. Do not fall for brake service myths that say ‘it will seat itself.’ It won’t. Take the extra five minutes to do it right.
Lessons My Knuckles Learned the Hard Way
After years of wrestling with drum brakes, I’ve realized that heat is the ultimate deceiver. A spring might look perfectly shiny, but if it has been through three or four overheating cycles, the metal’s tempered strength is gone. This is one of the most common brake service myths—that if it isn’t broken, it’s fine. In reality, those springs are the only thing keeping your car from dragging an anchor. I also learned that the ‘two-click’ rule is a lifesaver. When I adjust the star wheel, I always listen for a very faint ‘shhh’—a whisper of contact—rather than a dead stop. This gives the metal room to grow as it gets hot. Neglecting this small gap is how people end up needing understanding brake system repairs because they literally fused their shoes to the drum during a long highway drive. Finally, never skip the cleaning. A layer of dust can act like an insulator, keeping heat inside the drum and cooking your wheel cylinders from the inside out.
The Gear That Saved My Saturday
If you are tired of chasing springs across the floor, you need the right kit. I personally swear by the Lisle 47400 Brake Spring Tool; it makes hooking the return springs onto the anchor pin a five-second job instead of a twenty-minute battle. For lubrication, stay away from cheap multi-purpose grease. I use Permatex Ceramic Extreme because it won’t melt off and contaminate your shoes when the brakes get hot. Also, keep a printed copy of a car service checklist nearby so you don’t forget to torque your lug nuts when the job is done. I’ve seen seasoned pros forget that last step!
#IMAGE_PLACEHOLDER_E#
Take Control of Your Drive Again
Don’t let the complexity of a drum brake assembly scare you off. Once you understand that it is just a series of springs and levers working together, it becomes a puzzle rather than a problem. Taking the time to perform your own auto repair tasks not only saves you money but gives you the peace of mind that your car will actually stop when you need it most. You shouldn’t have to worry about your brake pedal going all the way to the floor in traffic just because a ten-cent spring failed. Dive in, get your hands a little dirty, and reclaim your car’s performance. Have you ever fought with a drum that just wouldn’t come off no matter how hard you hit it? Let me know your best ‘stuck brake’ stories in the comments below!