
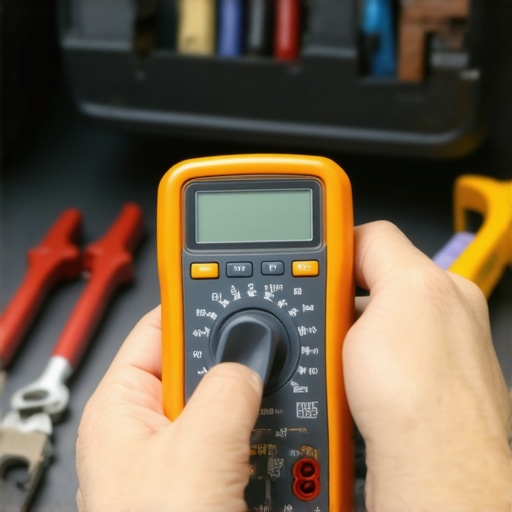
Ever been stranded because your car wouldn’t start, only to realize it was your alternator failing? I remember the first time I faced this dilemma—the engine sputtered, headlights dimmed, and I felt a mix of frustration and cluelessness. It was a lightbulb moment for me—figuring out a quick, affordable way to diagnose my car without rushing to the mechanic. Today, I’ll share that experience and guide you through a straightforward method to test your alternator using just a multimeter, right from your driveway.
Why Your Alternator’s Health Could Make or Break Your Day
If your car is giving you trouble starting or the battery keeps dying unexpectedly, the culprit might be your alternator. This vital component charges your battery while you drive and powers your vehicle’s electrical systems. When it starts to fail, symptoms can sneak up gradually—your headlights get dimmer, the dashboard lights flicker, and your battery warning light could even illuminate. Detecting this early is key because a dead alternator can leave you stranded, especially when you least expect it. According to automotive experts, a failing alternator is a common reason for roadside breakdowns, and most drivers only catch the problem too late.
Is Testing Your Alternator at Home Really Worth It?
At first, I was skeptical. I thought, ‘Testing automotive parts sounds complicated,’ until I realized that simple tools and a bit of know-how could save me time and money. I made one classic mistake early on—relying solely on my car’s warning lights without doing basic tests—and that almost led to a tow and costly repairs. So, I want to help you avoid that misstep by demonstrating how to use a multimeter to check your alternator’s performance. It’s surprisingly simple once you get the hang of it, and it’s a skill every car owner should have in their toolkit.
If you’re tired of the guesswork and want to take control of your vehicle’s health, read on. Next, we’ll walk through the step-by-step process to perform this test safely and accurately. And if you’re interested in improving your car’s overall performance and longevity, consider visiting this guide to tune-up strategies for some valuable tips. But first, let’s tackle that common question—how can you verify if your alternator is truly the culprit before heading to a mechanic? The answer lies just ahead.
Prepare Your Tools and Vehicle
Before starting, park your car on a flat surface, turn off the engine, and ensure the parking brake is engaged. Gather a digital multimeter, which is an affordable tool and essential for this test. I recall the first time I did this; I almost skipped charging the multimeter’s batteries, which led to inaccurate readings—lesson learned: double-check your equipment before diving in. Make sure your multimeter is set to measure voltage in volts (V).
Locate and Access Your Battery
Open your hood and locate the battery, usually on the engine bay’s side. Clean any corrosion or dirt with a wire brush if needed to get accurate readings. During my first test, I quickly realized that grime around the terminals can cause false readings—cleaning is crucial. Ensure the battery terminals are tight and free of corrosion for consistent contact.
Test Battery Voltage When the Car is Off
Set your multimeter to 20V DC range. Connect the red (positive) lead to the battery’s positive terminal (+) and the black (negative) lead to the negative terminal (–). Read the voltage displayed. A healthy, fully charged battery should read around 12.6 volts. I remember when my early reading was 11.8V—indicating a weak battery, which I didn’t notice until the alternator test later confirmed it. This initial check helps separate battery issues from charging problems.
Start the Engine and Measure Voltage
Start your car and keep the multimeter leads connected to the same terminals. Watch the voltage as the engine runs; it should increase to between 13.8V and 14.4V. Think of it as your alternator’s ‘power boost’—if the voltage doesn’t rise, your alternator might be failing. For example, I once had a reading of only 12.8V with the engine running, a clear sign the alternator was not charging as it should. If your voltage remains low or drops while the engine runs, that’s a red flag.
Check for Consistent Voltage Readings
A stable reading between 13.8V and 14.4V indicates your alternator is charging properly. If it spikes above this range (say, 15V), your voltage regulator could be overloaded—another point to consider for professional inspection. During my experience, a fluctuating voltage reading was a sign that the regulator needed replacement, saving me from a sudden breakdown.
Turn On Electrical Accessories and Re-Measure
Turn on headlights, air conditioning, and interior accessories. Observe the multimeter; the voltage should stay steady or slightly increase. A significant drop suggests your alternator struggles to supply power under load. I tested this during a hot summer day, and my voltage dipped below 13V when I turned on the AC, hinting at a weak alternator. Conduct this step to simulate real driving conditions.
Final Diagnosis and Next Steps
If your readings are below 13V with the engine running, or if voltage drops significantly when accessories are on, your alternator is likely failing. In such cases, consider scheduling a professional inspection or visiting this contact page for expert help. Regular testing can prevent breakdowns, giving you peace of mind and saving money—especially if you catch problems early. Plus, maintaining your alternator contributes to your vehicle’s overall health, extending its lifespan, as detailed in this tune-up strategies guide. Remember, consistent checks are your best defense against unexpected failures.
Most car owners believe that following standard maintenance schedules and replacing parts at recommended intervals are sufficient for optimal vehicle performance. However, this oversimplified view often leads to overlooked details that can cost you dearly over time. Contrary to popular belief, maintenance isn’t just about ticking boxes—it’s about understanding the complexities and nuances that differentiate a well-tuned car from one on the brink of costly repairs. For example, many think that a simple oil change suffices to keep their engine running smoothly, but ignoring the finer points—like the quality of the oil, the condition of the oil filter, or the state of the PCV valve—can lead to performance issues and engine wear down the line.
Are We Falling for the Myth That All Auto Repairs Are Equal?
A common misconception is that generic parts and services are just as good as OEM (original equipment manufacturer) components. In reality, using quality parts aligned with manufacturer standards can dramatically extend your vehicle’s lifespan and improve safety. Skimping on quality might save money upfront but often results in higher long-term costs due to premature failure or compromised safety. In my experience, many car owners neglect this nuance, leading to unnecessary repairs or even accidents. This is why understanding the specifications and standards of parts being installed is crucial and why detailed checklists, like the service checklist are invaluable.
Another overlooked aspect is the proper calibration and alignment after repairs or component replacements. For example, a misaligned brake system can cause uneven wear and reduce stopping efficiency, which might seem minor until it’s too late. Thus, professional inspection and precise adjustments are often necessary, especially when dealing with critical systems such as braking and suspension.
Now, you might wonder: How do I identify if my maintenance routines truly address these nuances? The answer involves asking detailed questions during service visits and staying informed about the latest trends and technologies in auto repair. Technology like diagnostic scanners and laser alignment tools are now standard for professional shops, but being aware of their benefits can help you evaluate the quality of your service providers. For instance, keeping up with emerging trends ensures your vehicle benefits from the most advanced and effective maintenance practices.
Lastly, consider the importance of regular tune-ups for ongoing health and efficiency. They’re not just for fixing problems but proactive measures to prevent issues before they materialize. Skilled mechanics will look beyond the obvious—examining the condition of spark plugs, ignition coils, and even fuel injectors, which often go unnoticed. These details, if neglected, can cause increased fuel consumption, rough idling, or complete engine failure. To maximize your car’s lifespan, consistent, nuanced maintenance is essential, as discussed here.
Have you ever fallen into this trap of neglecting the subtle yet crucial details? Share your experiences or questions in the comments—and remember, a well-informed owner is a safer, more economical driver. For tailored advice or professional assistance on precise maintenance strategies, don’t hesitate to reach out.
Maintaining your vehicle’s performance over time requires more than just occasional visits to the mechanic. Investing in the right tools and adopting specific methods can empower you to handle routine maintenance and minor repairs confidently. One invaluable item I personally rely on is a high-quality digital multimeter. It’s not just about measuring voltage; I use mine to check battery health, verify alternator output, and even diagnose electrical issues quickly. I prefer models with auto-ranging features because they eliminate the guesswork, ensuring precise readings without fiddly adjustments. For example, I use a Fluke 115 True RMS multimeter, known for accuracy and durability, which has saved me countless trips to the shop. When it comes to software, I recommend diagnostic scan tools compatible with OBD-II standards. Devices like the BlueDriver Bluetooth scan tool connect seamlessly to my smartphone, providing real-time data, stored fault codes, and even repair suggestions. This tech allows me to monitor my vehicle’s health proactively, identify trouble codes early, and decide whether a trip to the mechanic is urgent. I also recommend keeping a good set of basic hand tools—wrenches, screwdrivers, and pliers—that are essential for everyday fixes, like tightening loose clamps or replacing filters. Regularly performing simple tests, such as checking your battery voltage or listening for unusual noises during a test drive, can save you time and money. Looking ahead, I believe this trend toward affordable, user-friendly diagnostic tools and integrated apps will continue to grow, making vehicle maintenance more accessible for DIY enthusiasts. Curious about how to stay on top of your maintenance game? Don’t miss the detailed tips on efficient tune-ups and diagnostic procedures available in our comprehensive guides. Ready to elevate your auto care routine? Try using your multimeter to perform a quick alternator test—insert the leads into the battery terminals while the engine runs. It’s a simple step that can catch impending failures early and is a invaluable skill for long-term savings. For personalized advice or professional help, always feel free to reach out through our contact page and keep your vehicle running smoothly for miles to come.
Lessons That Changed My Approach to Auto Maintenance
- Trusting my instincts over the dashboard lights saved me from unexpected breakdowns; always perform a quick electrical test before panicking.
- Understanding how the alternator works prevented unnecessary repairs—knowing the signs can help you catch issues early and save money.
- Embracing DIY diagnostic skills transformed my relationship with my vehicle; I now handle small problems confidently, avoiding costly shop visits.
Tools and Knowledge That Keep Me Ahead
I’ve come to rely on a quality digital multimeter, like the Fluke 115, to perform quick checks on my battery and alternator’s health. For more advanced diagnostics, a smartphone-compatible OBD-II scanner such as BlueDriver connects me directly to my vehicle’s system, providing real-time insights that are invaluable. Having a basic set of hand tools has also proven essential in addressing minor issues promptly. For those looking to deepen their understanding, this article offers excellent tips on routine maintenance that complements electrical testing. Incorporating these tools and knowledge into regular checks gives me peace of mind and extends my car’s lifespan.
Keep Your Momentum and Drive Confidently
Your ability to diagnose and address electrical issues like alternator failures can significantly enhance your driving experience. Remember, most problems are manageable when you have the right knowledge and tools at your fingertips. Embrace the challenge of learning these practical skills—your vehicle will thank you, and your wallet will too. So, why not start today? Test your alternator’s performance and take control of your auto care journey. Have you ever struggled with diagnosing electrical problems? Let me know below, and share your experiences or questions—together, we can keep our cars running smoothly for miles ahead.