
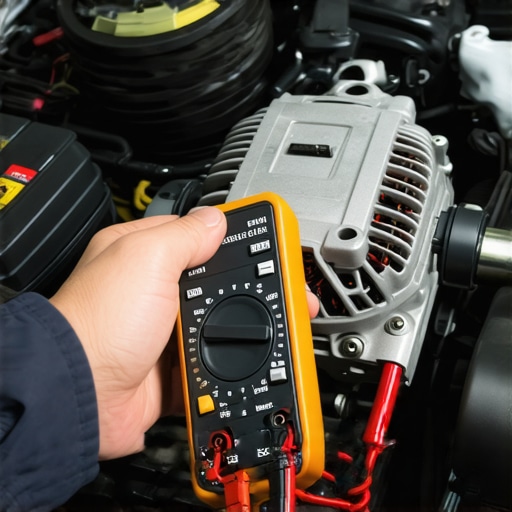
Have you ever been stranded on the side of the road because your car just wouldn’t start, only to realize the next morning that your alternator might be the culprit? I remember the frustration and helplessness that hit me then. It was late, and I didn’t have the big, expensive tools at hand—just a humble $10 multimeter I picked up on a whim. That moment sparked a lightbulb in my head: “Could I really test my own alternator without heading to the mechanic?”
Save Your Wallet and Your Time—Test Your Alternator at Home
Is Self-Testing Your Alternator Actually Worth the Hype?
When I first started, I thought, “This probably isn’t that simple,” and I almost threw in the towel before even trying. Early on, I made the mistake of assuming my multimeter would tell me everything by simply measuring the battery voltage. Turns out, that’s only part of the story. A lot of folks underestimate how crucial it is to understand what the readings mean and how to interpret them correctly—especially when diagnosing issues like a failing alternator. Knowing the right tests can save you hundreds in mechanic bills, and I promise, it’s easier than you think.
According to automotive experts, a failing alternator is among the top causes of breakdowns, with around 50% of battery problems actually stemming from issues with the charging system, including the alternator itself. So, getting comfortable with testing it yourself isn’t just a fun DIY hack; it can prevent you from being stuck in a pinch. Plus, a quick self-test can confirm whether you should seek professional help or if a simple fix might do the trick.
But here’s something I caution against—jumping straight into tests without knowing the common pitfalls. I once replaced my battery because I thought that was the problem, only to find out my alternator was barely charging the new battery. That wasted time and money could have been avoided if I had known how to properly test my alternator first. So, I’ll walk you through my tried-and-true method, simplest and least expensive, so you can tackle this problem confidently and keep your car running smoothly.
Gather Your Tools and Prepare
Start by collecting a reliable multimeter, preferably digital, which can measure voltage accurately. I remember a time when I used my basic multimeter and a pair of cheap test leads to diagnose my car’s charging system. Ensure your car’s engine is off before you begin, and locate the alternator, usually near the serpentine belt. Familiarize yourself with your vehicle’s manual if needed. Testing your alternator is simpler than replacing brake pads, but precision matters, so take your time.
Check Battery Voltage with Engine Off
Set your multimeter to DC volts, around 20V range. Connect the red lead to the positive terminal of the battery and the black lead to the negative terminal. Your battery voltage should read approximately 12.6 volts, indicating a fully charged battery. This step confirms your battery’s health; if the voltage is significantly lower, it might be your battery at fault, not the alternator. A quick battery test avoided a costly misdiagnosis on my part, where I replaced the alternator only to find the battery was the culprit. For more insights into battery health, visit this guide on battery issues.
Start the Engine and Measure Voltage Again
Keep the multimeter connected, then start the engine. The voltage should now read between 13.8 to 14.5 volts if the alternator is functioning well. This indicates that the alternator is charging the battery properly. If the voltage remains at 12.6V or drops below 13V, your alternator might be underperforming. During my own test, I watched the voltage fluctuate and dip intermittently, revealing a faulty regulator. Be cautious: if your readings are inconsistent or out of range, it may be time to consult a professional or consider a tune-up for your vehicle.
Rev Up and Observe
Give the engine a little gas—about 2000 RPM—and watch the voltage. It should stay steady within the previous range. A drop or surge might indicate a wiring problem or failing alternator. Once, I experienced a sudden voltage spike, which led me to examine the alternator belt for looseness and wear. If the belt is slipping or damaged, it can mimic alternator failure, so check its tension and condition. For detailed belt inspection tips, see belt inspection techniques.
Interpret Readings and Decide Next Steps
If your voltage reads below 13.8 volts with the engine running, your alternator may not be charging properly. An excessively high voltage over 15V suggests the regulator is faulty. In such cases, it’s wise to have your vehicle evaluated by a mechanic. Testing your alternator at home can save time and money, preventing roadside breakdowns or being overcharged for repairs. Remember, consistent practice makes perfect—so repeat this test periodically to monitor your charging system’s health.
Stay Ahead with Regular Checks
Incorporate alternator testing into your vehicle maintenance routine, especially before long trips or after noticing electrical issues. Regular checks can extend your car’s lifespan and avoid unexpected failures. For comprehensive vehicle health tips, explore this checklist or schedule routine tune-ups that keep all systems running smoothly. With these simple steps, you can confidently troubleshoot your alternator and keep your car dependable on the road.Many vehicle owners operate under assumptions about car maintenance that can lead to costly mistakes. One pervasive myth is that all car issues stem from the most obvious causes, like a dead battery or worn brake pads. However, often the problem lies elsewhere, such as in overlooked components or incorrect diagnostics. For instance, assuming that a squealing brake is always due to worn pads can be misleading; sometimes, contaminated brake fluid or even a warped rotor are the culprits, which are less obvious but equally important to address. This is why understanding the nuances of your vehicle’s systems and their interconnectedness is crucial, as emphasized in comprehensive guides on brake system repairs and routine maintenance.
Keep Your Car Running Smoothly with the Right Tools and Routine Maintenance
Maintaining your vehicle over time isn’t just about addressing immediate issues; it’s about using the right equipment and following disciplined routines to ensure longevity and performance. One tool I swear by is a high-quality digital multimeter, like the Fluke 117. Unlike budget models, it offers precision and durability, which are crucial when diagnosing electrical systems—a core component of modern automotive maintenance. Investing in reliable tools not only saves money in the long run but also empowers you to catch potential problems early, before they escalate into costly repairs.
Beyond basic tools, I recommend keeping a good set of mechanic’s gloves and a cordless LED work light. These might seem simple, but in poorly lit conditions or during tricky inspections, they make a significant difference. For instance, when checking your alternator or inspecting belts, good lighting quality ensures accurate diagnostics and prevents mishandling that could damage sensitive parts. Personally, I use the DeWalt 20V Max LED work light because of its portability and brightness—it’s a game-changer during evening or underground inspections.
Where do you start with ongoing maintenance?
Implementing scheduled checks based on your vehicle’s manual is vital. Regularly inspecting elements like brake pads, fluid levels, and belts keeps minor issues from becoming emergencies. Tools like a dedicated compressed air blower help clean engine components without risking damage—saving you time and money, especially during routine tune-ups. Additionally, a scan tool like the BlueDriver Bluetooth Adapter enables quick diagnostics of error codes. Using a smartphone app, you can read and clear codes, gaining insights into your vehicle’s health and avoiding unnecessary trips to the shop. With my personal experience, these tools have contributed immensely to extending my car’s service intervals and maintaining optimal performance.
Predicting Where Car Maintenance Is Heading
Looking forward, the integration of telematics and AI-driven diagnostics is poised to revolutionize personal vehicle upkeep. Imagine your car preemptively notifying you of parts nearing failure, scheduling maintenance at optimal times, and even ordering replacement parts automatically. Trends suggest that embracing smart tools now can set you ahead of the curve, ensuring your vehicle stays reliable for years to come. Check out auto repair trends for 2025 for more insights into future developments.
How do I maintain my vehicle’s performance over time?
Adopting a routine that blends regular inspections with the use of precise diagnostic tools is key. Don’t forget to review your vehicle’s maintenance schedule periodically—skipping crucial checks can lead to expensive repairs down the line. For extensive guidance, explore vehicle maintenance checklists, or consider scheduling proactive tune-ups to keep everything in top shape. Remember, consistent preventative measures combined with the right tools will help you maintain long-lasting vehicle performance, saving you money and stress over the years. Dive into these strategies today to ensure your car remains dependable and efficient for miles to come.
Lessons from My Garage: What I Didn’t Expect
- Even simple tools like a multimeter can reveal complex electrical issues if used with the right knowledge—it’s not just about the device but understanding what the readings mean.
- Trusting your instincts during tests saved me from costly mistakes, like assuming a dead battery was the root cause when the alternator was actually failing.
- Patience and a little research turned a frustrating troubleshooting process into a rewarding experience—empowering myself with knowledge felt liberating.
- Real-world experience in testing my alternator at home taught me that DIY diagnostics are accessible and can prevent roadside emergencies.
Tools and Resources That Changed My Approach
Investing in a quality digital multimeter, like the Fluke 117, was a game-changer, offering precise readings and durability that cheaper models lacked. For understanding vehicle electrical systems deeply, I recommend reading auto repair trends so you can stay ahead of modern diagnostic techniques. Also, tools like a trusted mechanic’s manual and online forums such as automotive communities helped me interpret the confusing readings and avoid mistakes. Building a reliable toolkit tailored to DIY diagnostics is one of the best investments you can make in your vehicle’s longevity.
Keep Moving Forward with Confidence
Taking control of your car’s health by learning to test your alternator can save you time, money, and anxiety. As vehicles become more complex, having the skills to troubleshoot fundamental issues now will ensure you’re prepared for whatever surprises come your way. Start with simple tests, familiarize yourself with your vehicle’s behavior, and gradually build your diagnostic confidence—your car will thank you for it. Remember, every successful DIY repair is a step toward independence and peace of mind behind the wheel.