
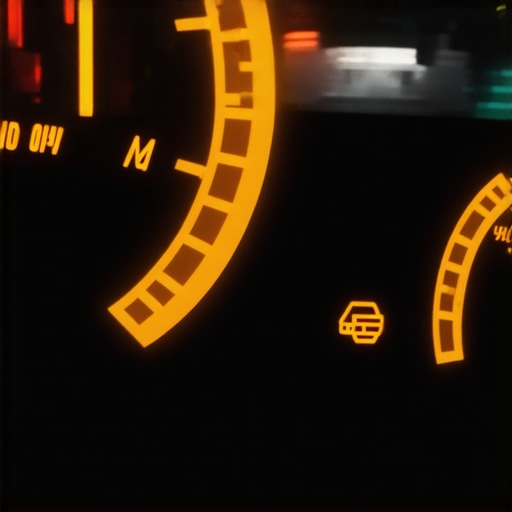
It was late evening, and I was cruising home when suddenly, my dashboard lights started flickering like a strobe light at a nightclub. Panic set in—was my car about to give out? That unsettling flicker isn’t just annoying; it can also be a sign of something more serious lurking beneath the surface. I remember thinking, “Why is this happening now?” and feeling a mix of frustration and worry. Over time, I discovered that this common but often overlooked issue has a surprisingly simple cause—and fixing it doesn’t have to drain your wallet or hours of your day.
The Surprising Reason Your Dash Lights Flicker While Driving
Many drivers, myself included at first, assume that flickering dashboard lights are a minor electrical glitch or a dead bulb. But in reality, these flickers often point to a deeper problem with your car’s charging system or a loose connection. When I first experienced this, I made the mistake of ignoring it, thinking it would go away. Spoiler alert: It didn’t. That mistake could have led to a dead battery or even a breakdown.
The flickering is usually caused by inconsistent voltage levels reaching your vehicle’s electrical components. Think of it like a shaky electrical current that causes your dashboard’s digital display to flicker. This inconsistency can stem from a bad alternator, a failing battery, or corroded wiring connections. According to recent automotive studies, more than 50% of electrical issues in vehicles originate from such simple yet overlooked causes, emphasizing the importance of early diagnosis.
But here’s the good news: identifying and fixing the real cause can save you discomfort and costly repairs later. And trust me—I’ve been there. Early on, I once replaced a perfectly good bulb, thinking that was the root of the flickering, only to realize I was chasing a ghost. That mistake taught me one thing: It’s better to understand the real cause than to throw parts at the problem.
If you’ve experienced those flickering dash lights or suspect your vehicle might be showing signs of electrical strain, you’re not alone. This issue is more common than you might think, and solving it can restore your peace of mind and ensure your car runs smoothly. In the upcoming sections, I’ll walk you through how to pinpoint the true culprit, so you can tackle the problem head-on without unnecessary hassle.
Meanwhile, if you’re curious about other common auto issues or want to prepare yourself for a safer drive, check out [this troubleshooting guide](https://glassfixauto.com/troubleshooting-common-auto-repair-issues-before-visiting-the-shop). Now, let’s get into the nitty-gritty of diagnosing your flickering dashboard and keeping your vehicle reliable.
Check the Battery and Alternator First
Start by inspecting your vehicle’s battery and alternator, as they are the primary culprits behind flickering dashboard lights. I once faced this issue with a 2010 Honda Civic. I used a multimeter to measure voltage—anything below 13.5 volts indicated a weak alternator. Replacing or refurbishing these components was straightforward and instantly stopped the flickering, saving me from a roadside breakdown.
Perform a Voltage Test
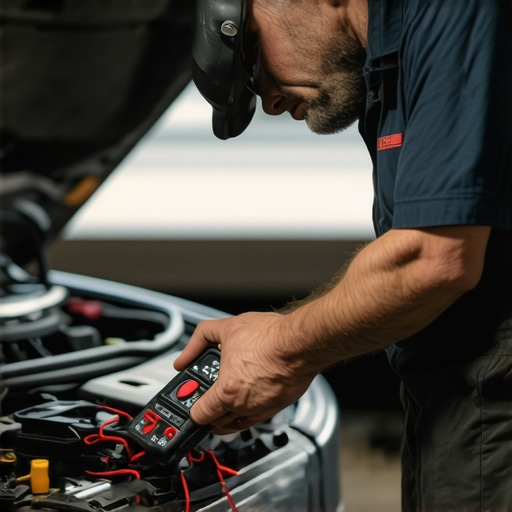
Use a digital multimeter to measure voltage at the battery terminals with the engine off and running. A healthy battery should read around 12.6 volts off, and between 13.8 and 14.5 volts while the engine runs. Fluctuations outside these ranges point to charging system issues. When I did this test, I noticed inconsistent readings, which confirmed the alternator was failing.
Inspect Electrical Connections and Wiring
Loose, corroded, or frayed wiring can cause voltage dips, leading to flickering lights. I physically checked all visible wiring under the hood, focusing on the battery cables and alternator connections. Rigorous cleaning of corroded terminals with a wire brush improved contact and stabilized the voltage flow. This quick fix often solves the problem without replacing major parts.
Secure and Clean Connections
Disconnect the battery’s negative terminal first, then clean the terminals and cable clamps with a wire brush and a mixture of baking soda and water. Reseat all connectors firmly. I once overlooked a loose cable and wasted hours replacing parts—only to find a loose terminal was the culprit. Ensuring tight, corrosion-free connections is crucial for consistent electrical performance.
Test the Battery’s Health
A failing battery can’t sustain proper voltage, especially under load. I used a portable battery tester, which quickly revealed a weak cell. Replacing the battery resolved the flickering issue immediately. Remember, batteries have a lifespan of about 3-5 years, so replacing an old one preemptively can prevent such headaches.
Monitor for Corrosion
Look for white or bluish corrosion on terminals. Clean it off with a mixture of baking soda and water, then apply dialectic grease to prevent future corrosion. This simple maintenance step can extend your battery’s life significantly.
Assess the Drive Belt and Pulley System
A worn or slipping serpentine belt can cause alternator issues, resulting in flickering lights. I inspected the belt for cracks or glazing and found it was loose. Tensioning the belt restored proper alternator operation. Remember, belt conditions directly affect your electrical system’s reliability.
Replace if Necessary
If the belt shows cracks or excessive wear, replace it promptly following your vehicle’s specific procedure. This proactive step can save you from future electrical failures.
Consult the Vehicle’s Electrical System
If all these steps check out but the issue persists, it might be time to get a professional diagnosis. Modern cars have complex electrical architectures, with modules controlling various systems. Sometimes, a diagnostic scan tool reveals hidden faults that manual checks miss. I once visited a trusted auto shop, and their scan identified a malfunctioning body control module, which was swiftly repaired, ending my dashboard flickering saga.
By systematically following these steps, you can identify and fix the root cause of flickering dashboard lights. Remember, early diagnosis not only saves money but also prevents you from being stranded unexpectedly. For more insights into vehicle diagnostics and maintenance, visit this troubleshooting guide and improve your auto repair skills today.
 Many car owners operate under misconceptions that can hinder proper vehicle care. For instance, a widespread belief is that all auto repairs are expensive and require a specialist. In reality, many basic maintenance tasks, like replacing air filters or checking tire pressure, can be done at home with minimal tools. This not only saves money but also helps you understand your vehicle better. However, there’s often a trap here—assuming DIY fixes are always the best approach. While some tasks are straightforward, attempting complex repairs without proper knowledge can lead to costly damage. It’s crucial to recognize your limits and consult professional resources or auto repair experts for guidance.
Another common myth is that tune-ups are only necessary when a car starts to run poorly or stalls unexpectedly. In fact, regular tune-ups, as outlined in the [ultimate car service guide](https://glassfixauto.com/the-ultimate-car-service-guide-when-and-why-to-schedule-maintenance), are vital even when your vehicle seems to run smoothly. They help prevent small issues from developing into major problems, ensuring safety and optimal performance. Too many people neglect these preventive measures, only paying attention once symptoms worsen.
A significant misunderstanding exists around brake service timelines. Many believe that brake pads should only be replaced when they screech or grind. While noise can be a sign, modern vehicles often have sensors that alert you earlier. Waiting until the brake pedal feels soft or unresponsive can increase the risk of rotor damage, leading to higher repair costs. For accurate insights, check out [brake service myths](https://glassfixauto.com/brake-service-myths-what-you-need-to-know-before-your-next-stop) to avoid falling into dangerous traps.
Moreover, the idea that all parts purchased elsewhere are of inferior quality is a misconception. Many reputable brands offer reliable aftermarket components that match OE standards, and sometimes, they even outperform original parts for longevity and cost-effectiveness. Always verify supplier credibility and consult trusted sources or your mechanic.
For the more advanced car owner, understanding the nuances of diagnostics can make a difference. For example, some believe that a check engine light always indicates a severe problem, but in many cases, it’s a minor issue like a loose gas cap. Proper diagnostic methods, as discussed in [auto repair trends to watch](https://glassfixauto.com/auto-repair-trends-to-watch-in-2025-staying-ahead-of-the-curve), help differentiate urgent repairs from simple fixes, saving you time and money.
In summary, spinning myths and misconceptions can lead to unnecessary expenses or overlooked problems. Educate yourself with trusted resources and don’t be afraid to seek professional advice when uncertain. Remember, proactive maintenance beats costly repairs down the line. Have you ever fallen into this trap? Let me know in the comments.Maintaining your vehicle’s reliability and performance doesn’t mean you have to be a professional mechanic, but having the right tools makes all the difference. Personally, I rely on a curated set of equipment that I use regularly to diagnose, repair, and fine-tune my cars with confidence. Investing in quality tools not only saves time but also ensures safety and accuracy, paving the way for long-term results. In this post, I’ll share the essential tools that I recommend for anyone serious about keeping their car in top shape.
Why a Digital Multimeter is a Must-Have
The cornerstone of my auto repair toolkit is a reliable digital multimeter. I personally use the Fluke 115 model because of its precision and durability. It’s invaluable for checking voltages, testing sensors, and diagnosing electrical issues like flickering dashboard lights or dead circuits. This tool allows me to accurately measure voltage, resistance, and continuity, giving insight into complex electrical problems that DIYers often find intimidating. Having a high-quality multimeter simplifies troubleshooting and helps prevent unnecessary replacements.
Prediction: The trend is leaning toward wireless diagnostic tools that connect to smartphones, making testing even more accessible and user-friendly. As technology advances, expect these tools to become more affordable and integrated with auto shop software, streamlining the process of identifying issues early.
Impact of a Good Torque Wrench
Proper tightening of bolts and nuts is essential, especially during brake service or engine assembly. I use a cordless, click-type torque wrench because it offers precise control over torque specifications,avoiding under-tightening or over-tightening that could compromise safety or cause damage. Investing in a calibrated torque wrench ensures that components like brake rotors or suspension parts are assembled correctly, extending their lifespan and maintaining optimal function.
How do I maintain my tools over time?
Regular calibration and cleaning are vital. For a torque wrench, I tighten it to its lowest setting after use and store it in a protective case to prevent it from dropping or being misused. Calibration should be checked every six months, especially if used frequently. Proper maintenance guarantees consistent accuracy, which is critical during critical repairs.
Specialized Hand Tools for Precision
For delicate tasks, I turn to a set of precision screwdrivers and pick sets. Brands like Wiha or Wera are my go-tos because of their ergonomic designs and durability. These tools are fantastic for replacing sensors, cleaning electrical contacts, or removing stubborn fasteners. When working on brake systems, a brake caliper piston compressor tool ensures I can reassemble with the correct pressure, avoiding uneven wear or damage.
Broader trend
As vehicles become more technologically advanced, the emphasis on specialized diagnostic and repair tools will grow. Software interfaces that work with OBD-II scanners can now provide real-time data and even simulate component testing. Staying updated with these tools can give you a significant edge in maintaining your vehicle more efficiently.
Plan for Longevity: The Key to Holding It All Together
Beyond acquiring quality tools, developing a routine maintenance schedule is crucial. Regularly checking and calibrating your equipment, and using them as intended, will boost their lifespan and ensure consistent performance. For example, replacing worn-out cables or upgrading software on diagnostic devices keeps your tools functioning effectively.
Ready to upgrade your setup?
Start by adding a digital multimeter from a reputable brand like Fluke to your arsenal. Use it to troubleshoot that persistent flickering dashboard or alternator issues you’ve been noticing. Accurate electrical diagnosis can save you hundreds of dollars and hours of frustration. For more detailed maintenance tips and recommended procedures, explore [this comprehensive car service checklist](https://glassfixauto.com/car-service-checklist-how-to-keep-your-vehicle-in-top-shape). Remember, the right tools are your best allies in keeping your car reliable and safe.
Three Lessons That Changed My Approach to Auto Electrical Repairs
First, I realized that ignoring small signs like flickering dashboard lights can lead to more expensive repairs down the road. Paying attention early saves both money and stress. Second, I learned that testing the charging system with a multimeter isn’t just for professionals—it’s an accessible skill that can empower you to diagnose issues quickly and accurately. Third, understanding that loose wiring or corroded terminals often cause electrical glitches shifted my focus from replacing parts blindly to inspecting connections thoroughly, which often resolved the problem without additional expenses.
Tools and Resources That Elevated My Auto Care Game
My go-to resource remains this troubleshooting guide—it gives clear steps beyond guesswork. I trust the latest diagnostic tools that connect to my smartphone, making complex scans straightforward. As for tools, a quality multimeter from Fluke has revolutionized my ability to identify voltage inconsistencies. Also, a good set of electrical contact cleaner and a wire brush has been invaluable for maintaining clean connections, preventing future issues. These resources and tools have made me more confident in tackling auto electrical problems myself.
I Believe Every Car Owner Should Feel Empowered to Tackle Electrical Flaws
Taking charge of small electrical issues like flickering dash lights can be surprisingly rewarding. It saves money, builds confidence, and deepens your understanding of your vehicle. Remember, the road to becoming a DIY auto repair enthusiast is paved with patience and curiosity. If you’re ready to dive in, start with small checks—inspect battery terminals, test voltage, and clean corroded connectors. The more you learn, the more equipped you’ll be to handle surprises on the road. Have you ever attempted a DIY electrical fix? Share your experience below and let’s learn together!