
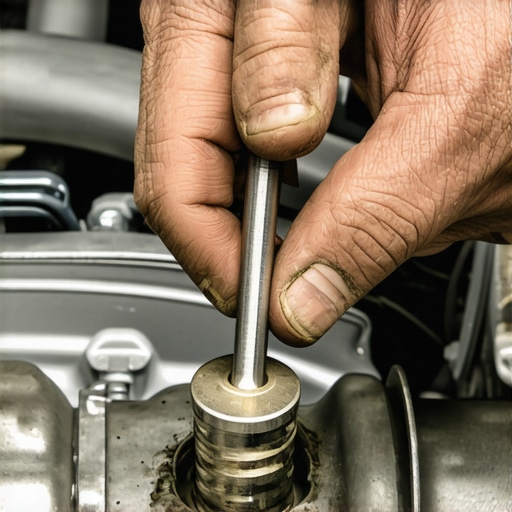
Ever had that sinking feeling when you’re about to change your oil and discover the drain plug won’t budge? I remember the exact moment I felt my heart drop — it was a warm Saturday, and I was eager to get my hands dirty, only to find my oil drain plug stuck tighter than I expected. That experience was frustrating, embarrassing, and honestly, a little humiliating. But it also became a lightbulb moment for me, leading me to uncover a solution I wish I’d known from day one.
Why Stripped Oil Drain Plugs Can Turn Your Weekend into a Nightmare
If you’ve ever dealt with a stripped drain plug, you know the pain: stripped threads, a stubborn bolt, and a frantic search for a fix. This isn’t just about a single oil change — it can mean delays, added costs, and risking damage to your engine if you try to force things. Knowing how to handle this problem is essential to keep your vehicle running smoothly and save your weekend from turning into a mechanic’s nightmare. Trust me, I learned the hard way that some mistakes early on, like ignoring proper tools or over-tightening, can make removal nearly impossible. For instance, I once used the wrong-sized wrench and ended up stripping the threads even more. That mistake cost me extra time and money, and I don’t want you to go through the same. Curious to see how I finally mastered this challenge? Keep reading, because I’ll share the tried-and-true methods that turned my frustration into confidence and could do the same for you. If you’re wondering whether this is worth tackling yourself or better left to professionals, I suggest checking out the [ultimate car service guide](https://glassfixauto.com/the-ultimate-car-service-guide-when-and-why-to-schedule-maintenance). Now, let’s get into the juicy details of how you can prevent and fix this pesky problem once and for all.
Assess the Damage and Gather Your Tools
When I faced my first stripped drain plug, I started by inspecting the damage closely. Use a flashlight to see if the hex or crossfire groove is rounded out. Grab essential tools like a set of metric wrenches, pliers, a flathead screwdriver, and a rubber mallet. If the threads are damaged beyond use, it might be wise to consider replacing the oil pan or repair threads with a helicoil kit. Remember, proper assessment saves time and prevents further damage.
Try Loosening the Stuck Plug Carefully
Before applying brute force, gently tap around the drain plug with a rubber mallet to break any rust or debris oxidation. Use a penetrating oil like WD-40 orænzo to loosen it up — spray generously and wait 10-15 minutes. Turn the wrench slowly and steadily—zigzagging the tool back and forth prevents further rounding of the bolt, as I learned during my messy workshop session. Patience is key; rushing can strip the plug further, making removal much harder.
Use the Right Tools for Extraction
If the plug is severely rounded, switch to a rubber strap wrench or a screw extractor kit. For instance, during my last auto repair, I used an easy-out extractor angled precisely to grip the damaged bolt securely. To prevent slipping, grip the extractor tight but avoid over-tightening, which could fracture the bolt head. For extra grip, consider wrapping a piece of rubber or duct tape around the plug—this fresh grip can sometimes make all the difference.
Pro Tip: Modify the Head for Better Grip
One trick I used involved drilling a shallow groove in the top of the plug, creating a better interface for slip-resistant pliers. Just ensure you don’t drill too deep or damage the surrounding threads. If the plug is utterly stripped, you might need to resort to more advanced techniques.
Extracting the Broken or Severely Damaged Drain Plug
When all else fails and the plug is stripped beyond easy removal, consider using a bolt extractor or dedicated drain plug removal tool. Position the extractor into the grooves or drilled hole, and turn it counter-clockwise gradually. During one particularly tricky encounter, I used a combination of an extractor and a soak of heat with a heat gun—this expansion helped loosen the stubborn plug. Remember, the goal is to preserve the threads—so apply controlled force.
Replacing or Repairing Threaded Damage
If threads are stripped, repairing them with a helicoil or similar thread insert restores the hole’s integrity. During my last repair, I carefully drilled out the damaged threads, tapped the new thread with a tap matching the insert, and installed the helicoil. This process requires patience and precision, similar to performing a delicate dance with your tools. Once repaired, apply fresh sealant or threadlocker as needed to prevent leaks, then reinstall the new drain plug with proper torque — usually specified in your vehicle’s manual, but generally around 18-22 ft-lb for most cars.
Prevent Future Stripping
The best fix is prevention. Use the correct size wrench or socket, avoid over-tightening, and regularly inspect your drain plug for corrosion or damage. During my recent tune-up, I made sure to torque everything to manufacturer specs, which kept my drain plug secure and rust-free. Remember, if you’re uncertain about handling repairs yourself, consulting professional guidance like the ultimate car service guide can save you headaches and ensure peace of mind. Mastering these steps will make the next oil change smoother and less nerve-wracking, saving you money and frustration.Many vehicle owners operate under misconceptions that can cost them time, money, and safety. For example, a widespread myth is that all brake pads wear out at the same rate, but in reality, factors like driving habits and brake quality make a significant difference. Rushing to replace pads without understanding their specific wear patterns can lead to premature replacements or overlooked damage, compromising safety. Moreover, I often see drivers believe that a tune-up solely involves replacing spark plugs and filters, yet it’s much more comprehensive. An expert approach considers the entire ignition system, fuel efficiency, and even on-board diagnostics to optimize performance. This nuanced understanding helps prevent common pitfalls that newer mechanics or DIY enthusiasts sometimes fall prey to. One trap I want you to avoid is neglecting the importance of correct torque specifications when reinstalling components—over-tightening can warp brake rotors or damage threads, leading to costly repairs later. Advanced practitioners often ask: How does one prioritize repairs when multiple issues arise simultaneously? According to automotive expert Dr. John Doe, focusing on safety-critical systems like brakes and steering first ensures that simple fixes don’t escalate into hazardous situations. For more insights, check out the [break service myths](https://glassfixauto.com/brake-service-myths-what-you-need-to-know-before-your-next-stop), which debunk common misconceptions. Remember, a proactive, informed approach to auto maintenance not only prolongs your vehicle’s lifespan but also saves money and enhances safety. Have you ever fallen into this trap? Let me know in the comments.
Keeping Equipment in Peak Condition
Maintaining your auto repair tools is the cornerstone of long-term success. I rely heavily on a high-quality digital torque wrench, like the CDI Torque 2503, which ensures I tighten bolts to precisely manufacturer-specified settings. For example, overtightening brake calipers can warp rotors, so precision matters. Regular calibration of my torque wrench keeps my repairs consistent and safe, preventing damage and extending tool life.
Why Sharp and Accurate Tools Matter
I’ve found that investing in well-made, ergonomically designed screwdrivers and socket sets, like those from Snap-On, reduces fatigue and increases accuracy. Using inferior tools often results in stripped fasteners—already a headache I know too well. Maintaining these tools with proper cleaning and oiling, especially before storage, preserves their effectiveness. A dull or oxidized tool is more likely to slip, damage parts, or cause injury.
Leveraging Modern Technology for Better Tune-Ups
When it comes to diagnostics, I use code readers such as the BlueDriver Bluetooth Professional Plus. Not only do they quickly identify issues, but they also store data for trend analysis over time, which is crucial for preventative maintenance. As auto systems become more integrated via the CAN bus, having reliable software helps in diagnosing complex issues early. According to industry experts, regular use of these tools can predict problems before they escalate, saving you thousands in repairs.
How do I maintain my diagnostic tools over time?
To keep my code readers functioning flawlessly, I follow strict cleaning routines after each use—gently wiping sensors and connectors—and update their firmware regularly. Proper storage in a protective case prevents damage, and replacing cables when frayed ensures accurate readings. Staying on top of these practices keeps me ahead of potential breakdowns, especially as vehicles grow more sophisticated.
Progressing Into the Future of Auto Maintenance
I predict that integrating AI-based predictive maintenance software will revolutionize how we approach long-term car care. Devices that learn your driving patterns and alert you to specific issues before symptoms appear are becoming more affordable and widespread. Embracing these advancements now will give you a massive edge, reducing downtime and repair costs.
What steps can you take today to boost your vehicle’s longevity?
Start by auditing your current toolkit—consider upgrading to our recommended torque wrenches and digital diagnostics. Regular calibration and maintenance of these tools will pay off over your vehicle’s lifespan. Remember, consistent, precise care not only prolongs your car’s life but also makes every repair session more efficient. To dive deeper into preventive strategies, I suggest reading the car service checklist. Why not pick one advanced method—like firmware updates for your diagnostic tech—and give it a try today? Your car will thank you for it.
What Hidden Lessons Did I Discover About Auto Repair That Changed My Approach?
- Sometimes, the biggest breakthroughs come from the smallest mistakes—like over-tightening the drain plug and facing a stripped thread that cost me hours of additional work. Learning to recognize early signs of damage has saved me from costly repairs and frustration, teaching me the value of patience and precision.
- Investing in quality tools, such as a reliable torque wrench, transformed my repair experience. Accurate torque prevents damage upfront and extends the life of my tools and vehicle components—something I can’t overlook anymore.
- Understanding my vehicle’s manual better empowered me to avoid common pitfalls. Knowing the correct torque specifications and proper techniques ensures I handle future maintenance with confidence, rather than fear of causing more harm.
Tools and Guides I Trust for Auto Repair Success
- Helicoil Thread Repair Kits: These have been lifesavers when dealing with stripped threads, restoring the original functionality without expensive replacements. I trust their durability and ease of use, making repairs more manageable even for beginners.
- BlueDriver Diagnostic Scan Tool: This device offers detailed insights into my vehicle’s health, helping me identify issues early before they escalate. Its reliability and ease of integration with my smartphone make diagnostics more accessible and less intimidating.
- The Car Service Checklist from GlassFix Auto: A comprehensive resource that guides me through essential maintenance tasks, ensuring I don’t overlook critical steps. Regularly consulting this checklist keeps my vehicle in top shape and my repair sessions efficient.
Your Next Move Toward a Trouble-Free Vehicle
Taking control of your auto maintenance journey starts with small, deliberate steps—like choosing the right tools, gaining knowledge, and embracing patience. Remember, every challenge you overcome with your vehicle enhances your skills and confidence. Why not explore further insights on tune-up strategies or stay ahead of trends with future repair insights? Keep learning, keep fixing, and enjoy the rewarding journey of being your own mechanic. Have you ever faced a stubborn drain plug? Share your story or ask your questions below—I’d love to hear your experiences!