
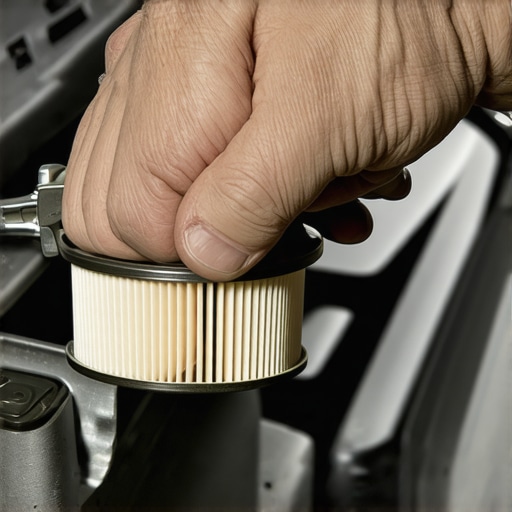
It happened on a sunny Saturday afternoon. I was crawling under my car, trying to change the oil—a routine task, right? But then, that dreaded moment: the oil filter wouldn’t budge. I shoved, I twisted, I yanked—nothing. That stubborn filter left me frustrated and covered in oil, questioning my DIY skills. Sound familiar? If you’ve ever faced a stuck oil filter, you know how tricky and messy it can get. I want you to know you’re not alone, and there’s actually a simple trick that can save you hours of struggle and mess.
Why stubborn oil filters make DIYers and pros alike groan
Oil filters are designed to seal tightly to prevent leaks, which is great for engine health but a nightmare when you need to remove them. Over time, they can become glued on due to corrosion, dirt, or the buildup of old oil. Plus, using the wrong tools or applying excessive force can make this already tough task even worse. Early in my mechanic adventures, I made the mistake of relying solely on the standard oil filter wrench—an oversight that cost me extra time and frustration. I learned that some tricks are more effective than brute force, especially when a filter refuses to come free.
But before we jump into the foolproof method, have you ever tried to loosen that stubborn filter only to feel like you’re about to strip the threads or crush the filter? If so, keep reading, because this simple trick might just change your oil-changing game.
For more insights on maintaining your vehicle efficiently, check out [how regular tune-ups improve fuel efficiency and safety](https://glassfixauto.com/how-regular-tune-ups-improve-fuel-efficiency-and-safety), which is key to avoiding other auto repair headaches. Now, let’s get into how you can tackle that stuck oil filter without the stress.
Secure the Engine and Prepare Your Tools
Begin by ensuring the engine is cool to prevent burns. Disconnect the negative battery terminal to avoid accidental electrical issues. Gather your tools: a quality oil filter wrench, rubber gloves, a rag, a drain pan, and an old towel. These will help contain the mess and provide a better grip on stubborn filters.
Pour a Lubricant to Loosen Adhesion
Apply a few drops of penetrating oil, like WD-40, around the edge of the oil filter’s seal. Think of it as oiling a rusty hinge—this helps break the bond between the filter and the housing. Let it sit for 10-15 minutes. Once, I faced a filter that had been on for years; a generous spray of penetrating oil and patience saved hours of struggle.
Use a Proper Wrench and Leverage Techniques
Place the oil filter wrench securely over the filter’s edge. If the filter is tight, consider using a longer pipe or a breaker bar to increase leverage. Be cautious not to apply excessive force, which can strip the threads or crush the filter. Do a slow, steady turn counterclockwise. Remember, it’s like turning a stubborn bolt—you want controlled force, not a sudden yank.
Employ Heat and Cold Strategies
If the filter remains unmoved, gently warming the area with a heat gun or hairdryer can expand the metal slightly, loosening the grip. Conversely, cold can make the metal contract. I once used a heat gun, and the expansion broke the seal just enough for my wrench to turn effortlessly. Just avoid overheating or direct flames that could damage nearby components.
Utilize a Strap or Chain for Extra Grip
If your wrench slips, a strap wrench or a makeshift chain wrapped around the filter can provide additional grip. Tighten it gradually, turning counterclockwise. Visualize it as tightening a belt around a stubborn jar lid. This approach distributes force evenly, reducing risk of damage.
Twist, Loosen, and Remove the Filter
With patience and the right leverage, the filter should start to turn. Once loosened, remove it by hand, supporting its weight to prevent dropping oil everywhere. Prepare your drain pan to catch residual oil and wrap the filter with a rag to absorb drips. This prevents waste and keeps your workspace clean. I learned that removing the filter gently is better than yanking it forcefully; I once cracked a housing, leading to a bigger repair job.
Finish Up and Clean the Workspace
Clean the mounting area thoroughly with a rag to remove old gasket remnants. Install the new filter hand-tight initially, then tighten according to the manufacturer’s specs—usually about ¾ turn past finger-tight. Always check for leaks after starting the engine. Proper technique and patience are key to avoiding damage and ensuring a smooth oil change process.
When it comes to auto service, many car owners have ingrained beliefs that can actually hinder proper maintenance. For example, a widespread misconception is that brake pads only need replacing when they squeal loudly. In reality, brake pads can wear unevenly or prematurely due to misaligned calipers or contaminated rotors, which aren’t always immediately obvious. Overlooking these factors can result in uneven brake wear and compromised safety. Additionally, some assume that a simple tune-up solely involves changing spark plugs, but an expert approach considers inspecting ignition coils, fuel injectors, and even engine compression, ensuring optimal performance.
What technical nuances do most drivers overlook, and how does that impact their vehicle’s longevity?
One often missed detail involves the importance of correct torque specifications during maintenance. Over-tightening or under-tightening bolts, especially on critical components like cylinder heads or suspension parts, can lead to failures that are costly and dangerous. Studies, such as those referenced by automotive engineers, emphasize that precise torque application significantly reduces the risk of component fatigue and leaks. Yet, many overlook this detail, relying solely on ‘hand-tight’ or generic torque estimates, which increases the likelihood of future problems. It’s crucial to follow manufacturer specifications and use a calibrated torque wrench to avoid these pitfalls. An additional common mistake relates to neglecting the role of driving habits on vehicle wear. Aggressive acceleration and braking accelerate brake and tire wear, counteracting the benefits of regular service. Regularly inspecting for signs of uneven wear patterns can inform adjustments in driving behavior, prolonging component lifespan. Be aware that when scheduled correctly, routine services—like spark plug replacements and fluid checks—are essential for peak safety and efficiency. For a comprehensive understanding, check out [how regular tune-ups improve fuel efficiency and safety](https://glassfixauto.com/how-regular-tune-ups-improve-fuel-efficiency-and-safety). Remember, often the key to a long-lasting vehicle isn’t just fixing what’s broken but understanding the subtle factors that accelerate wear. Don’t fall into the trap of ignoring these nuances; your car’s health depends on it. Have you ever fallen into this trap? Let me know in the comments.Maintaining your vehicle’s performance over the years hinges on using the right tools and adopting effective techniques. One of my go-to devices is a calibrated digital torque wrench. Unlike standard torque screwdrivers, these digital models provide precise readings, ensuring bolts and parts are tightened to manufacturer specifications, preventing costly damage from over-tightening. For example, when replacing suspension components or cylinder head bolts, accuracy matters immensely. I personally rely on the **TEKTON Digital Torque Wrench** because of its reliability and ease of use, which makes prevented issues more predictable and reduces guesswork.
How do I maintain my tools for longevity and accuracy?
Regular calibration is key. Many repair shops or specialty tool suppliers offer calibration services—it’s a small investment that pays off in accuracy. Storing your tools properly, in a dry environment and avoiding dropping them, also preserves their precision. When I started using a **digital torque wrench**, I noticed a tangible drop in over-tightened bolts and leaks—saving me time and money in the long run. As auto repair trends evolve, integrating advanced diagnostic software like **OBDeleven** or **Snap-on Verus Edge** can streamline troubleshooting and keep your diagnostics ahead of potential issues. These tools not only help identify problems early but also guide precise repairs, making maintenance more efficient. Looking ahead, the future of car maintenance leans heavily toward automation and real-time data analysis, allowing even hobbyists to perform complex repairs with confidence. To stay at the forefront, consider investing in **professional-grade diagnostic tools** that sync with your smartphone or tablet.
What techniques help extend your vehicle’s lifespan with proper maintenance?
Regular oil analysis and visual inspections of critical components like belts and hoses help catch problems before they escalate. Always verify that your tire pressures are maintained at optimal levels—this not only enhances safety but also prolongs tire wear. If you’re unfamiliar with how to interpret signs of early wear, check out [maximizing your car’s lifespan through expert tune-up strategies](https://glassfixauto.com/maximize-your-cars-lifespan-with-expert-tune-up-strategies). Incorporating these practices and utilizing precise tools keeps your vehicle running smoothly for years. Don’t hesitate to try out Techniques like using a **laser thermometer** to check coolant temperatures or a **fuel pressure gauge** to verify fuel system health — small investments that yield big benefits. Proper maintenance is a continual journey, but with the right tools and methods, your car can reliably serve you long into the future.
Lessons the Garage Can’t Teach You About Oil Changes
One of my biggest lightbulb moments came when I realized patience and the right technique beat brute force every time. Trying to turn a stubborn filter with excessive force only risks cracking the housing or damaging threads. Instead, I learned to rely on penetrating oils and leverage tools—these small shifts in approach saved me countless headaches.
Another revelation was understanding the importance of proper torque when installing new filters or tightening other critical engine components. Relying solely on hand-tightening or generic estimates often leads to leaks or even engine damage down the line. Using a calibrated torque wrench ensures peace of mind and longevity for your vehicle.
Lastly, recognizing when to employ heat or cold strategies makes all the difference. A careful application of heat can soften old sealant and break the bond naturally, while cold can contract metal slightly, easing removal. These nuanced techniques are often overlooked by DIYers but have been game-changers in my auto-maintenance journey.
Tools and Tips That Changed My Approach
My go-to arsenal now includes a reliable digital torque wrench, like the TEKTON Digital Torque Wrench. It guarantees that every bolt is tightened to exact specifications, preventing future leaks and ensuring safety. Regular calibration of my tools keeps my work precise and trustworthy.
For tackling stubborn filters, a strap wrench combined with penetrating oils has proven invaluable. It provides better grip without risking damage, especially on filters that haven’t budged in years. On tricky cases, I also keep a heat gun handy, but I always exercise caution to prevent any damage to surrounding components.
In addition, investing in diagnostic and troubleshooting tools like advanced scanner devices allows me to pinpoint issues accurately and avoid unnecessary parts replacements. These tools bridge the gap between DIY effort and professional precision, making auto maintenance more accessible and less intimidating.
Embrace the Journey, Not Just the Fix
Taking control of your vehicle’s health transforms a routine task into a confidence-building experience. Remember, every challenge, like a stubborn oil filter, offers a learning opportunity. With patience, the right tools, and knowledge, you can turn frustrations into triumphs. Your car will thank you for understanding its quirks and caring for it with intention and technique.
What’s the most stubborn auto fix you’ve faced, and how did you handle it? Share your story below—I love hearing how others conquer their auto challenges!