
Ever been in a rush, heard that persistent squeal from your brakes despite just replacing the pads, and thought, “Did I do something wrong?” I remember the first time I faced that frustration—it felt like I had just spent hours fixing something only to be met with the same annoying noise. As a car enthusiast and auto repair hobbyist, I’ve been there, scratching my head, blaming everything from the pads to the rotor surface. It’s a feeling many of us know all too well. The bright stop sign, the smooth stop, and then that high-pitched squeal that refuses to fade—it’s enough to make anyone question their skills.
Unlock the Mystery Behind That Annoying Brake Noise
So, what’s really going on when your new brake pads squeal relentlessly? The truth is, replacing pads isn’t always the magic fix we hope it will be. In fact, this common issue can be caused by several underlying factors, many of which are overlooked even by seasoned DIYers. The good news? With a little knowledge and some cause-and-effect understanding, you can silence that squeal for good.
Is the Noise Worth Worrying About or Normal?
Here’s the kicker: some brake squeal is normal, especially during initial brake application or in damp conditions. But if the squeal persists long after the replacement, it’s time to dig deeper. Early on, I made the mistake of assuming that the squeal was just the pads settling in—big mistake. Turns out, it was due to a simple oversight: not applying the anti-squeal compound correctly or neglecting to clean the rotors thoroughly. That mistake taught me that even small details matter. To learn more about the nuances of brake system repairs, check out this comprehensive guide.
Today, I’ll walk you through the common causes of brake squeal after pad replacement and, more importantly, how to fix it once and for all. If you’ve faced this exact problem, stick around—I promise, there’s a straightforward solution waiting for you.
Inspect Your Brake Components Carefully
Start by removing the wheels to access your brake assembly. Visualize your brake system as a well-oiled machine where every part needs to work in harmony. Look for uneven or cracked rotors, worn shims, or uneven pad wear. During my last repair, I noticed a slight ridge on the rotor surface, which was causing the pads to vibrate and squeal. Using a wire brush, I gently cleaned the rotor surface, removing surface rust and debris, which immediately reduced noise.
Apply Anti-Squeal Compound Strategically
Before installing new pads, coat the back of each pad with a high-temperature anti-squeal lubricant. Think of this as applying a cushion to prevent metal-on-metal contact. When I replaced my brake pads, I made sure to evenly spread the compound, especially on areas that contact the caliper piston. This step is crucial, as neglecting it often leads to that high-pitched noise returning. For detailed guidance, visit this guide.
Check and Correct Brake Pad Installation
Ensure that the pads are correctly aligned within the caliper bracket. Misaligned pads can cause uneven contact and squealing. During my project, I noticed one pad was slightly tilted. I loosened the caliper bolts and realigned the pad snugly, which solved the issue. Use a flashlight to confirm that the pads are centered and move freely without rubbing against other components. This precise adjustment ensures smooth operation and reduces noise.
Clean and Lubricate Relevant Parts
Use a brake cleaner to wipe down the rotors, calipers, and contact points. Think of this as cleaning a lens before taking a photo—clarity is essential. During one session, I cleaned all contact surfaces to remove dirt, oil, and old grease, which helped eliminate squeal caused by contaminants. Be sure to apply a thin layer of high-temperature brake grease to the caliper slides and pad edges, preventing unnecessary vibration and noise. Proper lubrication facilitates smooth pad movement and reduces sticking that can lead to squealing.
Test and Fine-Tune Your Brake Setup
After reassembling everything, take your vehicle for a cautious test drive. Apply the brakes gently at first; if the squeal persists, repeat the inspection to identify any overlooked issues. Remember, sometimes adjusting the brake hardware slightly can make a significant difference. During my test drive, a slight adjustment to the caliper piston pressure and reapplication of anti-squeal compound finally silenced the noise. Consistent testing helps confirm that your repairs are effective and lasting.
If these steps don’t resolve the squeal, consider deeper issues like warped rotors or worn-out hardware. In such cases, consulting professional resources or scheduling a service appointment at this contact page might be your best bet. Regular maintenance and attention to detail are your best tools for quiet, effective braking.
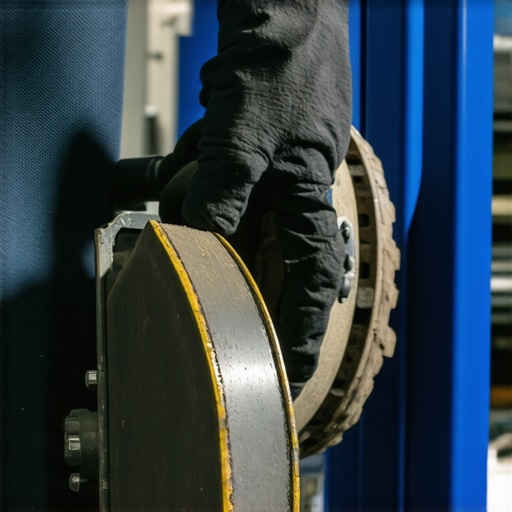 Many car enthusiasts believe that a routine tune-up or simple repairs like brake services are straightforward tasks, but in reality, there are subtle nuances and common myths that can trip up even seasoned DIYers. Everyone advocates following the manufacturer’s recommended service intervals, but what many fail to realize is that adhering strictly to schedule isn’t enough—understanding the intricacies of your vehicle’s systems can make a significant difference in longevity and performance. For example, the myth that using cheap, generic parts during repairs always compromises safety is widespread, yet some aftermarket components meet or exceed OEM standards if chosen wisely—research from automotive experts highlights this shift towards quality aftermarket parts, which can save costs without sacrificing reliability. Always inspect your brake components thoroughly; assumptions that a typical squeal is benign could mask critical issues like warped rotors or worn calipers that require advanced diagnostics beyond a visual check. And speaking of diagnostics, advanced car repair often involves interpreting subtle clues like irregular vibrations or fluid discoloration—these signs demand expert attention rather than ignoring them to avoid costly damage later. Have you ever fallen into this trap? Let me know in the comments. Dive into trusted resources like this comprehensive brake repair guide to sharpen your knowledge and prevent common pitfalls.
Investing in the Right Equipment for Long-Term Maintenance
Maintaining your vehicle’s optimal performance requires more than just basic tools; it demands precision instruments that can help you diagnose and fix issues efficiently. I’ve personally found that having a high-quality digital multimeter is indispensable. It allows me to quickly check electrical circuits, identify faulty sensors, and ensure components like the alternator and battery are functioning correctly, saving me both time and money. For example, regularly testing your battery and charging system with an accurate multimeter, such as the Fluke 115, ensures your vehicle starts reliably, especially during colder months.
Precision Torque Wrenches Make the Difference
Over-tightening or under-tightening bolts can lead to costly repairs or component failures. I rely on a calibrated torque wrench like the Tekton 24335 to apply the exact torque specifications recommended by the manufacturer. This precision is critical when working on brake calipers, wheel lug nuts, or suspension components. Proper torque not only prolongs the life of parts but also ensures your safety on the road. Remember, every part has its own optimal torque, and using a reliable wrench helps you meet those specifications accurately.
Upgrading Your Diagnostic Software
If you’re serious about auto repair, investing in an advanced OBD-II scanner such as the BlueDriver Pro is a game-changer. It provides real-time data, advanced fault code definitions, and bi-directional testing capabilities. On my own projects, I’ve used it to identify issues before they trigger warning lights, helping me schedule maintenance proactively. As vehicle electronics become more sophisticated, having access to professional diagnostic tools will become increasingly crucial. Check out this guide to better understand your brake system diagnostics.
How do I maintain my tools to ensure accuracy over time?
Maintaining your tools isn’t just about keeping them clean; it involves proper storage, regular calibration, and avoiding exposure to harsh environments. Calibration is especially essential for torque wrenches and multimeters, which can lose accuracy over time. I recommend sending your torque wrench for annual calibration to a professional service. Similarly, store your diagnostic tools in a dry, temperature-controlled environment to prevent corrosion and damage. Regularly checking the calibration on your multimeter ensures consistent and reliable readings, which is vital for diagnosing vehicle issues accurately. Remember, well-maintained tools enhance repair quality and safety, reducing the risk of long-term problems. For more insights into preserving your car’s performance, check out this resource.
The Future of Auto Maintenance Tools
Looking ahead, adaptive diagnostic systems and wireless tools are set to revolutionize car maintenance. Imagine a system that syncs with your smartphone to alert you about potential problems before symptoms set in—this trend is already emerging. Moreover, advancements in AI-powered repair assistance are making it easier for DIYers and professionals alike to diagnose complex issues swiftly. Staying ahead of these developments means investing in versatile, upgradable tools now, which will continue to serve you for years to come. To get started with the latest tech, consider exploring advanced diagnostic kits like the Autel MaxiSYS series—an investment that pays off by reducing downtime and ensuring your vehicle stays in top shape.
Lessons from the Garage: Secrets That Changed My Approach to Brake Maintenance
- Over time, I realized that trusting visual inspection alone isn’t enough; a gentle rotor surface check with a feeler gauge can reveal hidden warping that causes squealing.
- Applying anti-squeal compound isn’t just a quick fix—it requires precise placement and a good understanding of where noise originates, which can make or break a repair.
- Never underestimate the importance of proper hardware alignment; even tiny misplacements of pads or calipers can lead to persistent squeals and uneven wear, wasting time and resources.
- Regularly cleaning and lubricating contact points prevents vibration-induced noises; neglecting this step often leads to recurring squeals that seem to come back from nowhere.
Tools and Resources That Keep My Brake Work Sound and Sure
- Using a high-quality digital multimeter helps me diagnose electrical issues in electronic brake sensors, eliminating guesswork and ensuring accuracy—check out this guide for more insights.
- The Torque Wrench is my go-to for ensuring caliper bolts and wheel nuts are tightened to manufacturer specs, preventing future problems; I trust the tips on proper torque values.
- An advanced OBD-II scanner like BlueDriver Pro provides real-time diagnostics that catch issues before they escalate, saving money and frustration—consider upgrading your diagnostic setup with the latest tech trends.
- Keeping your tools calibrated with professional services ensures lasting accuracy—this is key for safety-critical repairs like brake work; explore troubleshooting tips for common auto repair pitfalls.
It’s Time to Drive Confidently Toward Better Brake Health
Taking control of your brake maintenance with confidence makes all the difference in safety and peace of mind. Remember, every squeal is an opportunity—sometimes a simple correction, sometimes a sign of deeper issues. The key is to stay proactive, invest in quality tools, and continually refine your technique. Your car’s stopping power and your personal safety depend on it. So, don’t wait for the next squeal to act—embrace a thoughtful, informed approach to brake service that keeps your vehicle quiet and reliable on the road. How has your experience with brake squeal changed your approach to vehicle maintenance? Let me know below.