
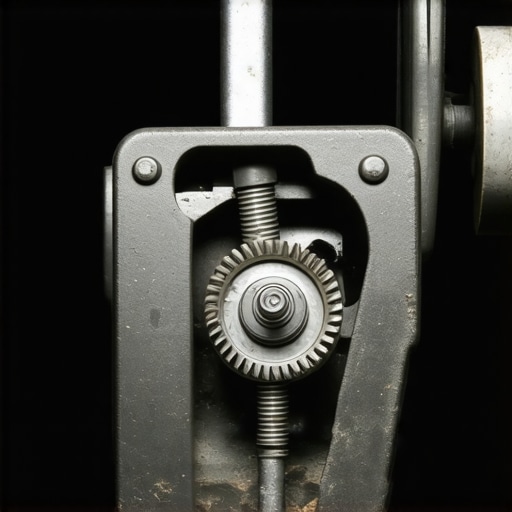
It was just another Saturday morning, or so I thought. I rolled out of bed and headed to the garage to take care of some routine maintenance. But as I pressed down on the brake pedal, my heart sank. It felt like pressing against a steel pole—a solid, unyielding resistance that made stopping nearly impossible. At that moment, I realized how dangerous and inconvenient a rock-hard brake pedal can be, and I knew I wasn’t alone in facing this frustrating issue.
Spotting the Hidden Culprit Behind That Stiff Brake Pedal
Sometimes, the problem is more than just a minor inconvenience. A brake pedal that won’t depress can jeopardize your safety and lead to costly repairs if not addressed promptly. Over the years, I’ve learned from personal experience—and a fair share of mistakes—that understanding the underlying cause is essential to fixing the issue effectively. Today, I want to share the insights I’ve gained to help you diagnose and resolve this problem before it becomes a crisis. So, if you’ve ever wondered why your brake pedal has suddenly become so stiff, stick around. We’ll walk through what’s really going on beneath the surface and how you can get your brakes feeling normal again.
Is Your Brake Pedal Really Worth the Hype? Think Again.
Early on, I made the mistake of assuming that a rigid brake pedal was just a minor issue or that a quick bleed would do the trick. Turns out, neglecting deeper problems can turn a manageable fix into a nightmare. According to professional mechanics, a brake pedal that’s hard as a rock often signals serious trouble—like a stuck brake booster or issues with the hydraulic system. Without proper diagnosis, you risk damaging other vital components or even endangering your life on the road. That’s why it’s crucial not to ignore this symptom or brush it off as just another annoyance. If you’re feeling overwhelmed or unsure whether your situation warrants a visit to the shop, don’t worry—I’ve been there. To avoid costly mistakes, I recommend reading this comprehensive guide on common brake issues and how to avoid them. For instance, I once overlooked a failing brake booster, which nearly led to an accident—lesson learned the hard way. So, let’s dive into how to pinpoint the cause and get your brakes back in shape.
Inspect Your Brake System Thoroughly
Start by lifting your vehicle safely on jack stands and removing the wheels to access the brake components. Check for leaks, corrosion, or damage in the brake lines and cylinders. If you notice fluid leaks or significant corrosion, these may be causing hydraulic pressure loss. Remember, a leak in your brake line is akin to a garden hose with a tear—pressure won’t be maintained, resulting in a stiff pedal. For detailed checking techniques, visit this guide on spotting brake line leaks.
Evaluate and Service the Brake Fluid System
Check Brake Fluid Level and Quality
Locate the master cylinder reservoir and verify it contains the correct amount of brake fluid. Use a clean cloth to wipe off the cap and inspect the fluid’s color. Dark, contaminated brake fluid behaves like thick molasses—restricting hydraulic flow and causing pedal stiffness. If fluid is dirty or low, a flush is necessary. For an accurate assessment, see this step-by-step fluid check. If you’re unsure about the procedure, a full bleed or replacement can restore proper hydraulic pressure.
Pro tip: Always use the manufacturer-recommended brake fluid type. Mixing incompatible fluids can lead to corrosion or a non-responsive pedal, similar to mixing oil and water. Discover the proper fluid for your vehicle in this comprehensive guide.
Test and Replace Faulty Brake Boosters and Master Cylinders
The brake booster amplifies your pedal pressure using vacuum assistance. If it fails, pressing the pedal feels solid and unresponsive—like pushing against a brick wall. To test it, start the engine, apply pressure to the pedal, then turn off the engine. If the pedal slowly sinks or feels hard and unyielding throughout, the booster likely needs replacing. This process is analogous to a vacuum cleaner losing suction—the engine’s vacuum isn’t assisting.
Replacing the booster involves disconnecting vacuum lines and mounting bolts, much like swapping out a gasket or valve in a water pipe. Exercise caution, and if you’re not comfortable, consult a mechanic. An operational booster can save you from future brake failures and improve pedal feel significantly.
Examine and Replace Worn Brake Pads and Rotors
Once the hydraulic and booster systems are confirmed functional, inspect your brake pads and rotors for wear or warping. Worn pads can cause uneven braking and stiffness, similar to pressing a door with worn-out hinges. Rotors that are warped or glazed can impede smooth contact, resulting in a hard pedal. If pads are less than 3mm thick or rotors exhibit cracks or grooves, replacement is advisable. Review this guide on brake component wear for more details. Remember, improper installation or using cheap parts may cause vibrations or pedal issues down the line.
Utilize Proper Bleeding Techniques
After replacing components or flushing fluid, bleed the brake system to remove air pockets—air is like bubbles in soda, preventing proper hydraulic pressure. Follow a step-by-step sequence: start at the wheel farthest from the master cylinder, usually the passenger rear, then proceed to the driver rear, passenger front, and finally driver front. Use a clear tube and a catch container, and have a trusted assistant press the brake pedal. This task is similar to squeezing toothpaste: slow, steady, and consistent pressure ensures the system is free of air. For an in-depth process, check this detailed bleeding tutorial. Once completed, test the pedal for firmness and responsiveness.
Many vehicle owners approach brake service and auto repairs with misconceptions that can lead to costly mistakes. While basic maintenance is straightforward, several nuanced pitfalls trip up even seasoned DIY enthusiasts and some professionals. One prevalent myth is that brake pads alone determine stopping power. In reality, focusing solely on pads ignores other critical components like rotors, calipers, and hydraulic systems. Neglecting these can cause uneven wear, vibrations, or even complete brake failure. According to automotive experts, a comprehensive approach ensures safety and longevity of brake systems, avoiding unnecessary replacements.
Another common misunderstanding involves the importance of fluid types and maintenance intervals. Some believe that top-up with any brake fluid suffices; however, using incompatible fluids or delaying flushes can lead to corrosion and internal component damage. A study from the National Institute for Automotive Service Excellence (ASE) emphasizes that proper brake fluid choice and regular replacement are essential for system integrity, especially in varying climate conditions.
A crucial Maintaining your vehicle’s brake system requires more than just routine visits to the mechanic; it hinges on having the right tools and a disciplined maintenance approach. One of my go-to pieces of equipment is a high-quality scan tool like the Autel MaxiSys, which enables me to quickly diagnose ABS and brake system error codes without relying solely on guesswork. I’ve found that regularly connecting this device during routine tire rotations or fluid checks helps catch potential issues early, saving time and money in the long run. Additionally, investing in a sturdy brake caliper piston tool, such as the Powerbuilt Brake Caliper Wind Back Tool, has transformed my DIY brake pad replacements. It provides precise, even pressure, preventing damage to components and ensuring a safe, effective service. Software-wise, I rely on vehicle-specific diagnostic apps that keep me updated with the latest recall info and service bulletins, which are invaluable when addressing persistent problems like braking vibrations or pedal inconsistencies. Looking ahead, I anticipate further integration of telematics and IoT devices into auto maintenance, allowing real-time alerts for potential issues before symptoms become severe. This evolution promises even more proactive care, extending component lifespan and enhancing safety. \n\n**How do I maintain brake system performance over time?** Consistent fluid management is crucial. I schedule semi-annual flushes, checking fluid quality and replacing it with manufacturer-approved types. For instance, using the correct brake fluid helps prevent internal corrosion and seal deterioration, which can lead to pedal firmness issues. To ensure optimal results, I follow procedures outlined in trusted sources like the [National Institute for Automotive Service Excellence (ASE)] guidelines, which recommend thorough bleeding techniques to eliminate air pockets—bubbles that can cause spongy feel or impaired braking.\n\nFor more on maintaining your car’s vital systems, visit [this comprehensive pre-road-trip checklist](https://glassfixauto.com/the-essential-pre-road-trip-checklist-every-driver-needs). Remember, armed with the right tools and disciplined routines, you can extend the life of your brake components significantly, ensuring safety and savings. Don’t hesitate to try my favorite tip: routinely inspect and clean your brake calipers and wheel hubs using a brake cleaner like CRC Brakleen. It keeps corrosion at bay and maintains efficient heat dissipation—key for consistent pedal feel and stopping power.
The Hardest Lesson I Learned About Brake Service
One of the most impactful lessons I gained was realizing that ignoring subtle signs of brake issues can escalate into dangerous situations. A stiff brake pedal isn’t just an annoyance; it often signals deeper problems that demand immediate attention. I once delayed inspecting a slightly hard pedal, only to find a warped rotor caused by unseen corrosion—an expensive fix I could have avoided with early detection.
Gear Up with My Essential Tools for Brake Care
Having the right equipment makes all the difference in diagnosing and maintaining your brake system. I rely on a quality scan tool like the Autel MaxiSys, which helps identify ABS and brake system errors swiftly. Investing in a reliable brake caliper piston tool, such as the Powerbuilt Brake Caliper Wind Back Tool, ensures safe and precise replacements. These tools empower me to handle repairs confidently and prevent costly trips to the mechanic.
Your Turn to Take Action
Now that you’ve learned the intricacies of diagnosing and fixing brake issues, it’s your turn to apply this knowledge. Regular inspection and proactive maintenance can save lives and money. Remember, a well-maintained brake system not only keeps you safe but also enhances your vehicle’s longevity. Stay vigilant, and don’t hesitate to seek professional help when needed. How will you incorporate these insights into your routine brake care today? Share your plans below!