
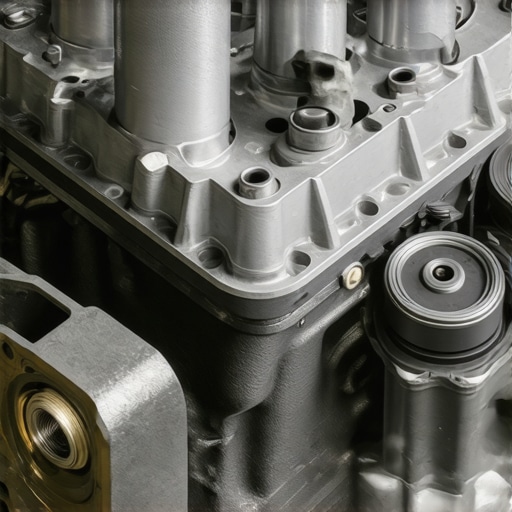
It was a chilly morning, and I turned the key in my car’s ignition. Instead of the usual reassuring purr, I was met with a rough cough, some white smoke curling out from the exhaust, and a sinking feeling in my stomach. That moment—when I realized something was seriously wrong—hit hard. I had no mechanic appointment scheduled, and the idea of a costly repair looming over me made me feel powerless. Sound familiar? Many car owners find themselves in a similar boat, suddenly facing the dreaded suspicion: Is my engine suffering from a blown head gasket?
Why Detecting a Blown Head Gasket Early Matters More Than You Think
Detecting a blown head gasket isn’t just about avoiding a hefty repair bill; it’s about preventing further damage that could leave you stranded or facing even steeper expenses. When your head gasket fails, it can cause coolant to mix with engine oil, lead to overheating, and even ruin your engine entirely. The good news? You don’t need a wizard’s degree or access to fancy diagnostic tools to get a good handle on whether your gasket is blown. With a keen eye and some simple checks, you can often identify the signs early—saving you money and headaches down the line.
Is It Really Possible to Spot a Blown Head Gasket Without a Mechanic?
Absolutely. I made the mistake early on of relying solely on my mechanic’s opinion when subtle signs appeared. It wasn’t until I did my research and learned some quick tests that I gained confidence. These methods are not foolproof, but they can provide enough clues to know when to seek professional help or consider a DIY fix. For instance, certain signs like white smoke from the exhaust or unexplained coolant loss are glaring indicators. To understand the full range of symptoms, check out a detailed guide on why your engine smokes on cold mornings.
Now, let’s explore how you can keep your engine healthy by identifying the telltale signs of a blown head gasket early on—so you’re not left guessing in a jam.
Start with a Visual Inspection
Check the engine for signs of coolant leaks around the head gasket area, especially between the engine block and cylinder head. Use a flashlight to look for white condensation or oil mixed with coolant—these are immediate red flags. I once found a tiny leak near the timing chain cover that I had previously missed, which helped me catch the issue early. To make this easier, park your car on a level surface, open the hood, and get a good look at the engine’s perimeters.
Monitor Coolant Levels and Oil Condition
Regularly check your coolant reservoir and oil dipstick. A sudden drop in coolant without visible leaks hints at it entering the combustion chamber, often caused by a blown gasket. Meanwhile, milky or frothy oil on the dipstick indicates coolant mixing with oil—a classic sign of gasket failure. I experienced this when my oil resembled a mocha latte, prompting me to do additional tests before heading to the mechanic.
Perform a Compression Test
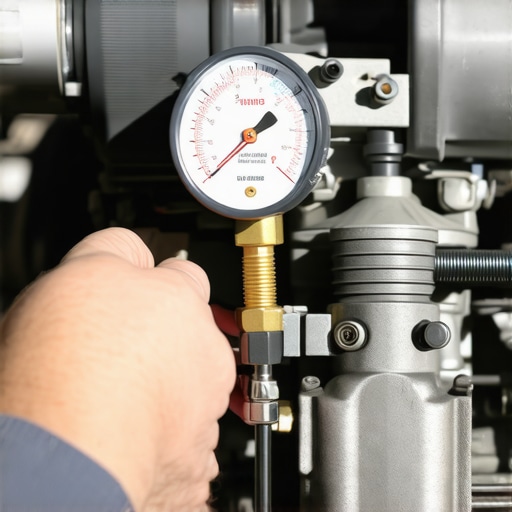
This test measures the pressure in each cylinder. Remove the spark plugs, attach a compression gauge, and crank the engine. Significant discrepancies between cylinders suggest issues like a blown gasket. It’s akin to checking the pressure in multiple tires to see if one is underinflated—an imbalance hints something’s off. I borrowed a compression tester from a local parts store, followed a tutorial, and identified one cylinder with notably lower pressure, which led me to specific repairs.
Use a Chemical Test for Combustion Gases
Buy a tester kit designed to detect exhaust gases in the radiator. Simply extract a small amount of coolant into the test chamber, add the chemical reagent, and observe the color change. A positive result (color change) indicates combustion gases in the cooling system—proof of a gasket breach. This method is similar to a pregnancy test in its simplicity and accuracy. I tried it at home after noticing white smoke and confirmed my suspicions before seeking professional help.
Check for White Smoke and Overheating
White smoke from the exhaust often signifies coolant burning in the combustion chamber. Keep a close eye during drives, especially on cold mornings. Overheating, especially if sudden or persistent, can be another warning sign—coolant leaks into the engine can drastically raise your engine’s temperature. I took note of every cold start and observed white smoke, which I categorized with the other signs to build my case.
Follow Up with Professional Diagnostics if You’re Unsure
If your DIY checks point toward a blown gasket but you’re unsure, don’t hesitate to visit a mechanic. They can perform an engine block test or a leak-down test for definitive proof. A quick visit settled all doubts for me, saving me from unnecessary parts replacement. Think of the mechanic’s test as a final shield, confirming your suspicions or putting your mind at ease.
Keep Records of Symptoms
Document any signs you notice, such as coolant loss, white smoke, engine misfires, or overheating episodes. This record helps during professional diagnosis and can alert you to worsening conditions. I kept a simple notebook, noting dates and symptoms, which made explaining my situation clearer to the technician. Remember, early detection can significantly reduce repair costs and prevent engine damage.
Act Quickly When Signs Appear
Delayed action on a suspected blown head gasket can lead to engine failure. If you observe multiple signs—like coolant consumption coupled with white exhaust smoke—address the issue promptly. It’s similar to tending a small leak before it turns into a flood. Taking immediate steps not only saves money but also ensures your safety during drives.
 Many vehicle owners operate under misconceptions about routine maintenance and repairs, often leading to costly mistakes. One common myth is that a simple oil change or brake pad replacement suffices to keep the car running smoothly, but in reality, neglecting the nuanced aspects of these services can cause bigger problems. For example, many overlook the importance of proper brake bed-in procedures, which ensure your new pads wear evenly and avoid squealing—learn more about correct brake bed-in techniques. Additionally, there’s a dangerous trap of assuming all vehicle diagnostics are equally accurate; a superficial inspection may miss subtle but critical issues like a failing serpentine belt, which when ignored, may snap unexpectedly, damaging your engine accessories. Recognizing these nuances is vital for extending your vehicle’s lifespan. The myth that high-mileage cars require no special attention is also widespread; in truth, components like timing belts and transmission fluid should be proactively serviced to prevent catastrophic failure, as emphasized in serpentine belt warning signs. Advanced mistakes include inconsistent maintenance schedules or neglecting to check warning lights—these oversights can escalate minor issues into major repairs. For an in-depth understanding, consider exploring expert insights on why brake fluid turns black. An often-overlooked detail involves the importance of regular fluid exchanges and system flushes; delaying these can cause corrosion and reduce braking efficiency. Remember, many car owners don’t realize that some repairs, although seemingly simple, require precise techniques—like properly bleeding brake systems—where a DIY fix can lead to air pockets, reducing effectiveness. To avoid such pitfalls, always follow recommended procedures or consult trusted guides. Have you ever fallen into this trap? Let me know in the comments.
Maintaining Your Car with Precision and Confidence
Keeping your vehicle running smoothly over the years requires more than just basic know-how; it demands the right tools, a systematic approach, and understanding the evolving nature of auto repair. From routine tune-ups to diagnosing complex issues like a failing serpentine belt, investing in quality equipment can save you money and extend your car’s lifespan.
Why I Invest in Quality Diagnostic Equipment
Personally, I rely on a professional-grade OBD-II scanner like the Autel MaxiCOM MK808. This device provides comprehensive diagnostic trouble codes, live data readings, and ABS/SRS functions. Using it regularly helps me identify issues before they escalate—say, catching irregular engine misfires or warning lights that might indicate deeper problems. A good scanner saves trips to the mechanic and empowers me to undertake minor repairs confidently. As vehicle electronics advance, having a reliable scanner becomes indispensable for consistent maintenance.
Tools That Make Brake Service a Breeze
When performing DIY brake pad replacements, I always use an impact wrench paired with a brake bedding tool. The impact wrench makes removing lug nuts effortless, especially on rusted bolts, while the bedding tool ensures your new pads wear evenly, preventing squeals and uneven braking. Regularly inspecting and using quality tools for brake maintenance not only improves safety but also prolongs the life of your rotors and pads.
Prolonging Belt and Hose Life with Proper Tools
A failing serpentine belt can leave you stranded, so I keep a belt tension gauge in my toolbox. Proper tension is crucial to prevent slips and premature wear. Consulting expert advice helps me understand the correct tension specifications—something I verify regularly during routine checks. Investing in a quality gauge and learning how to interpret its readings ensures your belts last longer and perform reliably.
Efficient Cleaning and Maintenance Supplies
Maintaining components like windshield wipers and headlights requires more than replacing parts; I recommend a plastic scraper and specialized cleaning solution. For example, cleaning foggy headlights with a polishing kit preserves visibility and adds safety. When I revived my headlights, the difference was night and day, reaffirming the importance of proper cleaning tools in your maintenance arsenal. Regular care prevents minor issues from turning into costly repairs.
Preparing for Future Repairs and Scaling Up
As your skills grow, consider acquiring an car lift or jack stands that support elevated work for suspension, transmission, or oil changes. For scaling your capabilities, investing in a throttle body cleaner and a torque wrench helps maintain engine response and ensures parts are tightened to specs. These tools are vital for long-term DIY projects and reduce the dependency on professional services, especially as you tackle more complex tasks.
What’s Next for Your Maintenance Routine?
Looking ahead, the trend in auto maintenance points toward smarter, connected diagnostics. Cloud-connected tools and advanced software will increasingly assist you in real-time troubleshooting, making maintenance more precise and less guesswork. Embracing this technology now positions you for the future of car care.
To start, try calibrating your belt tension with a belt tension gauge today. Correct tension extends the life of your serpentine belt and prevents unexpected breakdowns—simple, effective, and empowering. Remember, investing in the right tools and adopting a proactive maintenance mindset can make all the difference in keeping your car dependable for the long haul.
What I Wish I Knew About Brake Service Before Messing Up
- Initially, I underestimated the importance of proper brake bedding, which led to squealing and uneven wear. Learning the correct bedding technique, as explained here, saved me headaches and money.
- I used to think that simply replacing brake pads was enough, but I ignored the significance of rotor condition. A quick check of rotors and proper resurfacing can make a huge difference, preventing future issues.
- Attempting DIY brake bleeding without the right tools caused air pockets and reduced effectiveness. Investing in the right bleed kit made my repairs smoother and more reliable, emphasizing the value of quality tools.
- Over-tightening lug nuts seemed harmless at first, but I realized it stresses components and can cause warping. Following proper torque settings, verified with a torque wrench, is critical for safety and longevity.
- Neglecting regular brake fluid checks leads to moisture buildup and corrosion. Flushing fluid periodically using trusted methods keeps braking performance optimal, as outlined in this guide.
Tools and Resources That Changed My Approach
- The impact wrench I bought from a reputable brand made removing stubborn lug nuts effortless—saving time and effort.
- My digital torque wrench ensured I applied the correct tightness every time, preventing damage and ensuring safety.
- Headlight and headlight restoration kits, like the ones discussed here, keep visibility clear, especially during night repairs.
- I follow expert blogs and YouTube channels specializing in auto repair techniques. They keep my skills sharp and my repairs safe, saving me trips to the mechanic.
Keep Your Repairs Honest and Your Confidence High
Taking ownership of your car repairs isn’t just about saving money; it’s about empowering yourself to understand your vehicle better. Every time I tackle a brake job or engine check, I gain confidence that extends beyond the garage — it feels good to be in control. Start small, stay consistent, and use reliable resources to avoid costly mistakes. Remember, the right tools, proper procedures, and a willingness to learn are your best allies. Are you ready to turn DIY car repairs from a nightmare into a learning adventure? Share your experiences below, and let’s grow together in auto knowledge!