
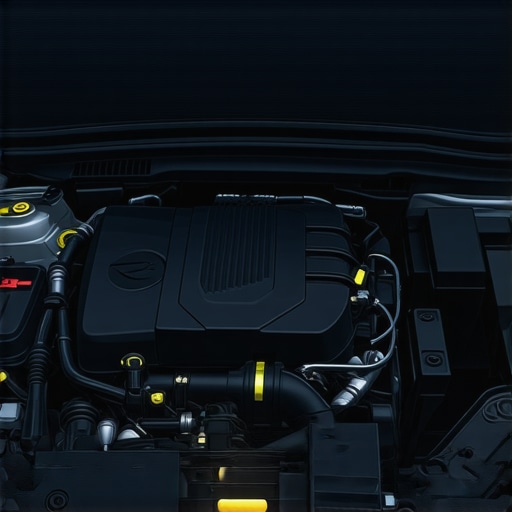
It happened to me on a gloomy Tuesday afternoon. I had just finished a quick fix on my car—replacing a worn-out sensor and tightening some loose wires—and I was pretty proud of myself. But as I turned the key and waited for the engine to start, that little engine warning light stubbornly refused to go off. Frustration set in. I had fixed the problem, but the warning was still blinking away, glaring from the dashboard like a neon sign.
At that moment, I realized I wasn’t alone in this. That nagging, persistent engine light can feel like a personal act of defiance from your car. And honestly? It’s more common than you might think. If you’ve ever experienced the same déjà vu after a repair, you’re probably asking yourself, “Why is this light still on? Did I miss something?”
Today, I want to unravel that mystery. Together, we’ll explore why your engine light might stay lit even after you believe the problem has been fixed, and more importantly, how you can troubleshoot and resolve it without endless guesswork. Because trust me, a stubborn warning doesn’t necessarily mean more costly repairs—it often just means a little extra diagnostics.
Understanding Why the Light Won’t Quit
Many car owners assume that once the suspected issue is addressed, the warning light should turn off immediately. That’s a common misconception. In reality, your vehicle’s onboard computer (ECU) needs to receive the correct signals that the problem has been resolved. Sometimes, it’s a matter of waiting for the ECU to register the fix, which could take a few drives or days.
But here’s where it gets tricky: if the repair wasn’t properly registered—say, because the sensor wasn’t reset or the diagnostic trouble code (DTC) wasn’t cleared—the warning light may stay lit indefinitely. I learned this the hard way early on, rushing into assumptions and skipping the step of actually resetting the system. That oversight cost me extra trips to the mechanic and unnecessary anxiety.
According to automotive experts, failing to clear these codes correctly can lead to misdiagnosing the issue or overlooking a lingering problem. An article from Car and Driver emphasizes that “the initial diagnostic process is only half the job; proper code clearing and system resets are equally vital” (source). This is a mistake worth avoiding.
Your best bet? Use an OBD-II scanner to check if there are existing error codes, and ensure they’re properly reset after repairs. Not sure how to do that? Don’t worry—next, I’ll walk you through the steps to troubleshoot a persistent Check Engine light and validate whether your repairs truly fixed the root cause.
Are you tired of that stubborn engine warning flickering at you? Let’s get into how to clear these codes properly and give your car the reset it needs to truly be done with the warning. Trust me, a little know-how can save you a lot of frustration—and money.
Use an OBD-II Scanner for Accurate Diagnosis
Start by connecting an OBD-II scanner to your vehicle’s port, usually located beneath the dashboard. Turn on the ignition without starting the engine. The scanner will read and display any stored trouble codes. For example, after fixing a sensor issue, I used a scanner to check if the code for that sensor had cleared, which was key to ensuring the system recognized the repair.
Clear Codes Correctly to Reset the Warning
Once you’ve confirmed the repair is complete, navigate your scanner’s menu to the ‘Erase’ or ‘Clear Codes’ option. Think of this step as hitting the reset button on your device—you’re telling the ECU that the problem has been addressed. I once ignored this and simply turned off the ignition, leaving the warning light on; the proper reset cleared the code and turned off the light, saving me multiple trips to the mechanic.
Drive Through Multiple Cycles to Confirm
After clearing codes, drive your car normally through several start-stop cycles. This allows the ECU to re-test the system and verify the fix. For instance, on a rainy day, I drove around the neighborhood, watching the warning light carefully. If it stays off after a few cycles, you’re likely good to go. If it comes back on, rechecking the codes or consulting a professional might be necessary.
Be Patient for the System to Register Changes
Sometimes, the ECU needs time to process the repairs, especially if it has to perform self-tests. This can take up to a few trips or even a day. It’s like waiting for a computer to update its software—patience ensures the system fully acknowledges the repair before concluding the issue is resolved.
Utilize Visual Cues for Final Confirmation
Ensure you observe the dashboard indicator to verify the warning light is extinguished. If you notice the light blinking or staying solid despite clearing codes and multiple drives, revisit the troubleshooting process. An extra step would be to review the prior error codes, which can often reveal lingering issues or new ones that need addressing. For example, I once cleared codes prematurely, only to realize the light returned because the underlying problem wasn’t fully resolved. Buying an inexpensive OBD-II scanner is worth it for ongoing maintenance and diagnostics.
Many car owners operate under the assumption that routine maintenance is just about following manufacturer recommendations and sticking to the basics. However, this belief often masks deeper misconceptions that can lead to costly mistakes. One prevalent myth is that all auto repairs are straightforward, requiring only a simple part replacement. In reality, skilled technicians understand that many repairs involve nuanced diagnostics; for example, a brake pad change might seem simple, but if the rotors are warped due to uneven wear, replacing pads alone won’t solve the squealing or pulsating issue. This is why understanding the intricacies of the repair process is vital.
Another common misconception is that a quick fix during a service visit guarantees your vehicle’s longevity. For instance, topping off fluids or replacing filters might be necessary, but neglecting to address underlying issues—like a failing transmission solenoid or an aging suspension component—can cause problems to resurface shortly after maintenance.
Beware the trap of assuming that cheaper parts always equal savings. Cheap brake pads, for example, may cost less upfront but can wear out faster and cause damage to rotors or generate brake dust that ruins your wheels, as detailed in this article on why cheap brake pads end up costing more. Investing in quality parts, though seemingly more expensive at first, tends to save money in the long run.
Now, for those who think that recurring issues like pulling to the right are solely due to misalignment, there’s often an underlying problem like uneven tire wear or suspension problems. Many overlook the importance of an appropriate tire rotation order, which directly impacts even tread wear and handling, and can be checked through guides like the best tire rotation practices. Recognizing that tire rotation isn’t just about following a schedule but about understanding how different patterns influence wear helps prevent premature tire replacements.
A hidden nuance many miss is the significance of systemic diagnostics when addressing auto repair, especially for complex issues like engine misfires or poor fuel economy. Using advanced tools such as OBD-II scanners, professionals can trace diagnosing errors more *precisely*, rather than relying on guesswork or mere symptom chasing. Even for experienced technicians, keeping up with the latest diagnostic techniques—which might involve checking for hidden vacuum leaks or sensor failures—can mean the difference between a temporary fix and a permanent solution.
Make no mistake: understanding your vehicle’s systems, from brake components to engine sensors, in depth can drastically improve your maintenance outcomes. Flawed logic like “if it runs, it’s fine” overlooks critical nuances that, if ignored, could lead to catastrophic failures down the line. For example, neglecting to inspect the catalytic converter after noticing reduced performance can result in increased emissions and even engine damage, as highlighted by experts in diagnosing catalytic converter issues.
Always remember, car maintenance isn’t just about following schedules or replacing parts; it’s about understanding the *why* behind each procedure. Next time you visit your mechanic or evaluate repair advice, ask yourself: Am I considering the full picture—including these subtle, sometimes overlooked details?
Have you ever fallen into this trap? Let me know in the comments. Staying aware of these hidden nuances empowers you to make smarter decisions and keep your vehicle running longer and safer.Maintaining your vehicle’s performance over time requires more than just basic knowledge—it demands the right tools and strategic methods. Personally, I advocate for a combination of high-quality diagnostic equipment and reliable maintenance supplies to keep my car running smoothly. One tool I can’t recommend enough is an **OBD-II scanner**. It may seem simple, but it provides instant access to trouble codes, helping you identify issues before they escalate. I own the **Autel MaxiScan MS300**, which is budget-friendly yet efficient for most applications. Using it regularly empowers me to catch problems early, such as lingering engine codes or pending system errors, ensuring my repairs are accurate and complete.
Lessons That Changed My Approach to Auto Care
One of the biggest lessons I learned was to never assume that fixing a problem automatically resets the vehicle’s warning systems. The importance of properly clearing diagnostic trouble codes before driving away can’t be overstated. Another insight was that patience during multiple drive cycles often reveals issues that quick fixes might overlook, saving me from future headaches. Lastly, I realized that investing in a quality OBD-II scanner empowers me to troubleshoot confidently, turning me from a passive owner into an active participant in my car’s health.
Tools and Resources That Elevated My Car Care Game
My go-to device is the Autel MaxiScan MS300, which provides reliable readings without breaking the bank. I also lean on trusted online guides, like the comprehensive articles at Glass Fix Auto, for insights into parts quality and maintenance best practices. Additionally, switching to premium brake pads has dramatically improved my vehicle’s stopping power. These resources consistently help me make smarter decisions, ensuring my vehicle runs smoothly and safely.
Keep Your Car Running and Your Worries Low
Remember, a stubborn engine warning isn’t the end—it’s an opportunity to learn more about your vehicle and refine your DIY skills. Embrace the process, trust your tools, and stay curious—your car will thank you for it. What’s the one repair tip or tool that has saved you time and money? Share your story below and let’s grow together in this auto care journey.