
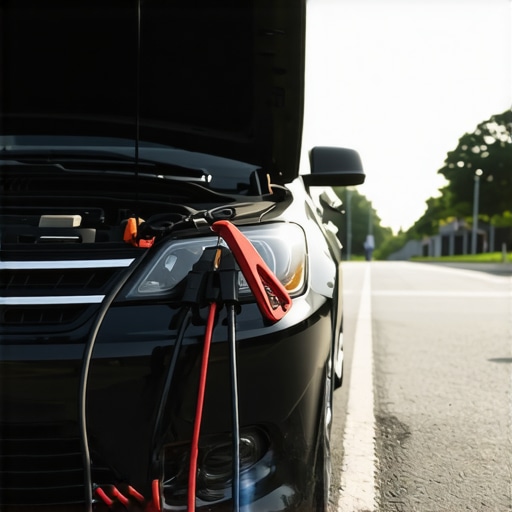
I remember the first time I tried to jumpstart a friend’s car, only to hear that terrible, crunching sound of what I later learned was an overwhelmed computer. It was a gut-wrenching moment. Since then, I’ve become passionate about figuring out how to jump a car properly—without risking frying the vehicle’s electronic brains. If you’ve ever been in that nerve-wracking situation where your engine refuses to turn over, you know how stressful it can be. What’s more frustrating is not knowing the safest way to do it, and sometimes, well-intentioned advice can actually cause more harm than good.
The Promise: How to Jumpstart Your Car Safely and Effectively
Today, I’ll share proven techniques I’ve gathered from years of experience (and a few mistakes along the way). By the end, you’ll understand exactly how to jump your car without risking damaging your vehicle’s sensitive computer systems. This isn’t just about cranking the engine; it’s about doing it the smart way—preserving your car’s health and saving yourself a costly trip to the shop.
Is Your Car’s Computer Worth the Risk? The Biggest Skepticism
One of my early mistakes was ignoring the importance of proper voltage and connection procedures, leading to a moment I’d rather forget. Many people believe that as long as the cables are connected, everything will be fine. But subtle errors—like connecting the cables in the wrong order—can cause voltage surges that fry the car’s computer modules. According to automotive experts, improper jumpstarting can lead to microchip failures, which are often not covered under warranty. So, it’s not just about getting your engine started; it’s about doing it safely, to avoid a repair bill that could soar over a thousand dollars.
If you’ve been skeptical about whether your method is enough or worried about causing more damage, you’re not alone. But rest assured, the technique I’ll explain is backed by seasoned mechanics and can be performed with common tools and some careful attention. No need to risk your car’s brain—just a little know-how can make all the difference. Ready to learn how to jump your car like a pro? Let’s dive into the step-by-step process that’ll keep your vehicle safe and sound.
Before we get into the nuts and bolts, it’s a good idea to familiarize yourself with common misconceptions about car batteries and jumpstarts. Sometimes, overlooking simple details can lead to unnecessary repairs. For more insights on preventing auto repair mishaps, check out our troubleshooting guide. Now, let’s get started on mastering the art of jumpstarting your car the right way!
,
Prepare Your Equipment and Environment
Before anything, ensure both cars are turned off, in park, and parked on a flat surface. Gather a pair of high-quality jumper cables—cheap ones can increase the risk of sparks or damage—and position the vehicles close enough for the cables to reach, but not touching. Turn off all accessories like headlights and radio to prevent power surges. Remember, working in a dry, well-ventilated area reduces risks, especially if you’re unfamiliar with the process. I once attempted a jump in pouring rain, which led me to realize the importance of safety gear and proper setup.
Connect the Jumper Cables Correctly
Attach the Red Clamp to the Battery Positive
Start by connecting one of the red clamps to the positive (+) terminal of the dead battery. These terminals are usually marked with a plus sign or labeled ‘POS’. Be firm but gentle, ensuring good contact. This step essentially ‘touches base’ with the dead battery, like planting a flag—it sets the stage for the transfer of energy.
Connect the Red Clamp to the Good Battery
Next, attach the other red clamp to the positive (+) terminal of the donor vehicle’s battery. This grounds the circuit for the positive side, allowing current to flow safely. I remember a time I mistakenly connected the black clamp first, which caused a small spark; now I always follow the positive-first rule for safety.
Attach the Black Clamp to the Donor Vehicle’s Negative Terminal
Connect the black clamp to the negative (−) terminal on the donor car, usually marked with a minus sign or labeled ‘NEG’. This completes the positive circuit, preparing the negative side for potential grounding.
Ground the Dead Car Properly
Instead of attaching the black clamp directly to the negative terminal of the dead battery—which can sometimes cause sparks—connect it to a clean, unpainted metal surface away from the battery, like a bolt or bracket on the engine block. This grounding minimizes the risk of igniting hydrogen gas emitted by the battery. I once neglected this step and saw a tiny spark—best to avoid surprises.
Start the Vehicles and Verify Success
Start the donor vehicle first, then attempt to start the dead car after a few moments. If the engine turns over smoothly, disconnect the cables in reverse order: black from the grounded metal, black from the donor, red from the dead car, then red from the donor. If it hesitates or doesn’t start, wait a few more minutes, and ensure all connections are secure. Remember, forceful cranking can damage the electronics—if it doesn’t start after multiple attempts, seek professional help.
Double-Check Your Work and Safely Disconnect
Once the vehicle is running, carefully remove the cables in the order opposite to connecting them—start with the black clamp from the grounded metal, then from the donor, followed by the red clamps. Keep the engines running for at least 15-30 minutes; driving helps recharge the battery fully. I learned the hard way that a quick restart might not fully restore the battery, so consider a routine maintenance check or a new battery if your vehicle keeps draining power. Regular tune-ups and brake service help prevent electrical issues that can lead to dead batteries. For more on maintaining your vehicle’s electrical system, visit this guide.
Many car owners operate under assumptions about auto repair, brake service, or regular tune-ups that are not only outdated but potentially harmful. The most pervasive myth is that all maintenance tasks are universally applicable without considering the specific needs of your vehicle or driving conditions. For example, the idea that a quick oil change every 3,000 miles suffices for modern engines is increasingly inaccurate; many vehicles now benefit from longer intervals based on their design and oil type.
Another overlooked nuance involves the selection of replacement parts. Opting for the cheapest components may save money upfront but can lead to premature failures or damage to other parts, especially if the part is not compatible or of subpar quality. Advanced repair shops often recommend OEM (Original Equipment Manufacturer) parts, which are engineered specifically for your vehicle, ensuring optimal performance and longevity.
One trap many fall into—particularly with brake service—is assuming that all brake pads are created equal. In reality, there are multiple types: organic, ceramic, and semi-metallic, each suited for different driving styles and conditions. Choosing the wrong type can result in increased wear, noise, and reduced braking effectiveness. For example, semi-metallic pads are more durable but generate more noise and dust, which might be unacceptable for daily city driving.
Why Do Some Drivers Overlook the Importance of Routine Tune-Ups?
It’s common to think that a well-functioning engine doesn’t need attention. However, regular tune-ups — including checking spark plugs, air filters, and fuel injectors — can significantly improve fuel efficiency and prevent costly breakdowns. A study by the Automotive Service Association highlights that neglecting routine maintenance can reduce engine lifespan by up to 30%. The hidden nuance here is that tuning isn’t just about performance but about proactive health monitoring. Missing preventive steps often leads to more significant issues down the line—like ignoring warning lights until a breakdown occurs. For comprehensive guidance on when and why to schedule maintenance, visit our ultimate car service guide.
Furthermore, many technicians emphasize the importance of proper diagnostic procedures. Jumping straight into repairs without accurate diagnostics can cause unnecessary replacements or misidentification of issues. This approach not only wastes resources but may also introduce new risks, such as damaging sensitive electronic systems during improper repairs. Staying informed about the latest diagnostic tools and techniques, like adaptive scan tools, is essential for effective and safe vehicle servicing.
In essence, understanding these nuances and challenging common myths can save you money, extend your vehicle’s lifespan, and keep you safe on the road. Have you ever fallen into this trap? Let me know in the comments. To ensure you’re up-to-date with annual maintenance, consider reviewing our auto repair trends for 2025.
Keep Your Vehicle Running Smoothly for Years
Maintaining your car over the long haul requires more than just occasional check-ups; it demands the right tools, consistent routines, and staying ahead of emerging trends in auto repair. From basic diagnostic scanners to specialized lubricants, employing the right equipment ensures you can identify issues early and prevent costly repairs down the line.
My Top Picks for Diagnostic and Maintenance Equipment
For accurate diagnostics, I personally rely on the Autel MaxiCOM MK808. Its comprehensive functionality covers most systems in modern vehicles, allowing me to quickly read fault codes, clear them, and run specific system checks. Unlike generic scanners, this device provides detailed insights, making it invaluable for proactive maintenance. Additionally, I always keep a digital torque wrench in my toolkit. Proper torque application prevents over-tightening or under-tightening components like wheel lug nuts or engine bolts, which is critical for safety and longevity.
To ensure optimal engine health, I use high-quality synthetic oils and oil catch cans. Synthetic oils like Mobil 1 significantly reduce engine wear, especially under extreme driving conditions. An oil catch can prevents sludge buildup by trapping blow-by gases, extending the interval between tune-ups and oil changes.
How do I maintain my tools over time?
Regular calibration of diagnostic scanners and torque tools guarantees their accuracy. I schedule biannual calibrations for my equipment, often through certified service providers. Additionally, cleaning and properly storing tools after each use prevent corrosion and damage, preserving their precision. Investing in a durable, waterproof toolbox allows me to keep everything organized and protected, saving time during repairs and routine maintenance.
Looking toward the future, automation and smart diagnostics are set to revolutionize vehicle maintenance. AI-powered diagnostic systems are evolving to predict failures before symptoms appear, enabling preemptive repairs. Alternatively, the integration of AI-based service platforms will streamline the entire maintenance process, making it more accessible and cost-effective for DIY enthusiasts and professionals alike.
What’s the best way to stay ahead in vehicle maintenance?
Adopt a proactive approach by incorporating advanced diagnostic tools and staying informed about technological trends. For instance, regularly updating your scanner’s firmware and software ensures compatibility with the latest vehicle models. Additionally, subscribing to industry updates and forums allows you to learn from experts—like the technical documentation from Bosch, which details maintenance protocols for modern ABS systems.
Take the advice a step further by trying out a practice like calibration of your diagnostic scanner every six months. This small effort can yield significant benefits, helping you detect issues early and avoid unnecessary repairs. Remember, consistent care today can save you hundreds or even thousands in the future—so invest in the right tools and habits to keep your vehicle running like new for years to come.
,
Lessons Hidden Beneath the Surface
One of the most eye-opening moments I encountered was realizing how small oversights—like neglecting to check battery terminals—can snowball into expensive problems. These little details, which many consider insignificant, often hold the key to long-term vehicle health.
Another lightbulb moment was understanding the importance of matching parts precisely to your car’s specifications. Using generic replacement components might save a few bucks upfront but can lead to reduced performance and safety risks later on.
Over time, I learned that patience during diagnostics pays off tremendously. Rushing to replace parts without thorough testing often results in unnecessary expenses and vehicle downtime. Embracing a methodical approach not only saves money but also deepens your understanding of how your car functions.
The biggest ‘aha’ was realizing that proactive maintenance is an ongoing relationship with your vehicle. Embracing regular tune-ups and staying updated with the latest auto repair trends, like those covered in auto repair trends for 2025, ensures you’re always a step ahead, preventing issues before they start.
Tools That Turn Auto Repair from Guesswork to Confidence
My essential toolkit includes the Autel MaxiCOM MK808 scanner—its comprehensive diagnostics have saved me from many potential mishaps. I trust it because of its detailed insights and consistent performance, which is vital when dealing with modern electronic systems. An often-overlooked item is a digital torque wrench; applying the correct torque prevents threading issues and maintains safety standards.
For engine health, I rely on high-quality synthetic oils like Mobil 1—these oils reduce wear and extend engine life. An oil catch can is also a game-changer, trapping harmful blow-by gases and keeping the engine cleaner for longer periods.
Regular calibration of diagnostic tools and maintaining a tidy workspace are actions that preserve accuracy and efficiency. Thinking ahead, I plan to explore AI-powered diagnostics, as discussed in future trends, which promise to take auto repair to the next level.
Step Up Your Car Care Game and Stay Ahead
The best way to keep your vehicle in top shape is to embrace continuous learning—periodically updating your diagnostic software, engaging with online communities, and reading up on the latest repair techniques. For tailored advice, my go-to source remains the comprehensive car service checklist.
Investing in quality tools and cultivating patience will not only save money but also give you the confidence to handle most auto repair situations. Remember, mastering these skills is an ongoing journey—so stay curious, stay proactive, and take pride in keeping your vehicle running smoothly for years to come.