
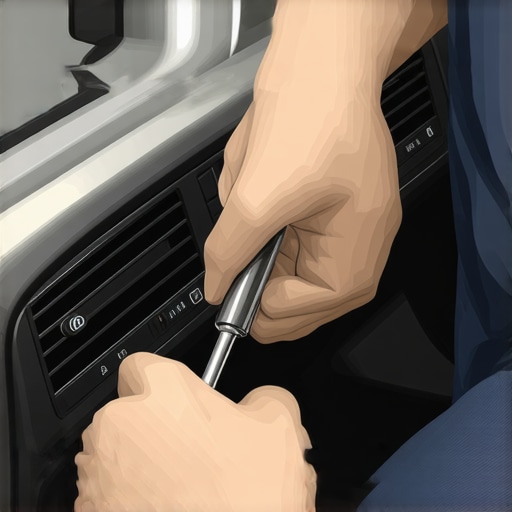
It was late afternoon when I hit that familiar, squeaky annoyance—my dashboard vibrating with every bump, almost like a tiny drummer was secretly hiding inside. I’d spent hours prying at panels, pulling apart parts of my car’s interior, only to realize I’d been doing it all wrong. The worst part? I was risking more damage by ripping into interior components I barely understood.
If you’re like I was, you’ve probably resigned yourself to a pricey visit to the mechanic or a futile attempt at DIY repairs that only made the noise worse. That persistent dash rattle can turn a peaceful drive into a test of patience, stealing your focus and turning every bump in the road into an unwelcome symphony.
But here’s the truth I learned after many failed attempts: you don’t need to pull apart your entire dashboard to silence that annoying noise. There’s a surprisingly simple way—no heavy panels required—that can fix this without risking damage or spending a fortune.
Today, I’m going to share exactly how I tackled my dash rattle with a technique that’s been a game-changer. We’ll explore practical, easy-to-follow steps to identify the culprit and fix your dashboard noise quickly and effectively, saving you time and money.
Why That Dash Rattle Is More Common Than You Think
Ever wondered why your car, which was so quiet when new, suddenly starts shaking and squeaking at every turn? It’s more common than you might think—especially as vehicles age and conditions change. The cause could be simple screw fields coming loose, or clips losing grip, but many folks don’t realize these small issues can lead to big noise problems.
I confess, early on I made a major mistake: assuming I’d need to replace entire panels or even pay for costly interior work. After digging deeper, I found that a lot of dash rattles are the result of loose fittings rather than major damage. In fact, some cases are so simple that fixing them requires just a few tools and a little patience—like tightening screws or adding a touch of foam padding to dampen vibrations.
To avoid the pitfalls I encountered, I recommend checking out trusted resources such as [Glass Fix Auto’s guide on fixing heat shields](https://glassfixauto.com/how-to-fix-a-rattling-heat-shield-without-buying-new-parts), which offers insights on minor fixes that make a huge difference.
Now that you understand why this issue occurs and how straightforward some fixes can be, let’s dive into the practical steps you can take to silence that dashboard noise once and for all—without pulling the entire interior apart.
Locate the Source of the Rattle
Start your fix by pinpointing where the noise originates. Sit in the driver’s seat and gently tap different areas of the dashboard while a friend listens from outside. I once spent an hour pressing random spots, but then I noticed the noise intensified near the glove box latch. Use a flashlight to inspect loose or vibrating components—screws, clips, or panels that seem misaligned. Remember, vibrations often come from small, overlooked parts.
Secure Loose Screws and Clips
Once you’ve identified loose parts, tighten their fasteners. Use a Phillips screwdriver or socket wrench—think of it as tightening a stubborn bolt that’s causing a squeak. For example, I loosened and then re-tightened the screws on my dashboard’s lower panel, which immediately subdued the rattling. Keep a small container of spare screws or clips handy, as losing these can cause ongoing issues. Be cautious not to overtighten; it might crack plastic components.
Add Damping Material to Vibrating Contact Points
If tightening doesn’t fully resolve the noise, add some padding. Use foam tape, rubber strips, or even old felt pads. Apply these between contact points—think of it as installing soundproofing to cancel vibrations. I pressed foam pieces behind the dashboard trim that rattled against metal frames. This quick fix absorbed vibrations effectively and prevented future noise. For more detailed tips on dampening vibrations, check out this guide.
Replace Worn or Broken Clips
Over time, clips that hold panels can degrade or break. Remove affected panels carefully using trim removal tools—these are like prying open tight puzzle pieces without snapping them. Carry a small set of plastic fastener removers; they make the job straightforward. I replaced a couple of clip. This restored a snug fit, eliminating the rattle. Be sure to check for missing clips—missing pieces are like missing puzzle parts that cause gaps and vibrations.
Inspect and Tighten Underlying Structural Elements
If noise persists, examine underlying brackets and mounting points—these are the skeleton supporting your dashboard. Use a flashlight and a mirror to access hard-to-see spots. Tighten any loose bolts or nuts with a ratchet or wrench. In my case, a loose bolt near the steering column was the culprit. Tightening it stabilized the setup, eradicated the rattle, and improved overall driving feel.
Test Your Repairs on a Bumpy Road
Finally, drive over a few bumps or rough patches to confirm the fix. If the noise stops, you’re done. If not, revisit the previous steps, or consider adding additional damping materials. Remember, a methodical approach ensures you don’t overlook the simplest fixes—sometimes, just tightening a screw saves hours of frustration. For complex issues, consulting detailed guides like this resource can be invaluable.Many car owners believe that simply replacing parts or following basic maintenance schedules guarantees optimal vehicle performance. However, this assumption often overlooks crucial nuances that can lead to costly mistakes. For instance, a widespread myth is that all brake pads wear out evenly; in reality, uneven wear can stem from underlying issues like warped rotors or caliper problems that many neglect to diagnose properly. Relying solely on routine replacements without understanding the root causes can result in repeated failures and safety risks.
One trap that catches even seasoned DIYers is assuming that a diagnostic code always points directly to a faulty component. Modern vehicles generate numerous codes that may reflect secondary issues or sensor misreads rather than the actual culprit. For example, a misfire code might stem from a clogged fuel injector or a faulty spark plug, but some might jump to costly replacements without thorough inspection. This oversight can be prevented by adopting a systematic diagnostic approach, as discussed in detailed guides like this resource.
Advanced mechanics know that certain symptoms manifest due to subtle interactions within the vehicle’s systems. For example, a shudder during braking may seem straightforward, but it could originate from warped brake rotors, uneven tire wear, or even suspension issues. Proper diagnosis involves checking these interconnected components, emphasizing that surface symptoms rarely tell the full story. This depth of understanding distinguishes a good repair shop from a mediocre one, and helps prevent unnecessary part replacements.
Why do some technicians overlook critical nuances when servicing cars? Lacking a thorough understanding of vehicle systems and relying solely on diagnostic tools can lead to oversight. For example, during a tune-up, replacing spark plugs without inspecting ignition coils or fuel delivery systems might only provide short-term relief. Experts emphasize comprehensive inspections and a keen eye for signs of wear beyond the obvious. As noted in this article, addressing the real issues often involves understanding the complex interplay of engine components.
What advanced mistakes should you avoid to ensure longevity and performance? Neglecting to consider the vehicle’s history, environmental conditions, and previous repairs can lead to recurring problems. For example, skipping the inspection of rubber hoses or seals after a radiator flush can cause future leaks, even if initial repairs seemed successful. Recognizing these subtleties and performing detailed checks as recommended in expert sources can save substantial time and money.
By digging beneath the surface and questioning common practices, vehicle owners can make smarter decisions. Remember, maintaining your car isn’t just about replacing worn parts but understanding the intricate web of systems that keep it running smoothly. Have you ever fallen into this trap? Let me know in the comments.Maintaining your vehicle’s performance over time requires more than just basic knowledge; it demands the right tools, disciplined routines, and an understanding of long-term strategies. In my experience, investing in quality equipment has transformed my approach to car repair, ensuring efficiency and safety. For example, one indispensable tool I rely on is a digital inspection camera, which allows me to peer behind engine components without disassembly, revealing issues early before they escalate. This not only saves money but also prevents unnecessary teardown. Additionally, I swear by a high-accuracy multimeter to diagnose electrical faults precisely, especially when dealing with complex systems like sensors or alternators, which I discuss in detail when troubleshooting [here](https://glassfixauto.com/why-your-engine-starts-fine-but-dies-immediately-after). To keep everything functioning smoothly, routine maintenance is key. Scheduling regular oil changes, brake inspections, and tune-ups based on manufacturer specs can extend the lifespan of critical parts and improve fuel efficiency. Using a detailed vehicle maintenance log helps track all service dates, ensuring nothing slips through the cracks. As vehicle electronics become more sophisticated, software diagnostics have become essential. I recommend tools like the Autel MaxiSys, which can read all OEM codes and adapt to specific makes and models, making diagnostics faster and more accurate. Looking ahead, the trend points toward smarter, integrated systems where remote diagnostics and predictive maintenance could take away much of the guesswork, reducing roadside breakdowns. To ensure your car keeps humming along, I suggest adopting a proactive mindset: regularly check and replace wear items like belts and hoses before they fail. A *pro tip* from experienced mechanics is to invest in a good set of jack stands and a wheel lock remover—simple yet crucial tools that make tire rotations or brake repairs safer and more manageable. Want to get serious about maintenance? Try implementing a monthly check of your vehicle’s fluid levels and electrical connections; it’s a small routine that pays huge dividends over the years. Remember, the best way to keep your vehicle reliable is to stay ahead of potential problems, rather than reacting once they become critical. For some advanced tips and detailed guides on tools I trust, have a look at [this resource](https://glassfixauto.com/why-your-brake-warning-light-stays-on-after-a-pad-change). Take control of your car’s health today—start with one of these tools or strategies, and enjoy the peace of mind that comes with a well-maintained ride.
Throughout my experience working on cars, I’ve realized that the most effective repairs often come from simple, yet overlooked, solutions. One of the key lessons I learned is to trust your senses—listening for strange noises, inspecting for loose parts, and feeling for vibrations can guide you more accurately than relying solely on diagnostic codes or guesswork.
I’ve also discovered that patience and a methodical approach are vital. Rushing into parts replacements without proper diagnosis wastes time and money. Taking the time to check connections, tighten screws, and add damping material can save you from expensive repairs down the line.
Furthermore, involving experts or trusted resources like reliable guides has profoundly expanded my understanding, helping me avoid common pitfalls and recognize the subtle signs of underlying issues.
Finally, I learned that investing time in routine inspections and maintaining proper tools empowers you to handle issues early and confidently. A well-maintained vehicle is not just about safety but also about peace of mind—something every car owner deserves.