
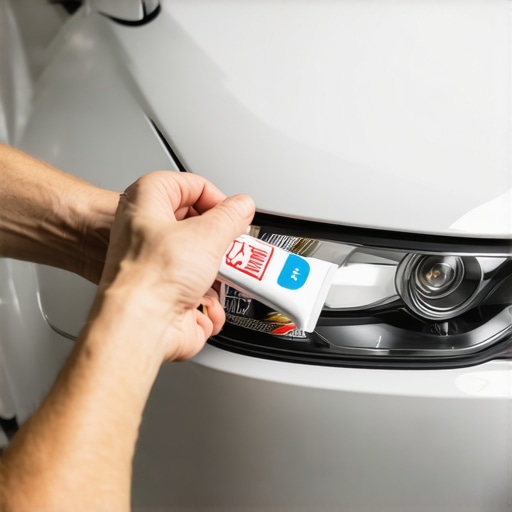
I remember the first time I caught my reflection in a foggy, hazy headlight—cringing at how my old car looked more tired than I felt. It was one of those mornings when I was already running late, and instead of dealing with a costly repair, I decided to try something surprisingly simple. To my amazement, I managed to make those headlights look almost new with nothing more than ingredients I kept in my kitchen. It was a lightbulb moment—literally—and since then, I’ve been eager to share this quick fix with fellow drivers who dread costly auto repairs for something as minor as foggy lights.
Bring Back Your Headlights Without Breaking the Bank
Headlights losing their clarity is a common issue, and honestly, it can be just plain embarrassing and unsafe. When your headlights are dulled or yellowed, your visibility at night drops, and other drivers may struggle to see you. But here’s the good news: you don’t have to spend hundreds at the shop. Over the years, I’ve discovered that simple household items—like baking soda, vinegar, and even toothpaste—can work wonders. I’ve tried and tested this method, and I can confidently say it’s a game-changer. Plus, it’s quick, affordable, and environmentally friendly. Ready to bring that shine back? Let’s get into it.
Is Restoring Headlights Really Worth the Hype?
Early on, I was skeptical. I thought maybe it was a quick fix that wouldn’t last or that I’d end up making things worse. I made the mistake of using abrasive scrapers which scratched the lens, and honestly, it looked worse afterward. That taught me to trust gentle, natural methods instead. It’s important to approach this task with patience and the right technique, or you might end up causing more harm than good. Still, with a little effort and the right approach, restoring headlights can be a simple DIY project that saves you money and improves your driving safety. Curious how I got those headlights crystal clear again? Keep reading, because I’ll walk you through the exact steps and tips I learned along the way. And if you want to check out some related auto maintenance tips, I recommend visiting this guide on tune-ups for peak performance.
Prepare Your Supplies and Set the Stage
Gather all necessary items before starting: microfiber cloths, a variety of cleaning agents like baking soda, vinegar, or toothpaste, masking tape, and optionally, sandpaper or polishing kits for severe cloudiness. Turn on your vehicle’s headlights to observe their current condition and identify areas needing extra attention. Remember, a clean workspace and good lighting will make the process smoother and prevent accidental damage.
Clean the Headlight Surface
First, wash your headlights with soap and water to remove dirt and debris, which can scratch the lens during polishing. Use a clean microfiber cloth for gentle wiping. For minor cloudiness, apply toothpaste directly onto the lens, then scrub gently with the cloth in circular motions—think of it as giving your headlights a gentle massage. I once tried this after a especially foggy morning; within minutes, I saw a visible improvement, which was satisfying and motivating.
Tackle Severe Haze with Sandpaper or Polish
If your headlights remain dull, consider wet-sanding with fine-grit sandpaper (at 1500-2000 grit). Dampen the surface and sand with light, even strokes—imagine sanding a piece of furniture gently. Afterward, apply a dedicated headlight polish or a rubbing compound, working in circular motions. This step smooths out deeper scratches and restores clarity. Progressively, I moved from coarse to fine grit sandpaper, and the difference was striking.
Apply a Protective Coating
Once your headlights look as clear as new, seal the surface with a UV-protectant or a clear topcoat. This step is crucial to prevent future yellowing and fogging. Spray or apply the coating evenly, and let it cure as per manufacturer instructions. Think of it as putting a sunscreen on your headlights—they need protection against UV rays, just like your skin.
Keep Your Vehicle in Top Shape
Regular maintenance extends beyond headlights. Following a comprehensive car service checklist ensures all systems function optimally. For instance, a well-maintained braking system not only stops smoothly but also prevents uneven wear that could affect wheel alignment and, by extension, headlight aim. Consistent tune-ups, like those detailed here, can save you money and improve safety.
Monitor Your Headlights Periodically
Every few months, revisit your headlights’ clarity and brightness. If they start fogging again, repeat the cleaning process or consider professional restoration for stubborn cases. Remember, your vehicle’s health is a sum of its parts; addressing small issues early prevents costly repairs down the line. For more detailed insights, check out how regular tune-ups enhance vehicle safety.
Many car owners believe that regular tune-ups and car services are just about replacing parts or ticking off a maintenance checklist, but there’s often a deeper misunderstanding at play. A common myth is that every issue requires expensive professional intervention; in reality, understanding the nuances of auto repair can save you significant money and prevent unnecessary repairs. For example, the misconception that all brake noises mean urgent replacement often leads to premature and costly brake service. However, some squeaks are benign, caused merely by dirt or light wear—knowing how to diagnose this can extend your brake pad life. Additionally, many assume that neglecting small issues won’t impact overall vehicle health, but unattended problems like minor leaks or delayed oil changes can escalate into major repairs. Being aware of these pitfalls enables you to act proactively.
Why do so many car owners fall for common auto repair misconceptions?
It often boils down to a lack of proper knowledge or trust in mechanics. While professional inspection is essential, relying solely on mechanics without understanding basic maintenance leads to overpaying for unnecessary repairs. Experts suggest familiarizing yourself with the fundamentals; check out essential tune-up tips to stay ahead. Also, beware of the trap of over-coverage—believing that every small squeal or warning light necessitates immediate, costly repairs. Instead, learn to interpret warning signs correctly—many issues are manageable with simple DIY steps. For example, misdiagnosed brake problems often stem from a lack of understanding about how the brake system works; reading this comprehensive guide can clarify what needs professional attention versus what can be handled at home. The key is gaining confidence in diagnosing basic issues, which helps avoid unnecessary expenses. Moreover, advanced drivers understand that many so-called myths—like the necessity of flushing all fluids every year—are outdated. Studies indicate that most fluids can last longer than commonly believed, provided they are inspected periodically. Regular monitoring and knowledge are your best tools to cut through misinformation and protect your investment. So, next time you hear a strange noise or see a dashboard warning, question whether it’s an urgent crisis or a simple fix you can manage. Have you ever fallen into this trap? Let me know in the comments.
Maintaining your vehicle’s optimal performance requires more than just occasional visits to the repair shop. As a DIY enthusiast or a seasoned driver, investing in the right equipment can save you time, money, and headaches down the road. One of my favorite tools is a quality OBD-II scanner. I personally use the Bluetooth-enabled models like the BlueDriver, which connect seamlessly to my smartphone and provide real-time diagnostics. It helps me catch issues early, whether it’s a misfiring spark plug or a pending sensor fault, so I can address them before they escalate. For more advanced troubleshooting, I recommend the Troubleshooting Guide to identify common auto repair issues at home.
Another indispensable tool is a precision torque wrench. Proper tightening of bolts—especially on critical components like brake calipers or suspension arms—not only ensures safety but also extends component life. I prefer digital torque wrenches because they provide a clear readout and minimize human error. Regularly checking and adhering to manufacturer torque specifications can make all the difference in long-term durability. You can find detailed torque specifications in your vehicle’s service manual or online databases.
To keep your brakes performing optimally, investing in a brake caliper piston tool is a smart move. It allows me to retract pistons quickly and accurately when replacing brake pads, avoiding damage and ensuring proper pedal feel. For beginners, a basic brake caliper rewind tool combined with the guide on wheel bearing troubleshooting can help you understand how critical brake service is to safety.
In terms of maintenance, a fluid tester is a game-changer. Regularly checking transmission, coolant, and brake fluid states helps prevent costly repairs. I personally use a refractometer, which gives me a quick reading of fluid quality—important since many drivers overlook how degraded fluids can impair performance. For accurate fluid maintenance, refer to the Ultimate Service Guide.
Looking ahead, the trend points toward smarter, connected tools that integrate with your smartphone or voice assistant. As vehicles become more tech-laden, tools like app-controlled diagnostic scanners and wireless tire pressure monitors will become standard. Staying updated with auto repair trends 2025 helps you anticipate the tools you’ll need to keep pace.
How do I maintain my tools over time?
Regular cleaning and proper storage are key. Wipe down your torque wrench after each use to prevent corrosion, and calibrate your diagnostic scanner annually to maintain accuracy. Check the manufacturer’s guidelines for specific maintenance instructions—most tools come with a maintenance schedule. A well-maintained toolkit ensures your auto repair efforts stay precise and safe. Try calibrating your Bluetooth scanner this weekend, and see how it improves your troubleshooting accuracy. Remember, investing in quality tools and maintaining them properly can make your long-term auto upkeep much more manageable.
Lessons Hidden Behind Every Headlight Byte
Over the years, I’ve learned that patience and gentle techniques often outperform haste and harsh abrasives—trusting the process has saved me money and preserved my car’s integrity. I discovered that skipping the protective coating leads to foggy headlights again within months, reinforcing the value of sealing right after polishing. And perhaps the most crucial insight was realizing that regular checkups for my tools and routine inspections prevent small issues from becoming costly repairs, making auto care a proactive instead of reactive habit.
My Toolkit for Auto Success
One resource I swear by is the Essential Tune-Up Guide. It helped me understand the importance of proper maintenance intervals and how simple upgrades like a quality OBD-II scanner or a torque wrench can dramatically improve my DIY repairs. Additionally, I trust reputable brands like BlueDriver for diagnostics and Craftsman for hand tools because their durability and precision inspire confidence during hands-on work. These tools are investments that pay off when tackling projects like headlight polishing or brake pad replacement.
Ignite Your Auto Care Confidence
Getting your hands dirty with simple fixes like headlight restoration isn’t just about saving money; it’s about reclaiming control over your vehicle’s health. Challenges along the way taught me that knowledge outweighs age or experience—it’s never too late to learn new skills, and every little maintenance step enhances safety and longevity. I encourage you to start small—try restoring your headlights this weekend or check out a basic auto repair trend to stay ahead of the curve—and see how empowering upkeep can be. What’s one small fix you’re ready to tackle today? Let me know below.