
There I was, proud as a peacock, pulling my trusty sedan out of the driveway after my very first DIY brake job. I’d spent four hours sweating, skinning my knuckles, and double-checking every bolt. But the moment I rolled down the street and tapped the pedal, a high-pitched squeal echoed through the neighborhood, and my heart sank into my stomach. I thought I’d bought cheap parts or, worse, installed them upside down. The truth was much simpler: I had skipped the most critical part of the job. I didn’t know that new brakes need a “first date” before they start working together. Today, I’m going to show you exactly how to seat those pads so you get maximum stopping power and zero noise, saving you from that gut-wrenching feeling of a job gone wrong.
Stop Ruining Your New Brakes Before You Even Get Home
Most folks think that once the wheels are back on, the job is finished. They drive away like they’re heading to the grocery store, but that is a recipe for glazed pads and shaky steering wheels. You see, when you install fresh components, the surfaces of the pads and rotors aren’t perfectly matched yet. You need to create a “transfer layer”—a thin coating of pad material that bonds to the rotor. If you don’t do this right, you’ll end up wondering why your brake pedal feels different or why they start vibrating within a week. I learned this the hard way years ago when I scorched a brand-new set of performance rotors by getting them red-hot and then sitting at a long red light with my foot clamped down. It left a “pad imprint” that felt like I was driving over a washboard every time I slowed down.
Is This Bedding Process Really Necessary?
You might be thinking this sounds like a lot of extra work for a standard daily driver. After all, shouldn’t they work right out of the box? While modern manufacturing is great, the physical reality of friction requires a break-in period. Many brake service myths suggest you can just drive normally, but professional racers and seasoned mechanics know better. If you want the secret to making your brake pads last twice as long, it starts in the first ten miles. Have you ever felt that weird “shudder” just days after getting your car back from the shop? That is usually a sign the technician didn’t have time to properly bed the brakes for you. I’ve seen it dozens of times: a perfectly good brake system repair goes south because the owner was too aggressive or too timid during those first few miles. Have you ever finished a repair only to have a new noise pop up five minutes later? I’d love to hear about your most frustrating “fixed it, but didn’t” moments in the comments. According to technical documentation from major manufacturers like Brembo, improper bedding can lead to uneven material transfer, which is the actual cause of most “warped” rotor sensations rather than the metal itself deforming. Now that you know why we cannot just slap them on and go, let’s talk about the specific sequence of stops you need to perform to get that perfect, glassy finish on your rotors.
Start With a Low-Speed Safety Check
Before you even think about hitting 45 miles per hour, you need to make sure you actually have pressure. I remember doing a brake system repair on an old truck where I forgot to pump the pedal before shifting into drive; I nearly rolled right through the back of my garage. Gently roll forward at 5 mph and tap the brakes. If your brake pedal goes all the way to the floor, stop immediately and check for air in the lines. This initial check is a vital part of any car service checklist. Once you’re sure the mechanicals are sound, head to a quiet industrial road where you won’t bother neighbors with any weird noises like the reason your brakes grind only when you are backing up—which is a whole different issue often caused by loose clips.
The Magic Sequence of Stops That Saves Your Rotors
Think of bedding like seasoning a cast-iron skillet. You want to apply heat gradually. Accelerate to 30 mph and brake firmly—but not enough to engage ABS—down to about 5 mph. Do not come to a complete stop! If you stop completely while the pads are this hot, you’ll leave a ‘smear’ of material in one spot, which leads to that annoying pulsing feeling later. Repeat this 30-to-5 mph cycle five times. You’ll start to smell the resins in the pads getting hot; that’s the smell of success, not failure.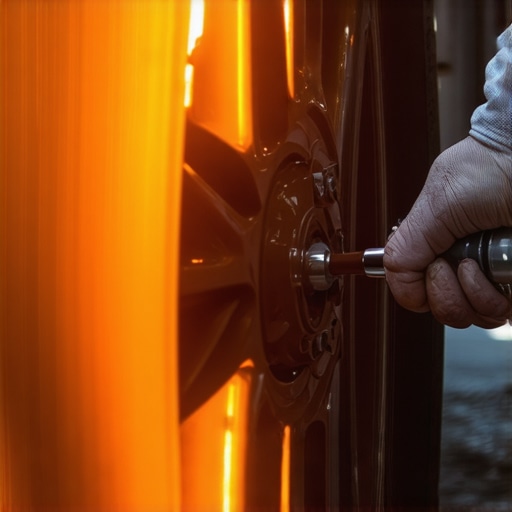
Step Up the Speed to Finalize the Transfer Layer
Now that the pads are warm, it’s time for the heavy lifting. Accelerate to 45 or 50 mph and brake hard down to 10 mph. Do this three or four times in a row. By the third stop, you might notice the brakes feeling a bit ‘faded’ or less responsive. This is normal. I once overdid this on a set of cheap ceramic pads, and the smoke coming off the wheels was thick enough to hide a small car. It was terrifying, but I stayed off the pedal and kept rolling to let the airflow do its thing. If you’re worried about whether your parts are holding up, remember brake service myths often claim this isn’t necessary for high-end parts, but even premium rotors need this thermal cycle.
Whatever You Do, Don’t Stop Moving
This is the part everyone messes up. After those hard stops, your rotors are glowing metaphorically. You must drive for at least 10 minutes without touching the brakes if possible. If you hit a red light and sit there with your foot clamped down, that’s exactly the secret to making your brake pads last twice as long being tossed out the window. That stationary contact creates a ‘cold spot’ on a hot rotor, causing uneven expansion. I learned this the hard way on a project car; I stopped for a celebratory taco right after bedding, and by the next morning, the steering wheel shook like a leaf every time I slowed down.
You’ve probably heard a well-meaning neighbor or even a local mechanic tell you to ‘just take it easy for the first 500 miles’ after a brake job. In my experience, that is one of the most persistent and damaging brake service myths in the automotive world. While it sounds safe, ‘babying’ your brakes actually prevents the pads from ever reaching the operating temperature needed to properly bond with the rotor. This leads to ‘glazing’—a condition where the pad surface becomes smooth and shiny like a mirror, losing its ability to bite into the rotor. Instead of a smooth stop, you get a loud, embarrassing squeal every time you pull up to a stoplight. According to a technical bulletin from Akebono, the world’s leading manufacturer of ceramic friction materials, a lack of thermal conditioning is the primary cause of noise complaints in new brake system repairs. Have you ever fallen into this trap and wondered why your brand-new brakes sounded like a freight train? Let me know in the comments.
The Silent Killer of New Rotors: The Parking Brake Trap
Here is the ‘Oops’ factor that catches even seasoned DIYers off guard. After you’ve spent twenty minutes performing the perfect series of aggressive stops to bed your pads, your rotors are essentially heat-soaked. If you pull into your driveway and immediately yank up that parking brake, you are asking for trouble. On many modern cars, the parking brake uses the main rear pads. Clamping those hot pads against a stationary, blistering rotor can cause ‘pad fusion’ or uneven cooling. This creates a localized area of the rotor that becomes much harder than the rest of the metal, a phenomenon known as Cementite formation. This isn’t just about troubleshooting common auto repair issues; it’s about preventing permanent damage. If you must park, try to do it on a flat surface and leave the parking brake off for at least 15 minutes while things cool down. If you don’t, you’ll be searching for the reason your brake pedal feels different by tomorrow morning.
Can You Actually Save a Pulsating Brake Pedal?
Many people assume that once the steering wheel starts shaking, the rotors are ‘warped’ and need to be tossed in the scrap bin. But here is a nuanced truth: rotors rarely actually warp. Most of the time, that vibration is just an uneven buildup of pad material. If you catch it early, you can often ‘scrub’ the rotors clean by performing a second, slightly more aggressive bedding procedure. I’ve saved dozens of sets of rotors this way, proving that the secret to making your brake pads last twice as long isn’t just about how you drive daily, but how you manage the friction surfaces during those first critical miles. If the vibration persists, you might need a professional ‘on-car’ lathe turning, but skipping the initial bedding is almost always the root cause of the failure. Knowing these advanced nuances is what separates a simple parts-changer from someone who truly understands the physics of stopping a two-ton machine.
Why My Torque Wrench Is the Only Tool I Never Loan Out
For the longest time, I thought ‘good and tight’ was a scientific measurement. I would lean on my breaker bar until the bolt groaned and call it a day. That was until I ruined a set of hub bearings because I over-torqued the caliper mounting brackets. Now, if you look in my toolbox, you’ll see a calibrated 1/2-inch drive torque wrench that stays in its protective case like a piece of jewelry. Using a torque wrench isn’t just about preventing bolts from falling off; it’s about ensuring even pressure across the rotor surface. When you unevenly tighten lug nuts, you’re practically inviting the rotor to develop that ‘warped’ feeling I mentioned earlier. I always cross-reference my car’s specific service manual for the exact foot-pounds. This level of precision is a cornerstone of any tune-up for peak performance. If you really want to get technical, I also use a dial indicator to check for lateral runout. If that needle moves more than 0.002 inches while I spin the rotor, I know the hub surface is dirty or the rotor itself is a dud. It’s this attention to detail that prevents troubleshooting common auto repair issues later down the road when you should be enjoying the drive.
How do I maintain my car’s stopping power over time?
The bedding process is just the beginning. To keep that firm pedal feel, you have to look at the chemistry of your car. Brake fluid is hygroscopic, meaning it acts like a sponge for moisture in the air. Over time, that water lowers the boiling point of the fluid, which is the reason your brake pedal feels different after a long mountain descent. You should be flushing your system every two years, regardless of mileage. I always check the color of my reservoir; why your brake fluid is green is a sign of internal corrosion that will eventually eat your expensive ABS pump from the inside out. Incorporating this into your ultimate car service guide routine is the only way to guarantee safety. I personally swear by the ‘Motive Power Bleeder’—it allows me to flush the entire system by myself without needing a second person to pump the pedal, which honestly has saved my marriage more than once.
The Future of Stopping and How to Stay Ready
As we look toward auto repair trends to watch in 2025, the traditional hydraulic system is undergoing a massive shift. We are moving toward ‘brake-by-wire’ systems where a computer interprets your foot pressure and sends an electronic signal to a motor at the wheel. This means the mechanical feedback we’ve relied on for decades is disappearing. According to technical documentation regarding the SAE International Standard J2522, the industry is focusing heavily on ‘Dyno-Brake Effectiveness’ to compensate for the lack of driver-felt feedback in these modern systems. Even with these advancements, the physics of friction remains the same. Whether you’re driving a 1990 project car or a brand-new EV, the transfer layer on the rotor is still the king of stopping power. If you want to see what else you should be looking out for, check out this car service checklist to stay ahead of the curve. My advice? Go grab a torque wrench today and use it on your lug nuts the next time you have a wheel off—you’ll be surprised at how much more consistent your braking feels when everything is torqued to the exact manufacturer spec.
The Most Expensive Mistakes I Made So You Don’t Have To
Years of grease under my fingernails taught me that the biggest enemy of a successful brake system repair is impatience. I once rushed a job on a Friday night, skipped the bedding process, and by Monday, my car sounded like a squealing pig. I learned that taking those extra twenty minutes on a quiet road saves you hours of troubleshooting common auto repair issues later. Another hard-earned lesson: never assume the rotors are clean out of the box. Even new ones have a protective oil coating that will ruin your pads if you don’t scrub it off with a non-chlorinated brake cleaner first. Checking your work against a car service checklist isn’t about being a beginner; it’s about being a pro who doesn’t like doing the same job twice.
The Gear That Lives in My Trunk for Every Brake Job
You don’t need a professional shop to get professional results, but you do need the right stuff. I personally trust the Precision Instruments Split-Beam Torque Wrench because it doesn’t require resetting to zero after use, ensuring my lug nuts are always perfectly seated to prevent rotor warp. For bleeding the lines solo, the Motive Products Power Bleeder is a game-changer that makes a messy two-person job a clean five-minute task. Lastly, always keep a high-quality silicone-based brake lubricant nearby for the slide pins. These tools are the foundation of any tune-up for peak performance and have saved me more times than I can count.
#IMAGE_PLACEHOLDER_E#
Take the Wheel with Confidence and Stop Like a Pro
Brakes are the most intimate connection you have with your car’s safety. Mastering the bedding process means you aren’t just a driver; you’re a steward of your machine’s longevity. When you feel that firm, immediate bite after a perfect bed-in, you’ll know you’ve done it right. Don’t be afraid to get out there and get your hands dirty—there is no better way to maximize your car’s lifespan with expert tune-up strategies than by taking control of your own maintenance. You have the knowledge, now go get the results. Have you ever experienced that terrifying ‘first stop’ after a repair where the car just didn’t want to slow down? Share your story in the comments below!