
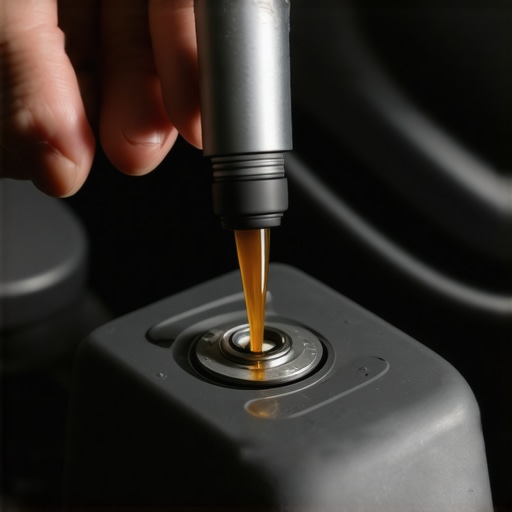
It starts as a faint, rhythmic whimper that only you seem to notice at first. You’re sitting in the school pickup line or creeping through rush hour, and there it is—a high-pitched creak every time you modulate the pressure. It’s like having a cricket living under your floorboards. I remember the first time it happened to me in my old truck; I was so convinced my entire braking system was toast that I nearly called a tow truck right there. Instead of looking for common auto repair issues calmly, I panicked. I grabbed a can of whatever oil was in the garage and sprayed the entire pedal assembly like I was painting a fence. Not only did the brake pedal still squeak the next morning, but my foot slipped off the metal twice on the way to work. It was messy, dangerous, and totally unnecessary. Today, I’m going to show you how to find the actual source of that noise and silence it for good, safely and without the oily mess.
Stop the Noise Before You Lose Your Mind
The truth is, a squeaky pedal inside the cabin is rarely a sign that your car won’t stop, but it is a massive drain on your driving enjoyment. Usually, it is just two pieces of metal or plastic rubbing together at a pivot point that has gone dry. While most brake system repairs focus on the pads and rotors outside the car, the mechanical linkage inside your cabin needs love too. According to technical documentation from manufacturers like General Motors, most interior pedal noises stem from the pushrod bushing or the main pivot pin losing its factory lubrication over time. It’s a common nuisance, but one you can fix in fifteen minutes once you know exactly where to aim. We aren’t just masking the sound; we are restoring the smooth action your car had when it was brand new.
Is this sound a sign of a total brake failure?
I get this question a lot from neighbors who hear that groan and immediately fear for their lives. While a squeak inside the cabin is almost always a simple lubrication issue, you should never ignore a change in how the car actually behaves. For instance, if the noise is accompanied by a spongy brake pedal or if the car pulls to one side, we are talking about a much more serious hydraulic or mechanical issue. But if it’s just a noise? We can handle that right in your driveway. Have you ever felt like your car was mocking you with every stoplight you hit? Drop a comment below if you’ve ever tried a ‘quick fix’ that ended up making a bigger mess than the original problem. We’re about to get into the specific lubricants and the exact reach-points under your dash to restore that factory-quiet stop.To get this right, you’re going to need to embrace your inner contortionist for a few minutes. Grab a bright flashlight and a can of white lithium grease or high-quality silicone spray. Please, for the love of your car’s interior, avoid standard WD-40 for this specific task. It’s a great solvent, but it evaporates too quickly and lacks the staying power to keep those moving parts silent for more than a few days. I learned this the hard way back in college when I sprayed my old sedan’s pedal with whatever was under the sink. Not only did the squeak return with a vengeance forty-eight hours later, but the chemical smell was so strong I had to drive with the windows down in the middle of winter. That’s why following a proper car service checklist is always about using the right tool for the right job rather than the one closest to your hand.
Locate the Friction Points Under Your Dash
Once you’re looking up under the dash, you’ll see the brake pedal arm extending upward into a mounting bracket. At the very top is a thick bolt—that’s the pivot pin. This is where most of that annoying friction happens. If the noise sounds more like a sharp snap or a metallic tap, you might actually be dealing with the hidden cause of a clicking sound under your dash, which is often a loose bracket or a failing brake light switch. But for a persistent squeak, we want to focus on that pivot pin and the point where the pushrod—the rod that actually goes through the firewall—connects to the pedal arm. This connection usually involves a small plastic bushing that can dry out and groan every time it moves. 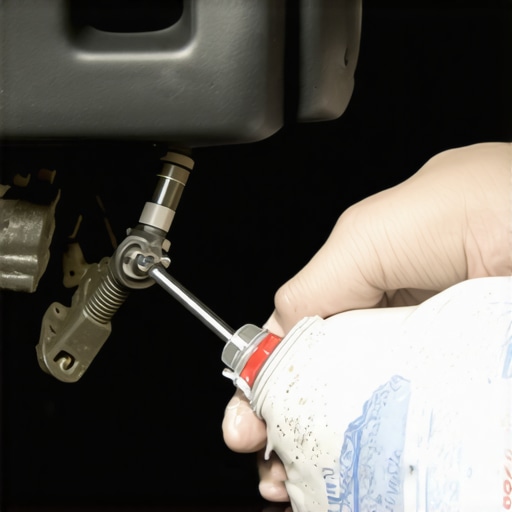
Choose a Lubricant That Actually Lasts
White lithium grease is the gold standard here because it is a ‘heavy’ lubricant that stays exactly where you put it without dripping onto your floor mats. If you prefer a cleaner application, a 100% silicone spray is a great secondary choice, especially if your car uses a lot of plastic components in the pedal assembly. Before you start spraying, it is a good idea to perform some basic troubleshooting of common auto repair issues to ensure the sound isn’t coming from outside the firewall. If the sound is coming from the engine bay, you might be looking at a master cylinder issue rather than a simple hinge problem.
The Proper Way to Apply and Bed-In the Lube
Aim the nozzle directly at the pivot pin and the pushrod bushing. Apply a small, controlled burst. You don’t need to drench the assembly; a little goes a long way. Once the lubricant is applied, use your hand to pump the brake pedal twenty or thirty times rapidly. This ‘beds in’ the lubricant, ensuring it works its way into the tiny crevices between the metal and plastic surfaces. While you are down there, keep an eye out for any oily wetness. If you see fluid dripping down the pushrod, stop what you are doing. This is a sign that your master cylinder is leaking internally, which is a common reason why a brake pedal drops to the floor at stoplights. If everything looks dry and the squeak is gone, you’ve just successfully performed a targeted brake system repair that would have cost you a hundred dollars in labor at a shop.Most drivers assume that if their car stops and doesn’t make noise, the system is healthy. This is the first myth we need to bust. Real expertise means looking past the obvious to the chemical and mechanical realities of your vehicle. For example, many shops suggest a ‘brake job’ is just swapping pads. I call this the ‘pad slap’—and it is a dangerous shortcut that often ignores the health of the calipers. If you do not clean and relubricate the caliper slide pins with high-temperature grease, your new pads will bind, leading to the reason why your brake rotors keep warping every few months. It is not the rotor’s fault; it is the lack of mechanical hygiene. Have you ever fallen into this trap? Let me know in the comments.
Stop trusting the ‘Lifetime’ fluid lie
Then there is the issue of fluid. People often ignore it during a standard tune-up because the reservoir looks full and clear. However, brake fluid is hygroscopic—it literally sucks moisture out of the air. According to research from SAE International, brake fluid can absorb up to 2% water in just twelve months in humid climates. This moisture lowers the boiling point, which is the hidden culprit behind that terrifying moment when your brakes feel fine around town but fade to nothing on a long downhill grade. This is why a proper car service checklist must include a chemical moisture test, not just a visual check.
Can your environment degrade brakes faster than your mileage?
Absolutely. If you live in a coastal area or a place with heavy road salt, your ‘maintenance intervals’ in the owner’s manual are likely too optimistic. These manuals are often written for ‘normal’ conditions, which rarely exist in the real world. This is a core part of brake service myths; the idea that the manufacturer’s schedule is an absolute law regardless of climate. In my experience, inspecting the rubber boots and lines for cracks every six months is far more valuable than waiting for a specific number on the dash. Ignoring this environmental wear can lead to situations where you are wondering how to tell if your brake booster is losing pressure because a vacuum line dry-rotted years before the manual said to check it. 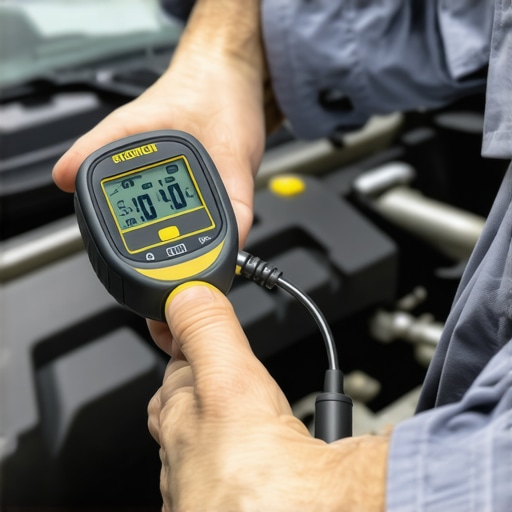
The ‘pad slap’ trap that kills your performance
The ‘Oops’ factor to watch for when performing your own maintenance is the type of lubricant you use. Never use petroleum-based grease on the rubber seals or boots of your brake system. Petroleum causes rubber to swell and eventually disintegrate, which can lead to a total caliper failure or a seized piston. Always stick to high-temperature silicone or Moly-fortified grease specifically designed for braking components. Mastering these nuances is what separates a DIYer who just changes parts from someone who actually understands brake system repairs and prioritizes long-term safety over a quick fix. Don’t just follow the ultimate car service guide blindly; adapt it to how and where you drive to keep your vehicle truly road-ready.
If you are ready to stop just ‘getting by’ and start maintaining your car like a pro, you need to upgrade your toolbox. I used to think a basic set of sockets was enough until I stripped my first bleeder valve with a cheap open-end wrench. Now, I never touch a brake line without a dedicated flare nut wrench. These wrap around the nut much further than a standard wrench, preventing that heart-sinking moment when the metal rounds off. I also swear by a handheld vacuum pump for one-man bleeding. It turns a two-person chore into a ten-minute solo task, which is essential for following the ultimate car service guide without begging a neighbor for help every time you want to freshen your fluid. For those curious about the science, technical data from the Brake Manufacturers Council (BMC) suggests that improper torque and poor tool choice account for nearly 30% of post-service noise complaints. If you use the right gear, you eliminate the variables that cause those annoying vibrations.
Stop stripping bolts with the wrong wrenches
Beyond the physical tools, you need to embrace digital diagnostic tools if you want to stay ahead of the game. Even if you don’t have a $5,000 scanner, a basic OBD-II reader can help you see if your vehicle is trying to tell you something before a dashboard light even flickers. This is a core part of tune-up your car for peak performance protocols. I’ve seen cases where a simple code for a wheel speed sensor pointed to a hub assembly that was about to fail, which would have felt like a brake issue to an untrained ear. Troubleshooting the electronics is just as vital as grease and steel in modern automotive care. 
How do I keep my car stopping smoothly for the long haul?
Consistency is your best friend here. Don’t wait for a squeal to open the hood. I make it a habit to check my fluid levels and look for signs of a leaking brake caliper every single time I rotate my tires. This small overlap in your car service checklist can save you thousands. By catching a torn rubber boot early, you prevent road grime from seizing the piston, which is the number one reason brakes start to drag and overheat. To truly maximize your car’s lifespan, you have to treat the braking system as a living part of the car that reacts to every puddle and temperature swing, rather than a ‘set it and forget it’ component.
Look out for the rise of brake-by-wire
As we look toward the future, the DIY landscape is shifting. We are seeing a massive move toward electronic brake boosters and brake-by-wire systems. According to auto repair trends to watch in 2025, these systems will become standard even on entry-level vehicles. This means that in a few years, ‘bleeding the brakes’ might involve a software prompt on your tablet rather than a wrench on a valve. While the mechanics of friction remain the same, the control systems are becoming highly sophisticated. If you haven’t yet, I highly recommend buying a cheap brake fluid moisture tester—it’s a $15 tool that provides an instant digital readout of your fluid’s health. It is the single easiest way to prove to yourself that your maintenance is actually working and that your car is truly safe for that next family road trip.
The Hard Truths Learned Under My Dash
Over the decades I’ve spent turning wrenches, I have realized that a squeak is rarely just a sound; it is your car’s way of asking for a quick check-up before a dry pivot pin turns into a mechanical failure. One of the biggest shifts in my mindset happened when I stopped treating my car like a black box and started viewing it as a series of simple systems. I learned that following a car service checklist isn’t about ticking boxes—it’s about building a relationship with your machine. I also discovered that ‘good enough’ usually isn’t, especially when you realize that brake service myths often lead owners to spend hundreds on parts they don’t need while ignoring a five-dollar bottle of grease. Finally, I have learned to appreciate the silence; a quiet cabin makes you a more focused, less stressed driver, which is worth more than any stereo upgrade.
What’s Currently in My Mobile Tool Bag
If you are serious about keeping your car in top shape, you need to move beyond the basic screwdriver. I always keep a bottle of Lucas Oil White Lithium Grease in my bag because it survives the heat of a summer cabin without dripping. For any hydraulic work, I never use standard pliers; I only trust Flare Nut Wrenches to protect those soft metal fittings. I also highly recommend the Phoenix Systems Reverse Bleeder; it turns a messy two-person job into a clean, solo task. These tools aren’t just for brake system repairs; they are the foundation of a DIY lifestyle that saves you thousands. Plus, once you master the pedal, you can easily learn how to stop your door hinges from creaking forever using the same lubrication principles. #IMAGE_PLACEHOLDER_E#
Take the Fear Out of Your Footwell
You don’t need a degree in mechanical engineering to make your car feel like new again. By taking twenty minutes to grease a pivot or check your fluid levels, you are doing more for your vehicle than most owners do in five years. Whether you are working through the ultimate car service guide or just tackling one annoying squeak, the confidence you gain by doing it yourself is permanent. Don’t let a tiny noise steal your peace of mind. Get under there, find the friction, and silence it. Your car—and your sanity—will thank you for every mile of quiet driving ahead. Remember, every master mechanic started with one small fix, and a thorough tune-up your car for peak performance starts right at your feet. Have you ever spent hours chasing a mystery noise only to find it was a simple two-minute fix? Let me know your most satisfying DIY win in the comments below!