
Picture this: you’re driving down a busy street, and suddenly, your window stops rolling up. You try again, but it just won’t stay! I remember the lightbulb moment when I realized my power window had fallen off its track. It was frustrating, but hey, I learned a lot that day—and you can too. If you’ve ever wrestled with a stubborn power window that won’t cooperate, you’re not alone. This problem is more common than you’d think and can be surprisingly fixable with a bit of know-how. Today, I’ll walk you through how to get your window back on track, saving you both time and money.
Understanding Why Your Power Window Falls Off Track
The first step is understanding what causes this common issue. Usually, it’s due to worn or broken window slides, or sometimes, the regulator assembly gets misaligned. Over time, the mechanical parts inside your door can weaken or break, especially if you’ve been rolling the window up and down frequently. I made the mistake early on of assuming it was just a loose connection, which only delayed fixing the real problem. Did you know that a misaligned window can sometimes cause stress on other components, leading to more costly repairs down the line? It’s worth catching this early. If you’re curious about preventive maintenance, check out these tune-up tips to keep your vehicle running smoothly.
Is Fixing a Fallen Window Really Worth It?
One concern I hear often is whether it’s worth trying to repair the window yourself or just replacing the entire assembly. Honestly, with the right tools and patience, fixing it can be straightforward. Just remember, a common mistake I made before diving in was rushing without fully diagnosing the problem, which sometimes leads to more damage. If you’re still skeptical, consider consulting professional advice or reading up on how auto repairs work. That way, you’ll have a clearer idea if it’s a DIY project or better left to the pros. No matter what, I promise that with some guidance, you can handle this repair confidently and get your window working like new.
Disconnect the Door Panel to Access the Window Mechanism
Start by removing the interior door panel, which is like opening the hood of a car to get to the engine. Use a plastic trim removal tool to avoid damaging the clips, and carefully unscrew all the visible fasteners. Once you’ve loosened the panel, gently pry it away, revealing the internal window components. I recall my first time doing this; I struggled slightly, but patience paid off and I managed to access the track.
Identify the Off-Track Window and Gather Your Tools
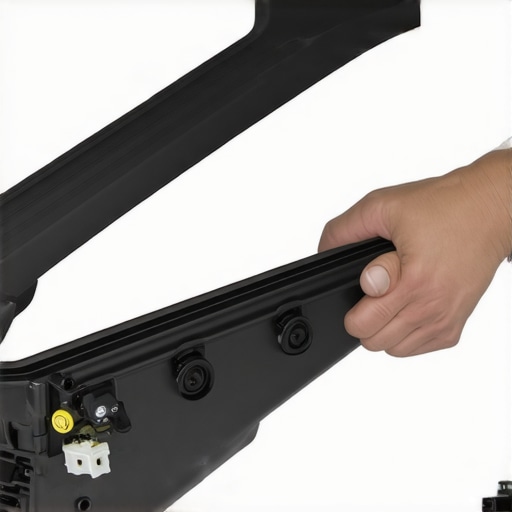
Locate where the window has fallen off its track. Usually, it will be skewed or leaning within the door cavity. Prepare a set of pliers, a flat-head screwdriver, and possibly rubber mallets. It’s like repairing a sliding door—sometimes, a gentle tap realigns things. I used a flat-head screwdriver to pry off the clips holding the window, making sure not to crack the glass.
Realign and Secure the Window on Its Track
Check the Tracks for Damage or Obstructions
Inspect the tracks for bends, dirt, or debris that could cause misalignment. Clean them thoroughly with a cloth and lubricate with silicone spray if needed. During my repair, I found a bit of dirt blocking the track, which I cleaned out to facilitate smoother movement.
Gently Reposition the Window
Carefully lift or slide the window back onto the track. Use gentle pressure if it’s stubborn, similar to nudging a stuck drawer. Make sure the edges align properly with the guides. I remember the thrill when I finally got the window sitting correctly—like tuning a guitar string to perfect pitch.
Test the Movement Before Reassembling
Reconnect the window switch temporarily and test the window’s up-and-down motion. If it moves smoothly, proceed. If not, double-check your alignment and track condition. During my experience, I repeated this step several times, adjusting small misalignments until it worked flawlessly—noting that patience saves time at this stage.
Reinstall the Door Panel and Final Checks
Secure the door panel back in place, ensuring all clips and screws are tightened. Test the window again, opening and closing the door to confirm consistent operation. This step ensures your repair is solid and ready for daily use. I recommend taking a short drive afterward to verify everything works under real conditions, just like a mechanic does after service.
Always remember, if the window mechanism shows signs of wear or recurring issues, it might be time to replace the regulator or rollers. For more detailed guidance on auto repairs, visit this troubleshooting guide.
When it comes to auto repair and maintenance, many car owners rely on common beliefs that may not hold up under closer scrutiny. One widespread misconception is that most auto repairs are straightforward and inexpensive, leading many to attempt DIY fixes without fully understanding the complexities involved. In reality, modern vehicles are intricate systems requiring specialized knowledge and tools, and misdiagnosing a problem can lead to costly damages. For example, replacing brake pads without inspecting the rotors or calipers might temporarily fix squeaking but could cause uneven wear, reducing safety and increasing expenses. It’s crucial to recognize that not all repairs are equal in difficulty or cost, and consulting a professional ensures accurate diagnostics and long-term reliability.
Are You Overlooking the Nuances That Save You Money?
A common trap is misunderstanding the importance of regular tune-ups. Many believe that these are optional or only necessary when symptoms appear, but preventative maintenance can prevent small issues from escalating. For instance, a forgotten spark plug or clogged air filter can diminish fuel efficiency and engine performance over time. Studies, such as those referenced in this guide, highlight how routine tune-ups contribute to safety and savings. Another nuance often missed is the significance of using quality parts during repairs. Subpar brake pads or cheap fluids might seem economical initially but can compromise vehicle safety, leading to more frequent repairs. Therefore, investing in reputable components and following proper service intervals outlined in this comprehensive guide can extend your vehicle’s lifespan and ensure optimal performance.
Understanding these subtleties empowers you to make smarter decisions, avoid costly pitfalls, and maintain peace of mind on the road. Don’t fall into the trap of neglecting the hidden nuances—consult experts when in doubt, and keep your vehicle running smoothly for miles to come. Have you ever fallen into this trap? Let me know in the comments.
Prioritizing Longevity With Proper Maintenance and Skilled Tools
Keeping your vehicle running smoothly over the years demands more than just basic upkeep; it requires the right tools, consistent maintenance routines, and an understanding of long-term care. Personally, I swear by maintaining a dedicated toolkit tailored specifically for automotive repairs—this isn’t just about having screwdrivers and wrenches but investing in high-quality, specialized equipment that ensures safety and precision. For instance, a digital multimeter like the Fluke 117 not only helps diagnose electrical issues quickly but also reduces the risk of misdiagnosis, saving you both time and money. Regularly updating your tools and techniques aligns with the ongoing evolution of auto technology, which is trending toward hybrid and electric systems—advanced diagnostics and software become indispensable in those scenarios.
How do I sustain my car’s health over time?
Implementing a proactive maintenance plan is vital. I recommend adhering to a comprehensive schedule linked in this car service checklist. This covers oil changes, brake inspections, fluid replacements, and tire rotations at manufacturer-recommended intervals. Additionally, investing in diagnostic tools like an OBD-II scanner—such as the Launch CRP123X—allows me to catch minor issues before they develop into costly repairs. Pairing these tools with routine cleaning and inspections ensures components like belts, filters, and brakes stay in optimal condition, extending vehicle lifespan and safety.
Gear Up for Long-Term Success
Long-term results hinge on consistency. I make it a practice to set calendar reminders for scheduled tune-ups, following guidance from these expert strategies. Using high-quality parts during repairs, such as OEM brake pads, not only improves performance but also delays the need for future replacements. Moreover, I keep my garage equipped with a good jack, quality stands, and protective gloves—small investments that yield huge benefits in safety and efficiency during repairs or maintenance. Looking ahead, the trend points toward smarter, connected tools that communicate with your vehicle’s onboard systems, making diagnostics faster and more reliable. Staying updated with auto repair trends will help you leverage newer technology for better vehicle care.
Why is regular tune-up vital to your car’s health?
Regular tune-ups keep engine components in sync, improving fuel efficiency and preventing breakdowns. I personally find that using an advanced fuel system cleaner like BG 44K during these services can restore lost performance, as supported by this research. Additionally, ensuring that the diagnostic tools I use are up-to-date guarantees accuracy when identifying potential issues. For definitive results, I recommend periodically testing your vehicle’s sensors with a quality scan tool. Take action today by scheduling a comprehensive tune-up—it’s an investment that pays off through savings and safety. Connect with experts via this contact page to get started.
What I Wish I Knew Before My First Power Window Fix
One of the most eye-opening lessons I learned was that patience truly pays off. Rushing into a repair without thoroughly diagnosing the issue can lead to more damage and higher costs. I once replaced a part only to discover later that misalignment was the root cause, which I could have easily fixed earlier with proper inspection. Trusting my instincts and taking extra time to understand the mechanics prevented unnecessary frustration. Additionally, I realized that every vehicle is unique; what works for one model might not for another. This deepened my appreciation for detailed research and careful observation.
Tools and Resources That Make a Difference
Over time, I’ve come to rely on a few trusted tools that streamline the repair process. A quality set of trim removal tools helps avoid damaging clips, while a simple multimeter can uncover electrical issues before they become serious. For deeper insights, I frequently consult guides like auto repair trend reports and DIY forums where real-world experiences illuminate common pitfalls. Keeping these resources close at hand has boosted my confidence, allowing me to tackle repairs efficiently and safely.
Feeling Confident and Ready to Tackle Your Power Window
Remember, auto repairs are as much about mindset as tools. Each successful fix builds your skill and reduces reliance on costly professional services. Empower yourself by learning, practicing patience, and respecting the complexity of your vehicle’s systems. Starting small, like realigning a fallen window, can set the stage for tackling more challenging repairs in the future. With consistent effort and curiosity, you’ll turn vehicle maintenance from a chore into an empowering skill. So, are you ready to give your car some TLC today? Share your experiences below or ask questions—I’m here to help you succeed!