
I was twenty years old, sweating in a cramped gravel driveway, and I had just finished what I thought was a perfect DIY brake job. I felt like a master mechanic until I pulled out onto the main road. Every time I touched the brake pedal, the car vibrated like it was trying to shake its own wheels off, and the squeal was loud enough to wake the neighborhood. I panicked, thinking I’d installed the pads backward or bought defective rotors. The truth was much simpler: I had skipped the most important ten minutes of the whole project. I didn’t know then that new pads and rotors need to ‘get acquainted’ through a process called bedding. Today, I’m going to show you the easiest way to marry those two surfaces together so you can enjoy smooth, silent, and incredibly responsive braking from day one.
Stop the Squeal and the Smoke Before They Start
When you first pull out of the shop or your garage, those shiny new parts aren’t actually ready for a panic stop. If you’ve ever noticed the real reason your new brake pads are smoking after a drive, it’s often because the resins in the pad are curing for the first time. My mistake back in that driveway was thinking I could just drive normally and they would ‘wear in’ on their own. Instead, I ended up with glazed pads that had zero bite. By following a simple sequence of controlled stops, you create a thin, even layer of friction material on the rotor. This is the secret to longevity. Without it, you’re just waiting for vibrations to ruin your commute. Have you ever finished a car repair only to have a new, terrifying sound start the moment you turned the key?
Is This Bedding Process Actually Worth the Hassle?
Many people believe that modern manufacturing is so precise that ‘breaking in’ components is a myth. However, even high-end performance brands like Brembo emphasize that proper bedding-in is essential to prevent ‘DTV’ (Disc Thickness Variation), which most people mistakenly call warped rotors. If you skip this, you might find the reason your brake pedal feels different is actually uneven material buildup on your discs. It isn’t just about noise; it’s about safety. According to the friction specialists at Tire Rack, bedding ensures that the pad and rotor have a consistent contact patch, which can significantly reduce your stopping distance in an emergency. If you want to avoid brake service myths that cost you money down the road, you need to treat those first few miles with intention. It’s the difference between a car that stops and a car that performs.
Find a Safe Zone to Work the Friction
To do this right, you need space. You cannot bed your brakes in a suburban neighborhood or a grocery store parking lot. I learned this the hard way years ago when I tried to bed a new set of ceramic pads on a busy street near my house. I was so focused on my speedometer that I almost missed a neighbor backing out of their driveway. Now, I always head to an empty industrial park or a quiet country road where I can safely reach 45-50 mph without a tailgater wondering why I keep slowing down. Before you even start the engine, double-check that you used the proper way to torque wheel bolts because the last thing you want during a bedding cycle is a loose wheel.
Execute the Moderate Heat Cycles
Once you have your clear stretch of road, you want to perform a series of moderate stops. Start by accelerating to about 35 mph and then brake firmly but smoothly down to about 5 mph. Do not trigger the ABS, and most importantly, do not stop completely. You want to repeat this cycle four or five times. The goal here is to raise the temperature of the components gradually. Think of it like preheating an oven before you bake a cake; you’re prepping the metal and the friction material to bond. If you just slam on the brakes at 60 mph right away, you risk thermal shock, which is a major factor in understanding brake system repairs and why some parts fail prematurely.
The Golden Rule of the Rolling Stop
This is where most DIYers fail. After you’ve done your moderate cycles, speed up to 50-55 mph and brake hard down to 10 mph. Do this three times in a row. You will likely start to smell those resins I mentioned earlier, and you might even see a faint wisp of smoke. This is normal. What is not normal is coming to a full, dead stop while the brakes are this hot. If you stop completely and keep your foot on the brake pedal, you will transfer a thick ‘clump’ of pad material onto one spot on the rotor. This creates an uneven surface that leads to that annoying pulsing feeling later on. This is often why your brake pedal feels different or inconsistent after a fresh install. 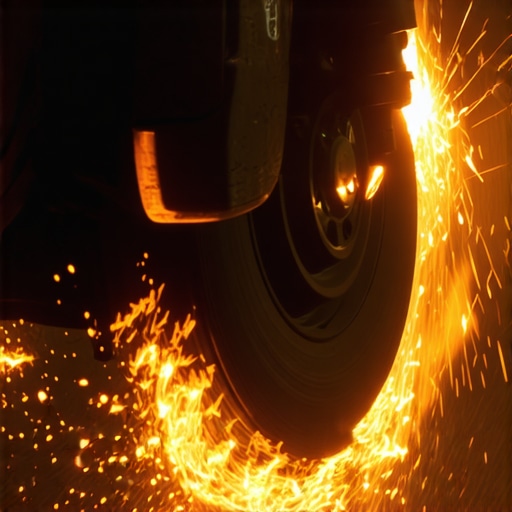
Let the Metal Breathe Before You Park
The final step is arguably the hardest because it requires patience. After your last hard deceleration, you need to drive the car for at least five to ten minutes without using the brakes as much as possible. This ‘cool-down lap’ allows airflow to dissipate the intense heat evenly across the rotor surface. I remember one crisp October evening when I rushed this part and parked my car immediately after a heavy bedding session. The next morning, the brakes felt ‘grabby’ and weird because the heat hadn’t escaped uniformly. By letting them cool while moving, you ensure the friction layer cures perfectly. This attention to detail is what separates a standard fix for grinding brakes from a high-performance service that lasts for years. If you find your brakes feel soft even after this, you may still have air in the lines, but usually, a proper bed-in will provide that firm, confident pedal feel you’re looking for.It’s easy to think that buying the most expensive ceramic pads is a shortcut to perfection, but that’s one of the biggest brake service myths I see online. In reality, the most expensive parts in the world won’t help you if the hub surface isn’t surgically clean. Most DIYers—and even some rushed professionals—slap new rotors over a rusty hub. This creates ‘lateral runout,’ a tiny wobble that grows into a massive vibration over a few thousand miles. If you want to maximize your car’s lifespan with expert tune-up strategies, you need to treat the hub-to-rotor interface like a clean room. I’ve seen people replace entire front ends trying to find a shimmy that was actually just a half-millimeter of rust behind a rotor. 
Why Grease Is Often Your Greatest Enemy
We’re taught that moving parts need lubrication, but in the world of understanding brake system repairs, more is definitely not better. The ‘trap’ many fall into is using petroleum-based grease on rubber slide-pin boots. This causes the rubber to swell and seize, leading to dragging brakes and ruined pads. Always use a dedicated silicone-based brake lubricant. It’s a nuance that separates a driveway amateur from someone who truly knows how to tune up your car for peak performance. Even the Society of Automotive Engineers (SAE) highlights that friction consistency is highly dependent on the thermal stability of your lubricants. If your grease melts and hits the pad surface, your stopping power vanishes instantly.
Is Your Master Cylinder Failing Internally?
Sometimes, even after the perfect bed-in and a thorough bleed, you might find your brakes feel soft or the pedal slowly sinks to the floor at a stoplight. This is a sophisticated problem that many overlook. You need to know how to tell if your master cylinder is failing internally. When the internal seals wear out, fluid bypasses the piston without leaking a drop outside the car. It’s an invisible failure that no amount of bleeding will fix. Have you ever fallen into this trap where you replaced everything only to realize the problem was deep inside the hydraulics? Let me know in the comments. Keeping a car service checklist helps, but true expertise comes from spotting these ‘ghost’ issues before they lead to a dangerous situation on the road.
Stop Guessing and Start Measuring
If you want to move beyond basic driveway fixes, you need to stop ‘feeling’ how tight a bolt is and start knowing. I used to trust my elbow to tell me when a lug nut was tight, but after learning about the reason your steering wheel feels loose after an alignment, I realized that even a few foot-pounds of difference can warp a rotor over time. I personally swear by a split-beam digital torque wrench. Unlike the old click-type ones that lose calibration if you don’t dial them back to zero before putting them away, a split-beam stays accurate for years. It is the only way to ensure you follow the proper way to torque wheel bolts every single time. This isn’t just about being a perfectionist; it’s about maximizing your car’s lifespan with expert tune-up strategies. When you treat every bolt with that level of respect, you eliminate the vibrations that most people think are just ‘part of owning an old car.’
How do I keep my brakes performing like new for years?
Maintenance isn’t just a one-time event after a repair; it is a cycle of vigilance. To keep that firm pedal feel, you need to commit to a brake fluid flush every two years, regardless of how many miles you have driven. Brake fluid is hygroscopic, meaning it literally sucks moisture out of the air. This water lowers the boiling point of the fluid and corrodes your calipers from the inside out. When you follow the ultimate car service guide, you realize that fluid condition is just as important as pad thickness. According to technical bulletins from the Akebono Brake Corporation, using high-quality stainless steel hardware and replacing it with every single pad change is non-negotiable for preventing ‘pad drag.’ If you want to tune up your car for peak performance, you cannot ignore the small clips that hold everything in place. #IMAGE_PLACE_HOLDER_D#
Brake-by-Wire is Changing the DIY Landscape
As we look toward the future, the way we interact with our cars is shifting. We are already seeing a massive move toward electronic braking systems in hybrids and EVs. If you’re following auto repair trends to watch in 2025, you’ll notice that the physical connection between your foot and the master cylinder is disappearing in many models. This means troubleshooting common auto repair issues will soon require more software knowledge than a set of wrenches. In many modern cars, you cannot even change rear pads without a bidirectional scan tool to retract the electronic parking brake safely. I use a tablet-based scanner that lets me cycle the ABS pump during a bleed—this is a total game changer for getting every last air bubble out of the system. It makes the how regular tune-ups improve fuel efficiency and safety discussion even more critical because these systems rely on precise sensor data to function correctly.
Adopting the 200,000 Mile Mindset
The real secret to getting 200,000 miles out of your original engine and chassis is consistency over speed. Don’t wait for a squeak or a grind to look at your wheels. Take five minutes every time you rotate your tires to inspect the rubber boots on your calipers and the condition of your flexible lines. If you see why your brake fluid levels keep dropping, do not just top it off and forget it—find the source of the drop immediately. My challenge to you: next time you have the wheels off, don’t just glance at the pads. Use a small wire brush to clean the sliding surfaces and apply a tiny dab of high-temp ceramic brake lubricant to the ‘ears’ of the pads. It takes 60 seconds and will prevent 90% of the future noise issues that drive most owners crazy.#IMAGE_PLACE_HOLDER_D#
Hard-Won Lessons from the Garage Floor
I’ve spent thousands of hours under wheel wells, and if there is one thing I’ve learned, it’s that patience pays more than the most expensive parts. First, never ignore that “burnt hair” smell during your first drive; it’s actually a sign you’re doing the bedding right, as long as you don’t stay stationary. Second, the hub surface must be shiny and flat; even a flake of rust can cause a wobble that feels like a “warped” rotor. Finally, remember that your understanding brake system repairs grows with every project, so take your time to visualize how the pad and rotor are interacting.
My Go-To Gear for Stopping Power
To get the results I’ve described, you need more than just a standard socket set. I always keep a split-beam torque wrench in my kit because it stays calibrated through the toughest jobs, ensuring I follow the proper way to torque wheel bolts every single time. For lubrication, I only trust high-temp ceramic brake grease; using generic petroleum grease is a recipe for seized pins and a fix for a soft brake pedal that mechanics keep missing. Lastly, a simple wire brush and some brake cleaner are your best friends for keeping the “ears” of the pads moving freely.
Take Pride in Every Smooth Stop
Performing your own brake service is about more than just saving a few hundred dollars at the shop. It is about the confidence that comes from knowing exactly how your vehicle will react when you need it most. By following these bedding steps and staying on top of the ultimate car service guide, you aren’t just maintaining a machine; you are mastering a craft. Don’t let the complexity of modern systems intimidate you; the physics of friction remains the same. Have you ever noticed a major difference in how your car stops after a proper bed-in procedure, or did you used to just “drive and hope” like I did? Let me know in the comments below!