
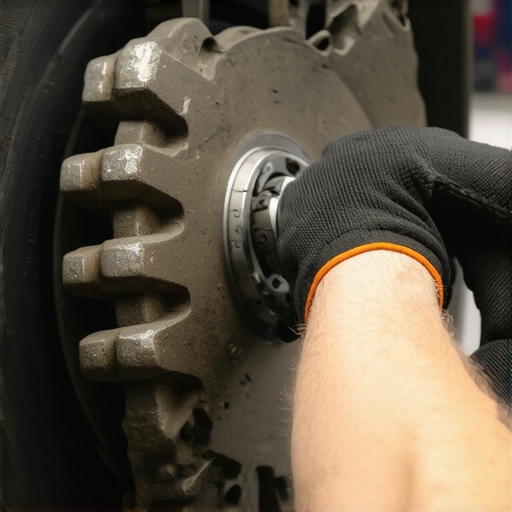
I was pulling out of my driveway last Tuesday morning, ready to tackle the day, when a sound like a garbage disposal full of spoons erupted from my front left wheel. Scritch-grind-thump. My heart didn’t just sink; it did a full-blown swan dive into my stomach. I knew that sound. It was the sound of my bank account potentially losing five hundred dollars at the local shop. But here is the thing: most of us have been conditioned to believe that the second we hear a grind, the rotors are trash. I used to be that guy. I once spent an entire Saturday afternoon and way too much cash replacing parts that were actually perfectly fine, all because I didn’t know how to look for the real culprit. Today, I want to show you that there is a better way to handle this without immediately reaching for the credit card.
The Sound of Metal Against Metal is Your Warning Shot
When your car starts making noise, it is trying to save your life—or at least your wallet. According to data from the National Highway Traffic Safety Administration (NHTSA), brake failure is a factor in nearly 22% of crashes caused by vehicle failure. It’s easy to panic when you hear that screech, but sometimes it isn’t even the pads wearing out. I once spent three hours tearing down a wheel only to find a tiny piece of road salt had wedged itself into the dust shield. The metal-on-metal noise usually happens because the brake pad material has worn down to the backing plate, but it can also be a simple mechanical obstruction. Before you assume the worst, check out these brake service myths that most people fall for. Have you ever had a noise start suddenly like that, or did yours build up over a few weeks? Drop a comment below and tell me your story.
Is it actually possible to save a damaged rotor?
This is where most people get skeptical. If the metal is grinding, isn’t it scarred forever? Not necessarily. Unless you’ve been driving on the screaming brakes for a month, the surface scoring is often shallow enough to be bedded in by new pads or simply cleaned up. One of my biggest early mistakes was thinking I could just ignore a stuck caliper pin. I learned the hard way that a little bit of high-temp grease on the slide pins can prevent a rotor from ever reaching the grinding stage in the first place. Understanding how brake system repairs actually work is the first step to saving yourself a lot of grief.
Your Quick Strategy to Silence the Grind
The goal today is to help you figure out if you’ve really hit the wear indicators or if something else is causing the ruckus. For instance, you might find the reason your brakes grind only when backing up is actually a simple fix involving the hardware clips rather than the rotor surface itself. We want to distinguish between serious brake squeaks and actual mechanical damage. If we can catch it now, we can clean the components, lubricate the moving parts, and get you back on the road safely. It’s all about maintaining a solid car service checklist so you aren’t caught off guard by these sounds again. If you do end up needing new friction material, you must break in new brake pads correctly to ensure the smooth surface of the rotor stays intact for years to come.
Pull the Wheel and Get Your Hands Dirty
To stop the noise, you have to find the source, and that starts with getting the car in the air. Think of your brake pads like the soles of your favorite running shoes. When the tread is gone, you’re walking on the structural base, and that is exactly where the grinding starts. Once you have the wheel off, look at the caliper—the big metal clamp holding the pads. You want to peek through the inspection window. I remember one humid July afternoon when I was convinced my rotors were toast on an old sedan. I had already priced out the parts, but when I pulled the wheel, I realized the pads had plenty of life. The culprit? A rusted hardware clip had shifted and was scraping the outer lip of the rotor. By simply resetting the clip and following a solid car service checklist, I saved myself a trip to the parts store and a lot of frustration.
Look for the Tell-Tale Scoring Marks
Before you condemn the metal, run your fingernail across the rotor surface (make sure it is cool first!). If you feel deep grooves like a vinyl record, you might be in trouble. But if it is just a light dusting or surface discoloration, you can usually save it. 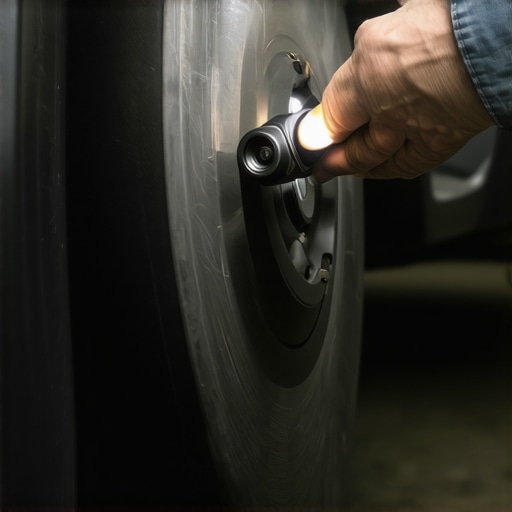 If you are already troubleshooting common auto repair issues before visiting the shop, this is the moment of truth. Shallow grooves can often be smoothed out by the new friction material during the bedding process. However, if the surface looks like a plowed field, the heat generated will eventually lead to a pulsing sensation in the pedal.
The Rubber Mallet Trick for Stuck Components
Sometimes the grind isn’t coming from the pads at all, but from a caliper that refuses to slide. If one pad is paper-thin and the other looks brand new, your slide pins are seized. This is where a bit of percussive maintenance comes in handy. Much like how you might diagnose a bad fuel pump with a rubber mallet, a few gentle taps on the caliper body can help loosen years of road grime and salt. If the caliper doesn’t move freely on its pins, it will keep the pad pressed against the rotor even when your foot is off the pedal, creating a constant, low-grade grind that eats your fuel economy and your hardware.
Don’t Ignore the Rear Assembly
We often focus on the front because they do 70% of the work, but don’t forget the back. If you have a different setup behind the rear wheels, you need to know how to tell if your drum brakes are dragging. A dragging shoe in a drum setup creates a hollow, scraping sound that can be easily confused with a front-end grind. If the noise persists even after you’ve inspected the front discs, the rear drums are your next stop. Ignoring a mechanical drag back there can lead to a terrifying moment where the brake pedal goes all the way to the floor in traffic because the fluid has overheated from the constant friction.
Button Everything Up with Precision
Once you’ve cleaned the debris and lubricated the slide pins with high-temp ceramic grease, it is time to reassemble. This is the part where most DIYers get lazy, but it is the most critical for safety. You cannot just ‘wing it’ when tightening your wheels back down. Learning the proper way to torque wheel bolts without a manual ensures that you don’t warp the very rotors you just tried to save. Uneven pressure on the lug nuts is a leading cause of rotor ‘warping’—which is actually just uneven deposit buildup—so take the extra three minutes to use a star pattern and a torque wrench.
Stop Playing the Guessing Game with Your Engine
While we are on the subject of precision, I want to address the biggest lie in the modern garage: the “one-size-fits-all” tune-up. Many drivers still think that a tune-up is a simple checklist of spark plugs and filters. In reality, modern vehicles are essentially high-performance computers on wheels. If you’re still treating your car like a 1970s carburetor-fed engine, you’re likely wasting money on parts you don’t need while ignoring the silent killers of engine health. Everyone says “just change the plugs,” but I have seen countless DIYers spend a fortune on the truth about budget spark plugs only to realize their rough idle was actually a software glitch or a vacuum leak.
The “Oops” factor in modern auto repair is what I call the “Parts Cannon.” This is when you start replacing sensors because a code popped up on your dash. However, expert data from organizations like AAA suggests that delayed maintenance is the real culprit behind most major failures, not the sensors themselves. For instance, you might think your O2 sensor is shot, but how a dirty mass airflow sensor can trigger a lean code error is a far more common—and cheaper—fix that most people overlook. Before you spend $200 on a new part, spend $10 on a can of sensor cleaner and check some essential maintenance tips to see if the problem vanishes.
Why does your engine oil level actually increase on the dipstick?
This is the kind of advanced nuance that separates the pros from the amateurs. You would assume that more oil is a good thing, or perhaps a sign of a “healthy” engine. In reality, if your oil level is rising, you have a serious contamination problem. Understanding why your engine oil level is increasing on the dipstick is the key to preventing a total engine meltdown. This phenomenon, often caused by fuel dilution or a failing head gasket, can turn your lubrication into a watery mess that provides zero protection to your bearings. 
Don’t Skip the Heavy Hitters in Your Service Manual
The real danger comes when we get too comfortable with “basic” care and start ignoring the big-ticket items. I’ve met plenty of people who are religious about 3,000-mile oil changes but completely ignore the timing belt or the transmission fluid. You must realize the real cost of skipping your 100,000-mile major service is often a dead car on the side of the highway. By using expert tune-up strategies, you shift from reactive repairs to proactive management. Have you ever fallen into this trap of replacing parts without a diagnosis? Let me know in the comments and let’s figure out what went wrong together.
Buy These Tools Before You Buy More Spare Parts
I learned a long time ago that a $20 tool is almost always cheaper than a $200 ‘guess.’ When I was first starting out, I wasted so much time trying to eyeball electrical issues until a mentor finally threw a digital multimeter at me. If you want to stop the cycle of frustration, you need to learn how to test your own alternator with a simple multimeter at home. This single device allows you to stop wondering if your battery is dying or if the charging system is the culprit. It’s about having data, not just a hunch. For mechanical gremlins that don’t throw a code, sometimes the best tools are the most low-tech. Believe it or not, I still use the ‘old school’ trick and identify a vacuum leak using a simple cigar when I suspect a cracked hose is causing a rough idle. It’s precise, visual, and costs next to nothing compared to a smoke machine.

Where Car Repair is Heading in 2025
The days of fixing everything with a wrench and a screwdriver are fading fast. As we look at auto repair trends to watch in 2025, it is clear that software and sensor calibration are becoming the new ‘tune-up.’ If your car has emergency braking or lane-keep assist, a simple bumper repair or windshield swap isn’t simple anymore. You have to ensure how to tell if your local mechanic actually has the tools for a proper ADAS calibration, because without that alignment, those safety features could actually work against you. We are moving toward a world where your car’s computer will predict a failure before you even hear a squeak, but you still need the mechanical foundation to act on that information.
How do I keep this engine purring for the long haul?
The real ‘secret’ isn’t a magic oil additive or a special brand of gasoline. It’s consistency. According to the technical guidelines in the SAE International Standard J1703, fluids like brake fluid aren’t just there to move pistons; they are engineered to prevent internal corrosion through specific chemical stability over thousands of thermal cycles. When you skip a flush, you aren’t just using old fluid—you are letting acid eat your brake lines from the inside out. If you want the secret to getting 200,000 miles out of your original engine, you have to treat your service manual like a sacred text. Combine that with expert tune-up strategies and a comprehensive ultimate car service guide to stay ahead of the wear-and-tear curve. My challenge for you: Grab a multimeter this weekend and check your battery’s resting voltage—it’s the easiest way to catch a failing charging system before it leaves you stranded in a grocery store parking lot.
Three Grinding Truths Most Mechanics Skip
After years of turning wrenches in my own driveway, I’ve realized that auto repair isn’t just about swapping out what’s broken; it’s about reading the signs of the next failure before it happens. One lightbulb moment for me was discovering that if you ignore the color of your fluids, no new part will save you. If you pull your reservoir cap and see that your brake fluid looks like coffee creamer, it means moisture has compromised your system, and your stopping power is already fading regardless of your pad thickness. Another lesson? Don’t panic if you see a little haze after a big job; knowing the real reason your new brake pads are smoking—which is often just the initial resins curing—can save you a frantic, unnecessary second trip to the shop. Finally, the best repair is the one you never have to perform because you used essential maintenance tips to keep the components clean and lubricated from day one.
The Gear I Actually Use Every Saturday
If you want to move beyond the expensive cycle of the “parts cannon,” you need a few staples that don’t come in a standard socket set. I swear by my digital multimeter for diagnosing electrical ghosts, a high-quality torque wrench to prevent the uneven pressure that warps rotors, and a physical copy of the factory service manual. #IMAGE_PLACEHOLDER_E# Relying on expert tune-up strategies is much easier when you have the actual manufacturer specs rather than guessing from a YouTube video. I also keep a digital copy of the ultimate car service guide bookmarked on my phone so I can verify fluid types and intervals while I am actually under the chassis.
Take the Keys Back into Your Hands
There is a unique kind of pride that comes from silencing a grinding wheel or smoothing out a rough idle with your own two hands. You don’t need to be a master technician to keep your vehicle safe and efficient; you just need the patience to listen to what the machine is telling you and the discipline to follow a schedule. By taking a proactive stance on your brake service and general maintenance, you aren’t just saving money—you’re ensuring that your car remains a reliable partner for another 100,000 miles. Have you ever successfully diagnosed a strange car noise only to find it was something incredibly simple like a loose clip or a bit of gravel? Let me know your biggest DIY win in the comments below!