
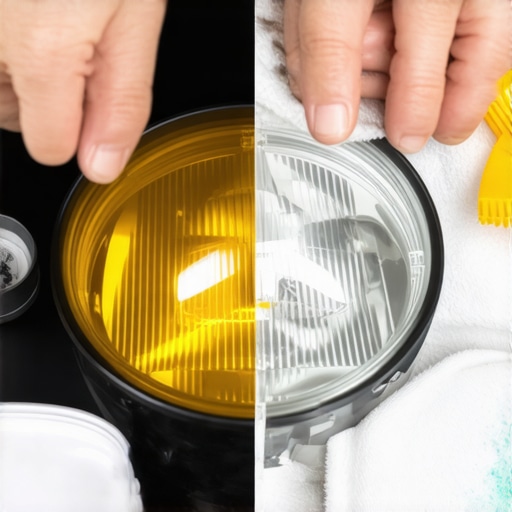
I’ll never forget the rainy Tuesday I nearly missed my own driveway because I was squinting so hard. It wasn’t that my vision was failing—it was my car. My 2012 sedan looked like it had cataracts, with headlights so yellowed and hazy that they barely cast a glow on the pavement. I felt like a hazard to myself and everyone else on the road. I had just finished going through my regular car service checklist, but I completely overlooked the plastic lenses. I almost spent a fortune on new housings before a buddy of mine stopped me. He told me I was overthinking it. It turns out, you don’t need a professional shop or expensive kits to get that factory-fresh shine back. You just need a few things already sitting in your kitchen or bathroom. Today, I am going to show you exactly how to clear that fog without breaking the bank. Have you ever felt that sinking feeling when you realize your visibility is cut in half just because of some oxidized plastic?
The Night My Foggy Lenses Almost Cost Me a Fender
It’s easy to ignore cloudy headlights during the day, but at night, the danger becomes real. When I finally sat down to look at the numbers, I was shocked. According to research from the American Automobile Association (AAA), clouded headlights can produce as little as 20% of the light that new lenses do, which is a terrifying thought when you are merging onto a dark highway. We often focus on the safety benefits of a regular tune-up, but visibility is just as critical for keeping your family safe. Early on, I made the mistake of trying to scrub the oxidation off with a dry, abrasive pad—big mistake. All I did was create deep scratches that made the glare even worse. You have to be gentle but effective. Trust me, I’ve tried the ‘miracle’ sprays and the heavy-duty sanders, and while they have their place, most of us just need a quick, reliable fix that works. If you are already troubleshooting common auto issues on your own, this is one of the most satisfying DIY wins you can get.
Is using toothpaste actually worth the hype?
I know what you are thinking. You’ve seen the viral videos of people rubbing Colgate on their cars and thought it was total clickbait. I was a skeptic too. I thought, ‘There is no way a minty paste is going to do what a specialized chemical can’t.’ But here is the secret: toothpaste is a mild abrasive designed to polish enamel without destroying it. It works on the same principle as high-end buffing compounds. I remember the first time I actually tried it—I was standing in my garage at 10:00 PM, feeling a bit ridiculous, but as I wiped away the residue, I saw clear plastic for the first time in years. It’s not a permanent ‘forever’ fix, but as a neighborhood pro-tip, it’s unbeatable for getting you safely through the season. We are going to dive into the exact process, including how to seal the lens so you don’t have to do it again in two weeks.
Tape the Paint Before You Touch the Plastic
The biggest mistake I ever made was jumping straight into scrubbing without protecting the surrounding bodywork. I was so excited to see results that I ended up scuffing the clear coat on my fender with the abrasive compound. It was a classic case of rushing a job that required finesse. Before you even open your tube of toothpaste or your polishing kit, grab a roll of blue painter’s tape. Tape off the edges where the plastic lens meets the metal or plastic body panels. Think of this as the safety net for your car’s finish. Just as you would follow a car service checklist to ensure every bolt is tight, this taping step ensures you don’t create a secondary repair job while trying to fix the first one. Double-layer the tape if you are using a drill-powered buffing pad, as those can jump and bite into the paint if you aren’t careful.
Wash Away the Surface Grit
You cannot polish a dirty lens. If there is road salt, sand, or oily residue on the plastic, you’ll just be grinding that debris into the lens, creating deeper scratches. Use a basic dish soap or car wash soap and a microfiber towel to get the surface as clean as possible. This is the foundation of any good tune up for peak performance—starting with a clean slate. Once it’s washed, dry it thoroughly. Water can act as a lubricant that prevents the abrasives in the toothpaste from actually cutting through the oxidation.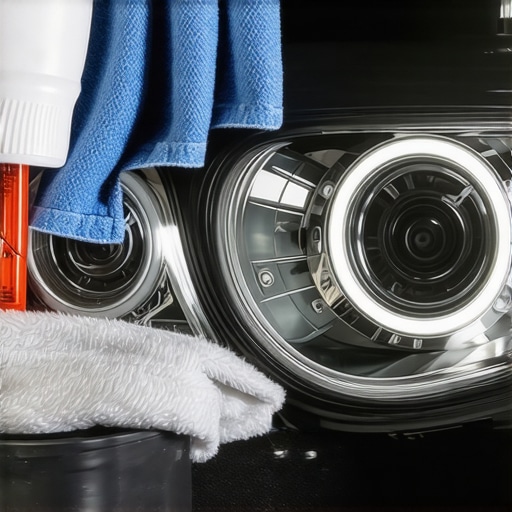
Work the Compound in Tight Concentric Circles
Now comes the part where the magic happens. Squeeze a generous amount of non-gel, whitening toothpaste onto a damp microfiber cloth. The whitening varieties usually have more grit, which is what we need to shear off that yellowed ‘skin’ of oxidized plastic. I remember standing in my driveway, arm aching after five minutes, wondering if I was doing anything. The trick is consistency and pressure. You want to rub in small, overlapping circles, much like you would if you were trying to buff out a scuff on a wooden table. If you’ve ever had to fix a squealing belt using the water spray test, you know that sometimes the simplest diagnostic tools are the most effective. The toothpaste will start to turn a nasty shade of brown or yellow—that’s the oxidation actually leaving the lens. Keep going until the paste feels like it’s drying out, then add a tiny splash of water to keep it moving.
The Rinse and Inspection Phase
After about five to ten minutes of vigorous scrubbing per headlight, rinse the lens with plenty of fresh water. At this stage, the lens should look significantly better, though it might still have a slight ‘frosted’ look. Don’t panic. If you see spots that are still heavily yellowed, go back in for a second round. It’s a bit like when your car smells like burning after a short drive; you don’t just ignore it, you find the source and keep working until the problem is gone. Once you are satisfied with the clarity, dry the lens completely with a lint-free cloth.
Seal the Plastic to Prevent Future Yellowing
The reason your headlights turned yellow in the first place is that the factory UV coating wore off. If you stop after the toothpaste step, your lights will look great for a few weeks, but the sun will bake them right back to yellow in no time. You must apply a UV-resistant sealant. You can find these in small bottles at any auto parts store, or some people use a high-quality paste wax as a temporary shield. Applying the sealant is like the final step of a car maintenance schedule; it protects the work you just did and ensures longevity. Wipe it on in a thin, even layer and let it cure according to the instructions on the bottle. This thin chemical barrier is the only thing standing between your clear vision and the harsh ultraviolet rays of the sun.
The Warped Rotor Myth That Costs You Money
Most drivers think that when their steering wheel shakes during a stop, their brake rotors have literally bent or ‘warped’ from excessive heat. I used to believe this too until I saw the laboratory data. In reality, modern cast-iron rotors rarely warp in a structural sense. What you are actually feeling is disc thickness variation caused by uneven brake pad material transfer. When you sit at a long stoplight with red-hot brakes, a tiny ‘stamp’ of pad material can stick to the rotor. According to research by the Society of Automotive Engineers (SAE), this creates a microscopic high spot that grows over time as more material accumulates. If you’ve ever wondered why your brake rotors keep warping every few months, it is likely not the metal bending; it is your driving habits or low-quality pads leaving uneven deposits on the surface.
Stop Cranking Those Lug Nuts by Feel
Here is the ‘oops’ factor that almost every DIYer—and even some hurried shops—gets wrong: the torque wrench. If you use an impact gun or a standard tire iron to tighten your wheels ‘as hard as you can,’ you are asking for a vibration headache. Unevenly torqued lug nuts put lateral stress on the wheel hub, which eventually pulls the rotor out of alignment. This is the fastest way to ruin a perfectly good brake service. Always use a calibrated torque wrench to hit the manufacturer’s specification in a star pattern. 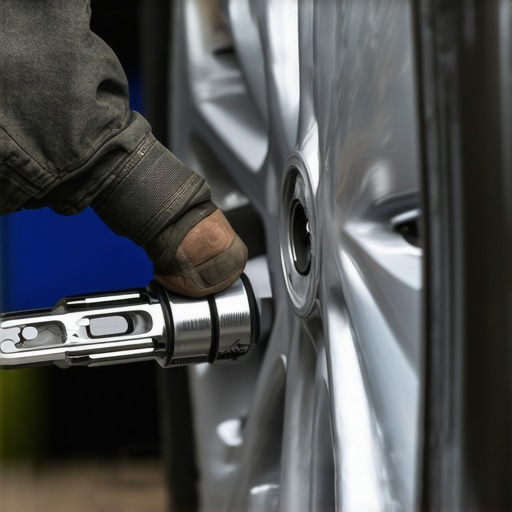
The 100,000 Mile Spark Plug Trap
We have all seen the marketing for platinum or iridium plugs that supposedly last 100,000 miles. While the electrode might technically survive that long, the ‘gap’—the distance the spark must jump—often widens significantly due to wear. This forces your ignition coils to work significantly harder to bridge the gap, which leads to premature coil failure. If you are troubleshooting common auto repair issues like a subtle misfire, don’t assume the plugs are fine just because you haven’t hit the 100k mark yet. Pulling them every 50,000 miles as part of a proactive car service checklist can save your ignition system and your fuel economy.
Why do my rear brake pads wear out before the fronts?
This is a question I get constantly from savvy drivers who remember when front brakes did 80% of the work. On modern vehicles, Electronic Brake Force Distribution (EBD) and automated ‘brake drying’ features actually engage the rear calipers more frequently to keep the car level or to wipe moisture off the discs. If you find the real reason your rear brakes wear faster is actually software-driven, you will realize it is a feature, not a bug. Just like how regular tune-ups improve fuel efficiency, understanding these technical shifts prevents you from over-diagnosing a healthy car. Have you ever fallen into this trap where you replaced a part only to find the problem came back a month later? Let me know in the comments.
Buy the $20 Scanner Before You Visit the Shop
I remember the first time a ‘Check Engine’ light popped up on my dashboard; I felt that immediate gut-punch of anxiety and a vision of my savings account draining away. I used to drive straight to the nearest mechanic, but then I invested in a basic OBD-II scanner, and it changed my entire relationship with my car. Instead of being at the mercy of a service writer’s jargon, I could now see exactly what a P0300 code really means for your wallet before I even popped the hood. As noted in the Bosch Automotive Handbook, precise diagnostics are the foundation of modern engine management, and even a slight misfire can snowball into catalytic converter failure if ignored. Owning your own diagnostic tool is the single best way to avoid ‘parts cannon’ repairs where you just throw new components at a problem and hope it disappears. 
Stop Guessing and Start Measuring Your Fluids
Beyond electronics, I’ve learned that the difference between a car that dies at 100,000 miles and one that hits the quarter-million mark is found in the fluids. I used to think a quick oil change was enough, but now I understand why I’ll never skip a transmission fluid change again. It is about proactive care rather than reactive panic. Even performing the 5-minute check to prevent transmission failure once a month can help you catch a slow, weeping leak before it turns into a catastrophic failure on the highway. This is the truth about why my car finally hit 200,000 miles—it wasn’t luck or a ‘good’ brand; it was a refusal to let small issues become big ones.
Predicting the Future of the DIY Garage
Looking ahead, I see a major shift in auto repair trends to watch in 2025 where vehicles will become increasingly software-defined. We are moving toward an era where your car might proactively order its own replacement parts. However, until the robots take over, your hands and a few key tools—like a high-quality torque wrench and a reliable multimeter—remain your best defense against depreciation.
How do I maintain engine health over the long haul?
Maintaining peak performance requires you to look past the superficial. It starts with using high-quality synthetic lubricants and strictly adhering to your car service checklist. Don’t wait for a squeak, a rattle, or a strange smell to investigate; be the driver who knows their vehicle’s baseline performance so well that you notice a change the second it happens. I challenge you to go out to your garage right now and perform a thorough fluid level check. It takes five minutes, costs nothing, and is the most advanced ‘pro tip’ I can give you for ensuring your car stays on the road for years to come.
The Expensive Lessons Only a Leaky Gasket Can Teach
The biggest lightbulb moment in my journey wasn’t learning how to turn a wrench, but realizing that cars speak to us long before they break down. I used to think parts just failed out of spite, but most issues are slow, predictable shifts. I learned the hard way that a $10 seal replaced today prevents a $1,000 teardown tomorrow. Another hard truth is that cleanliness isn’t just for car shows; keeping an engine bay free of debris makes it ten times easier to spot a fresh leak before it hits the pavement. Finally, I realized that while YouTube is great, your owner’s manual is the actual bible for your specific engine. When I stopped guessing and started mastering the basics of brake system care, the mystery and the fear of the shop finally vanished.
The Essential Toolkit for Every Driveway Mechanic
You don’t need a professional-grade garage to keep your vehicle in top shape, but you do need a few reliable companions. I always keep a basic OBD-II scanner in my glovebox because it is the only way to effectively start spotting those annoying ghost codes that trigger the check engine light. Along with that, a simple digital multimeter is worth its weight in gold for checking your battery’s health in the driveway without having to wait for a jump start. These tools turn you from a passive driver into an active caretaker, allowing you to catch small electrical gremlins before they leave you stranded. #IMAGE_PLACEHOLDER_E#
Turning Your Car Into a Quarter-Million-Mile Machine
Taking ownership of your vehicle’s maintenance is one of the most rewarding skills you can develop. It’s about more than just avoiding a bill; it’s about the confidence of knowing exactly what is happening under the hood when you’re miles from home. By implementing better maintenance habits, you aren’t just fixing a machine—you’re protecting your investment and your family’s safety. Don’t be afraid to get your hands a little dirty this weekend. Whether it’s clearing your headlights or checking your oil, every small action adds years to your car’s life. Have you ever had a ‘simple’ repair turn into a weekend-long project because of a missing tool? Let me know in the comments below!